If you run a virtual machine (VM) on your Mac, you’ve likely hit a frustrating wall: your Mac is connected to the VPN, but your VM is stuck outside, unable to see anything.
In the past, the only workaround was to install a second VPN client inside the VM. VPN Tracker changes that. Now, when you connect your Mac to a VPN, your virtual machines are automatically included, without extra logins or setup.
In this guide:
One Connection, Total Coverage
When you toggle your VPN connection, VPN Tracker creates a secure bridge. Your VMs simply "hitch a ride" on your Mac’s encrypted tunnel.
This works instantly across all major platforms: VMware Fusion, VirtualBox, Parallel Desktop, and Docker. If your Mac is in the tunnel, your VM is in the tunnel.
Setup Guide: VMware, VirtualBox, Parallels & Docker
For the vast majority of users, there is actually nothing to configure within VPN Tracker. It just works!
To ensure your VM picks up the connection, just check one setting in your VM app:
- Open your VM’s Network Settings and select Shared Network or NAT
- Connect to your VPN in VPN Tracker for Mac
- Start your VM. You are now connected!
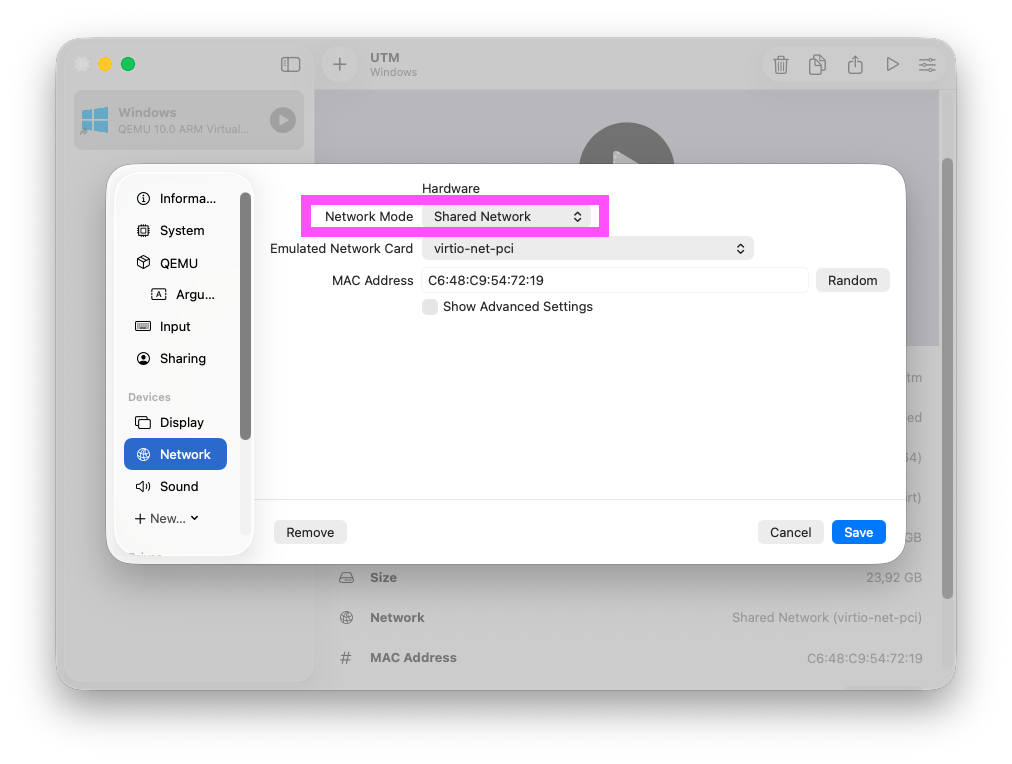
Select Shared Networking or NAT in your VM's network settings
Special Note for UTM Users
Because UTM (a popular app for running Windows on Apple Silicon) handles networking slightly differently, we have added a dedicated optimization to ensure a smooth experience.
If you are using UTM, follow these two steps:
- In VPN Tracker, go to Settings > General
- Enable the toggle for Set NAT rules for UTM VM access
This handles the behind-the-scenes routing required specifically for UTM.
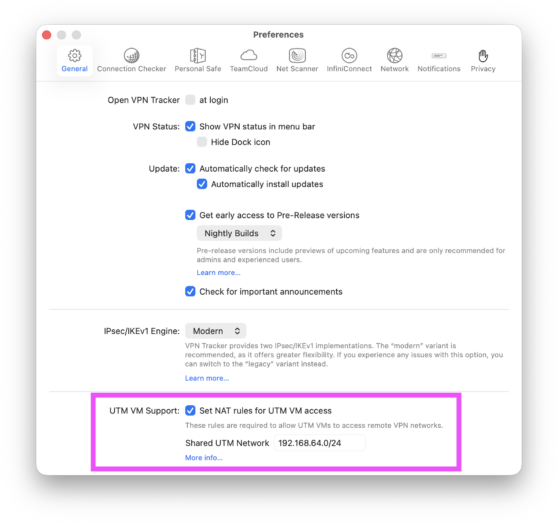
Only required for UTM: Activate the NAT rules toggle in Settings.
What Can You Do with a Bridged VM?
Now you're able to share Mac VPN with VM, here are some examples of how your workflow will improve:
Consultants: Perform remote firmware updates on client hardware (like industrial printers or network switches) using Windows-only tools, directly over the VPN.
Network Admins: Manage client user accounts in Active Directory or specialized server consoles as if you were sitting at a desk in their building.
Specialized Accounting & Finance: Remotely access legacy accounting software or secure banking portals that require specific Windows drivers and a secure network path simultaneously.
Developers: Test code or manage Linux-based servers and databases over a secure connection without needing to configure complex networking inside your development environment.
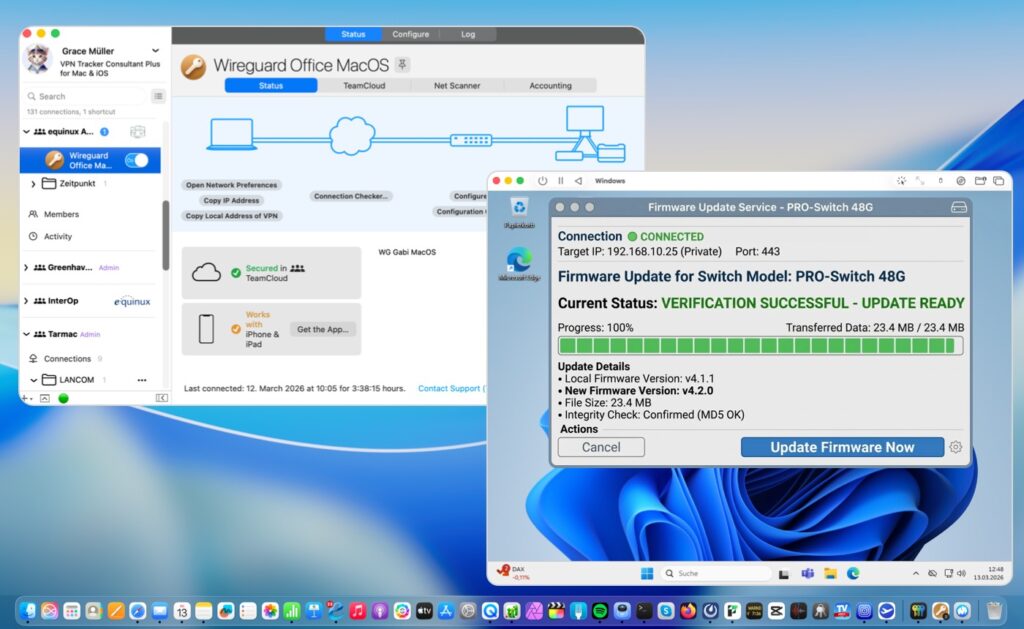
Perform firmware updates in your VM using your Mac’s secure VPN connection.
Ready to simplify your workflow?
Stop choosing between your Mac and your VM. Now your Mac is the only tool you need to access any device on your network.