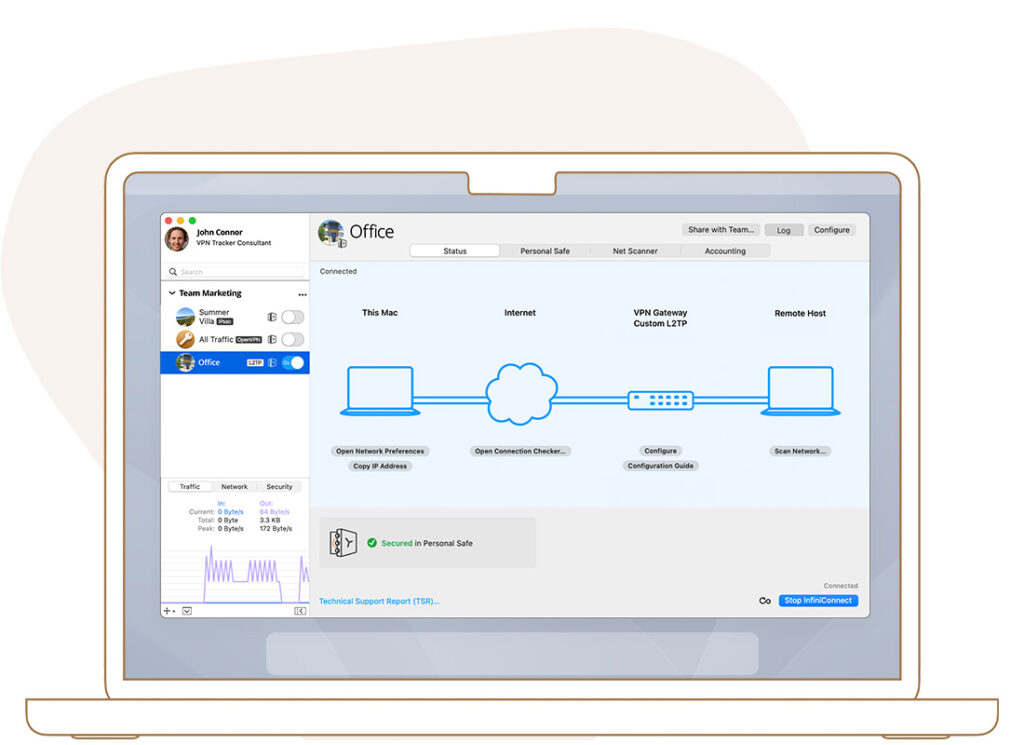
Download the latest version of VPN Tracker 365 for Mac from the VPN Tracker 365 website.
Please note: The initial installation of VPN Tracker requires administrative privileges. Once installed following these instructions, the app can be used without admin access.
Install the App
Once downloaded, click on the VPN Tracker 365 Icon in your Downloads Folder:
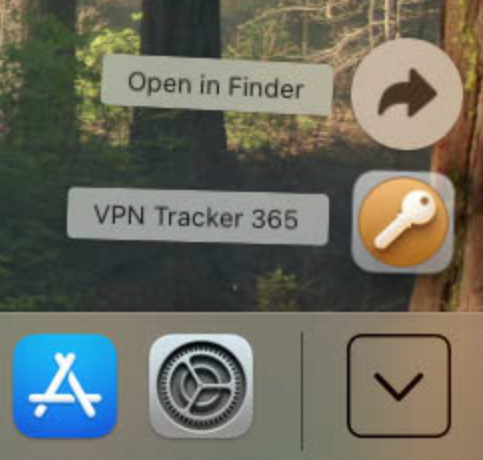
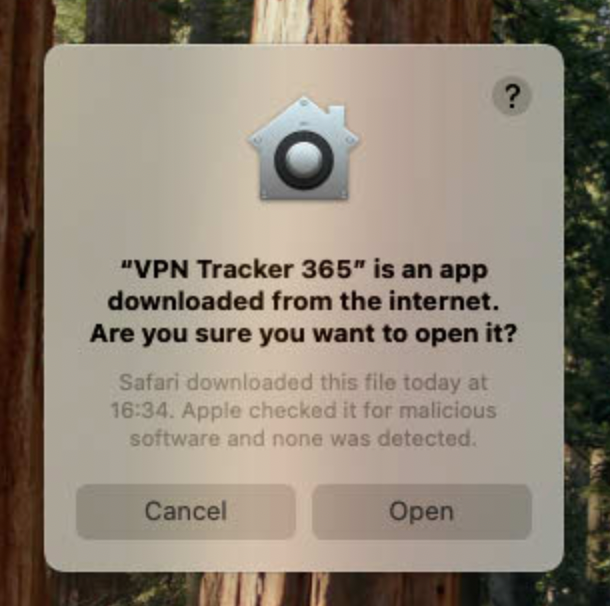
The system will asks you if you want to open the downloaded app. Confirm by pressing "Open"
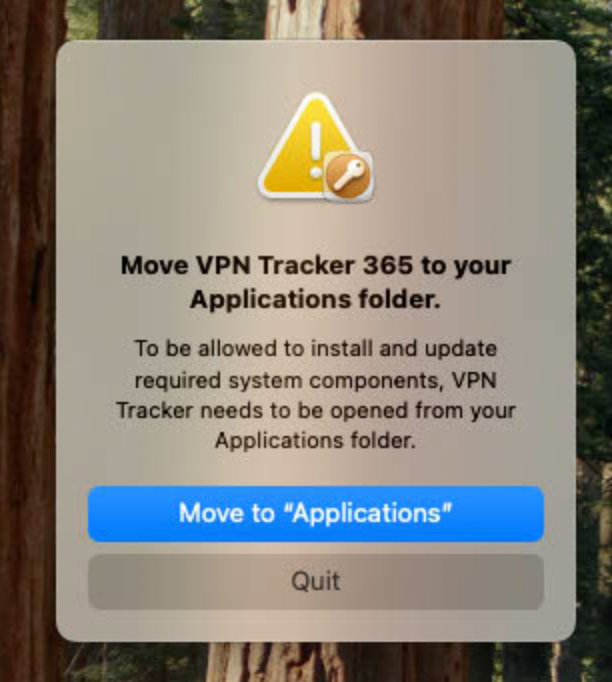
In Order for VPN Tracker to work correctly, it needs to be moved to your Applications folder. Confirm the move by clicking on: Move to "Applications"
In the next step enter your password to confirm the move.
Install the VPN Engine
Next VPN Tracker will need to install the VPN Engine.
Important: This step must be completed on the machine. It cannot be done remotely (i.e. via Remote Desktop)
Step 1: Install VPN Engine Helper
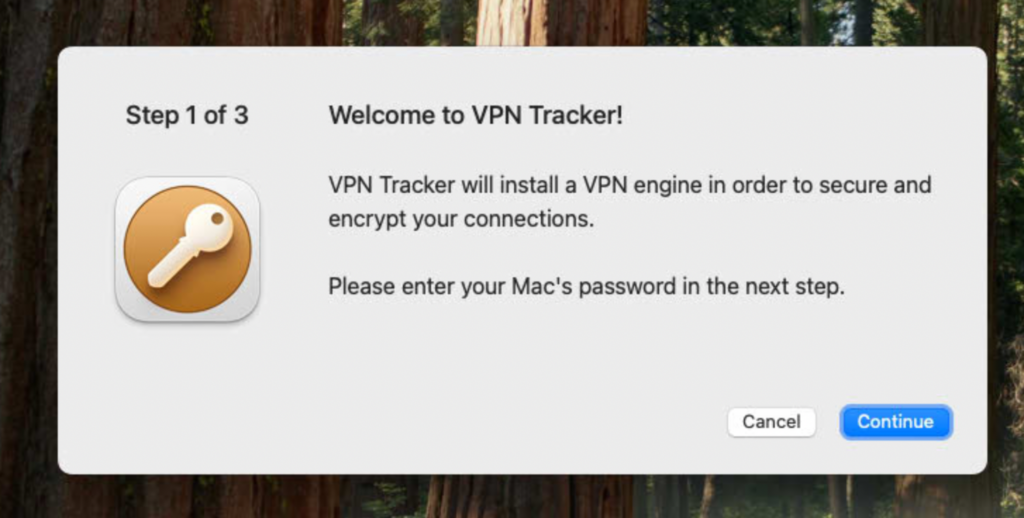
Press Continue to start the installation of your VPN Engine
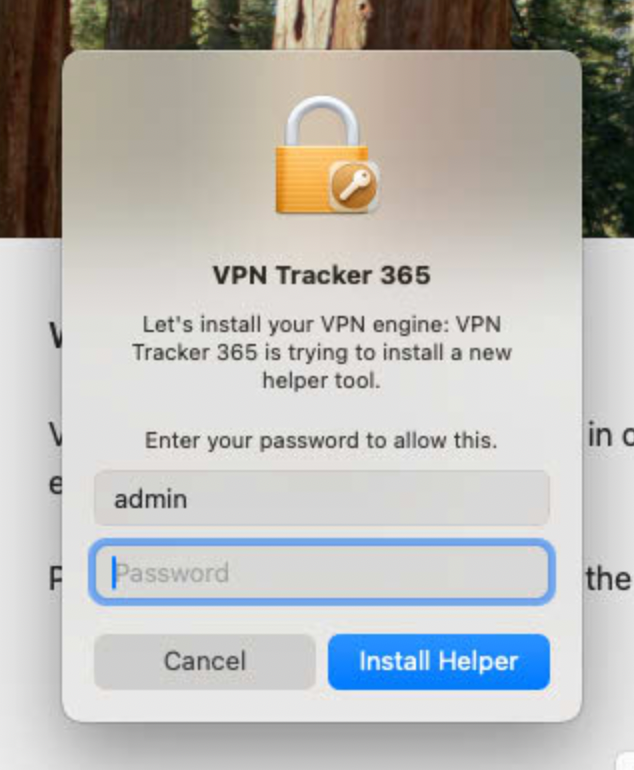
Enter your password to confirm the Installation of the VPN Engine Helper and click Install Helper
Step 2: Allow System Extension
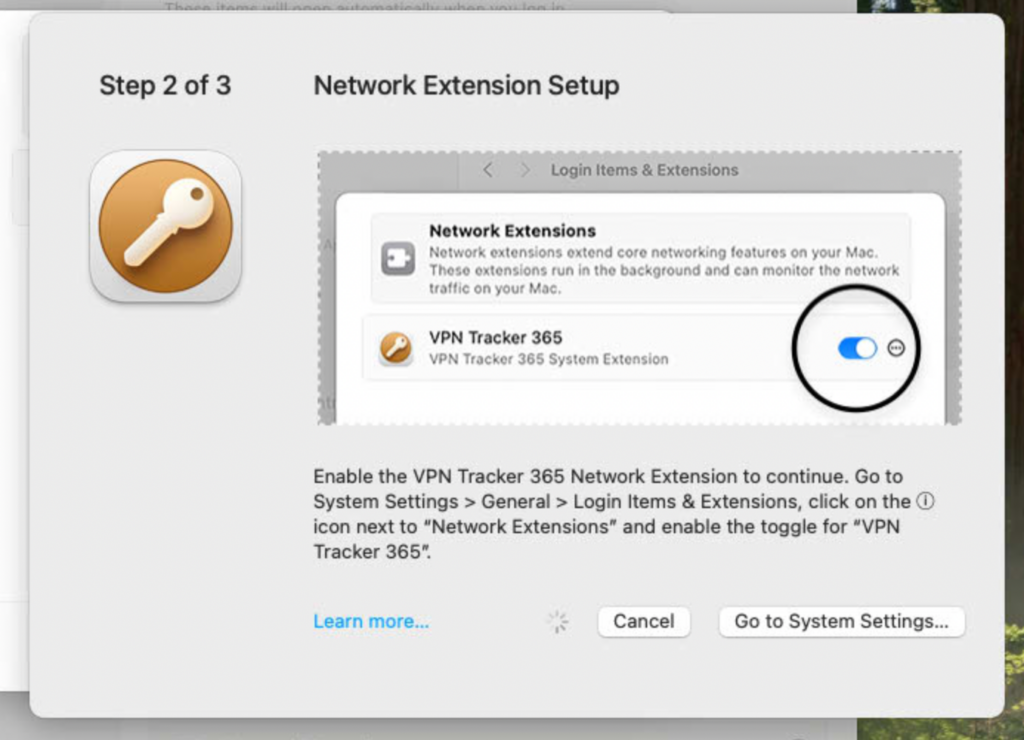
VPN Tracker needs to add a System Extension to your Mac in order to function properly. This needs to be approved by you before being allowed to use the app.
Click on Open Security Settings to open up Settings.
The system will ask you if you want to use a new network extension. Press OK to confirm.
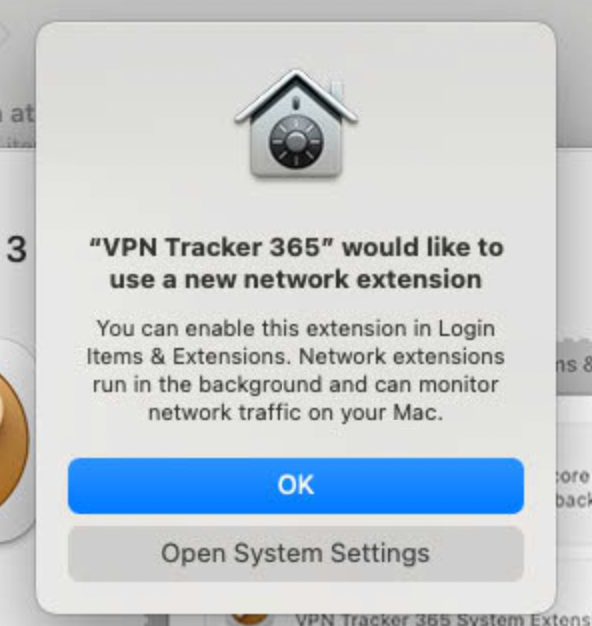
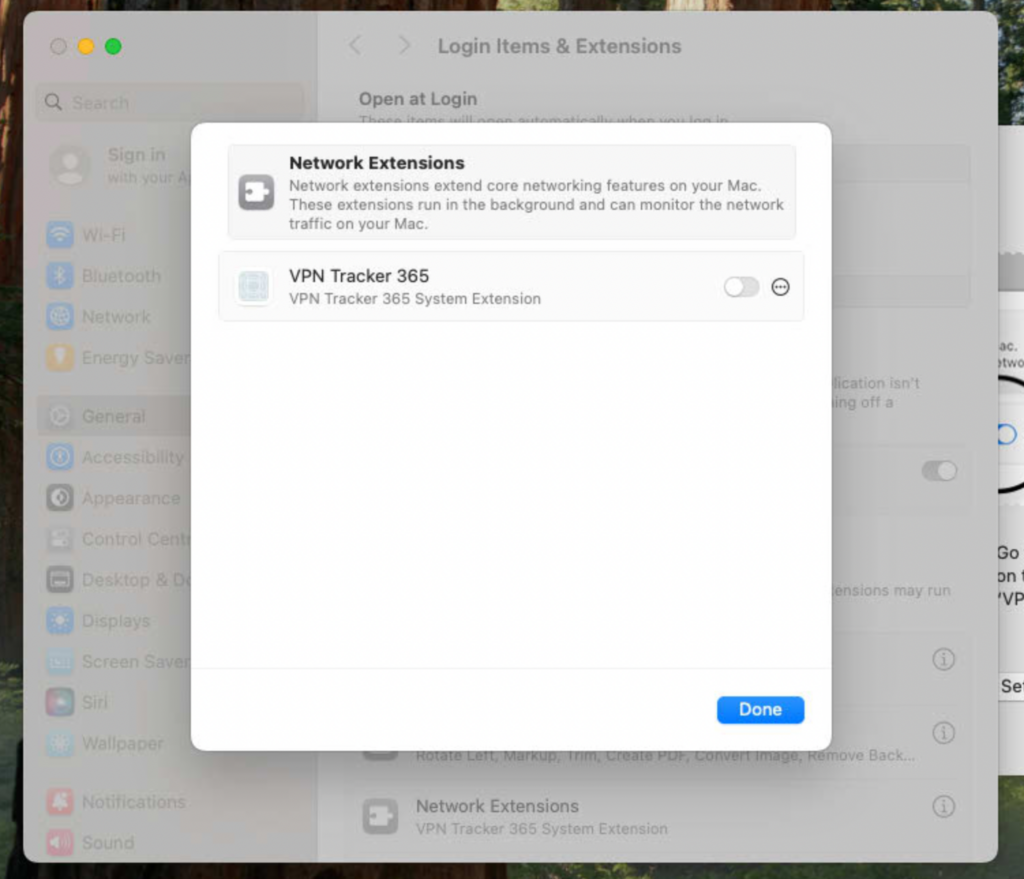
Flip the Switch next to VPN Tracker 365 so it goes from grey to blue.
Enter your password to confirm. Once the switch is blue you can press Done.
Close the settings window.
Step 3: Allow VPN Configuration
VPN Tracker needs to apply a VPN Configuration to your Mac. Click on Allow VPN Configurations to start.
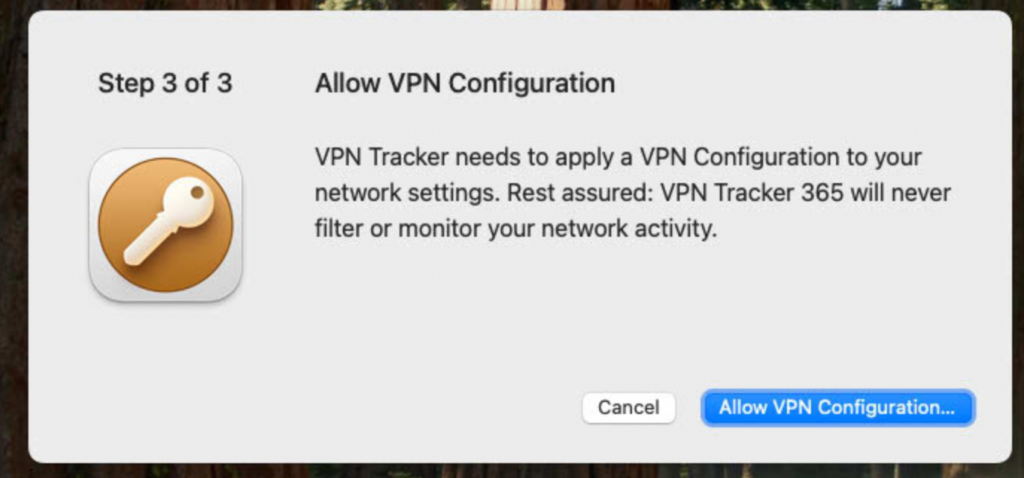
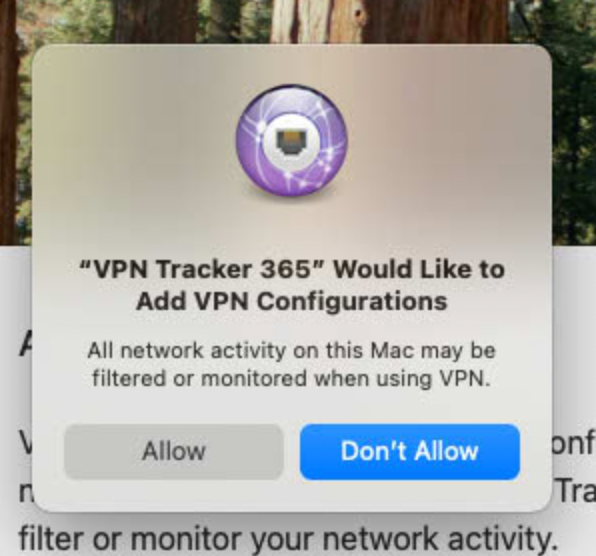
In the Window that opens, press on "Allow"
You're all set! VPN Tracker is successfully installed.
Continue by signing in, or creating an account.