



Looking for an easy way to share VPN connections? As an IT admin, you likely already rely on VPN Tracker to manage secure remote access for your company. But as your organization grows, keeping track of VPN setups for different departments, offices, or teams can become tricky.
Good news: VPN Tracker’s Teams feature makes it simple to manage users, plans, and shared VPN connections in one organized workspace. The entire setup follows one smooth, linear workflow: create the team, prepare the VPN connection, invite users, assign their plans, and share access. Because you can assign plans while invitations are still pending, you can complete the rollout in one pass — there is no need to wait for each colleague to accept before finishing setup.
In this guide, you’ll learn how to:
Create a New Team
In VPN Tracker, Teams let you organize people and share VPN connections. Only team members with the right permissions can view or use a connection.
- Open VPN Tracker for Mac.
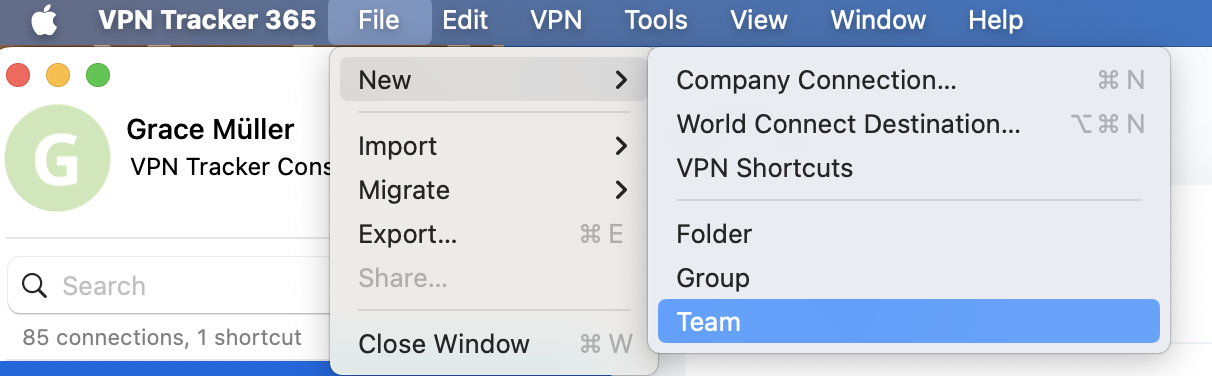
- Go to File > New > Team in the menu bar.
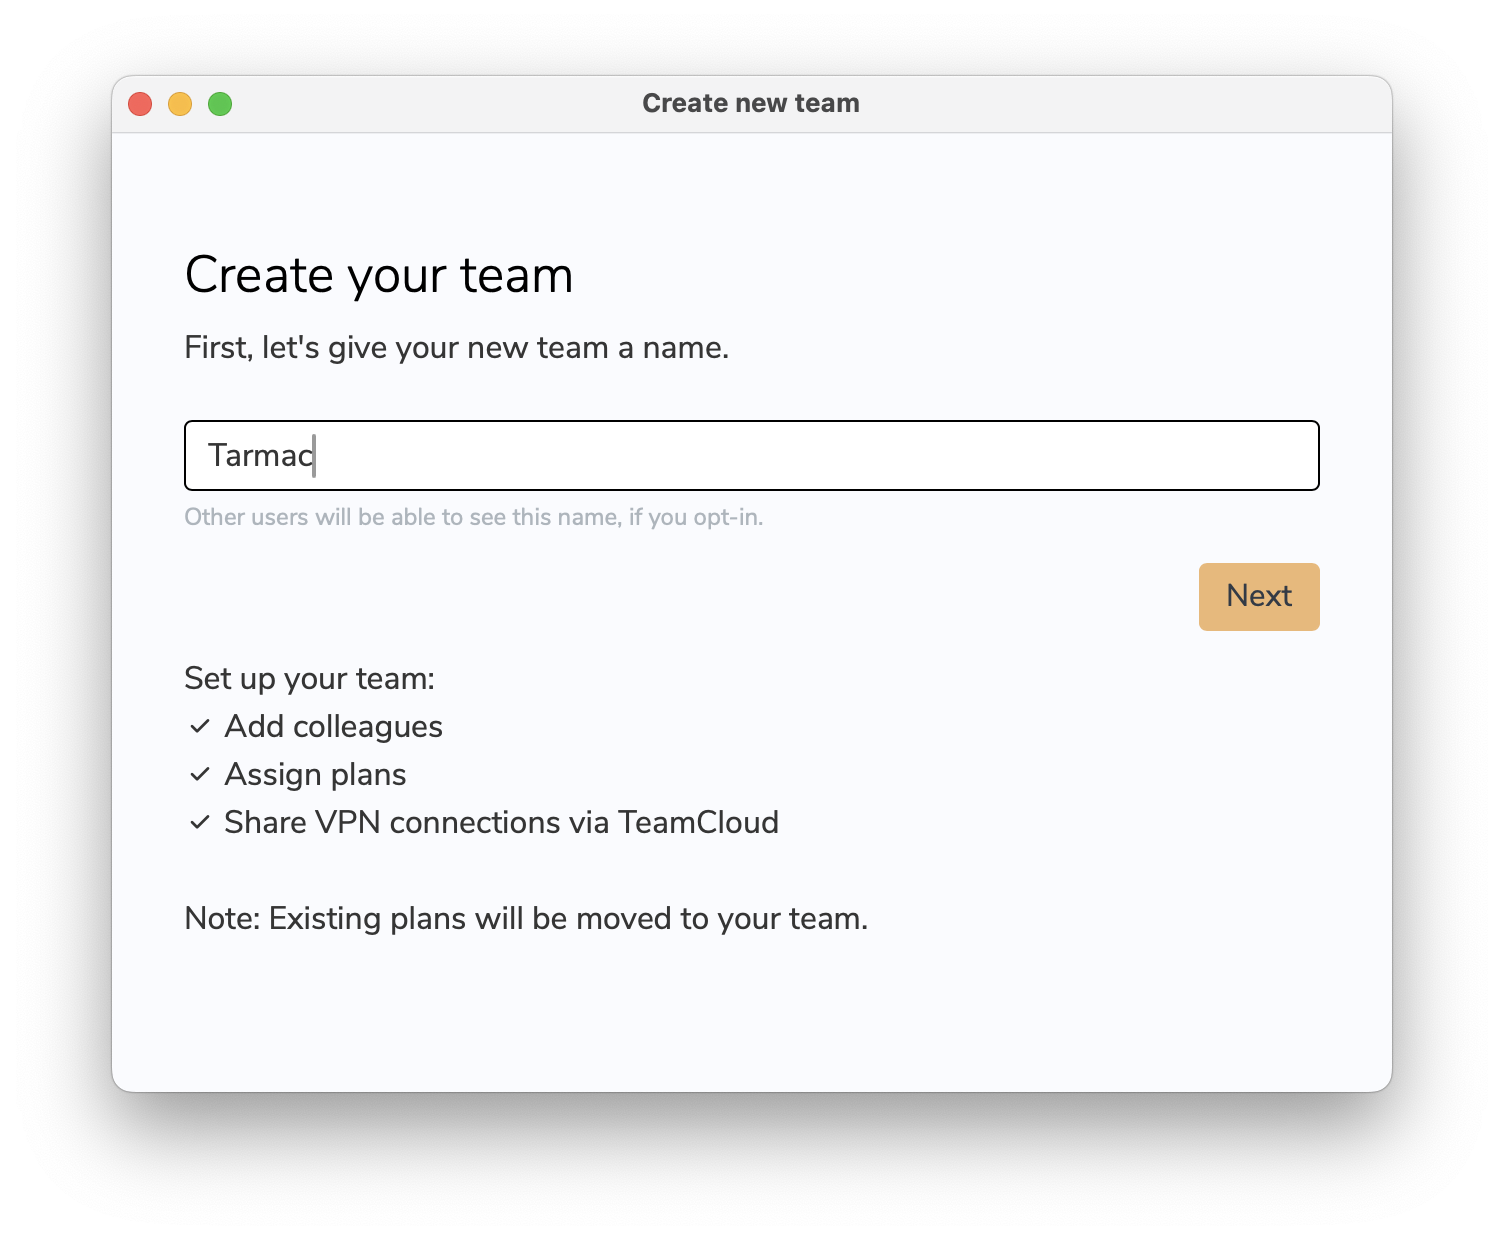
A popup will appear where you can name your new team — for example, your company or department name, such as Tarmac.
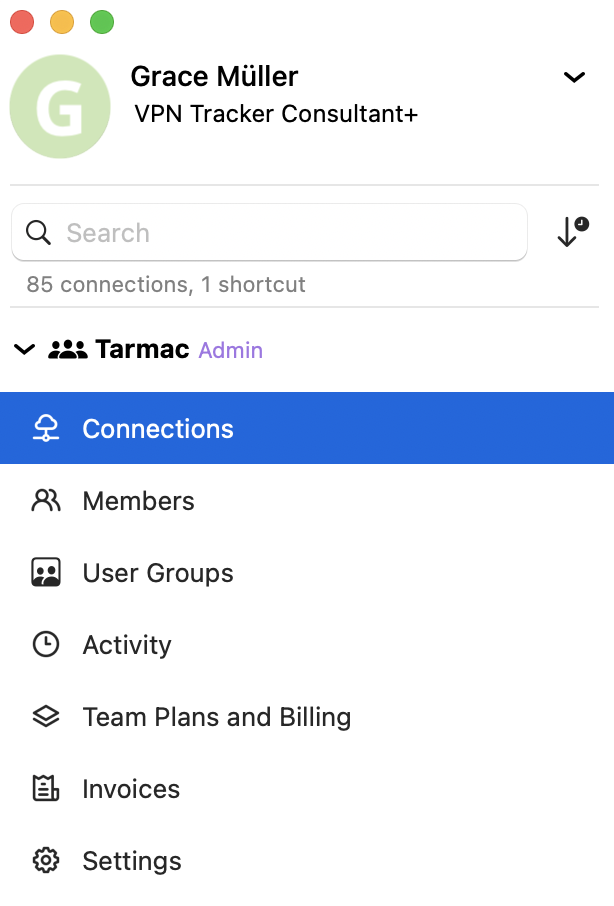
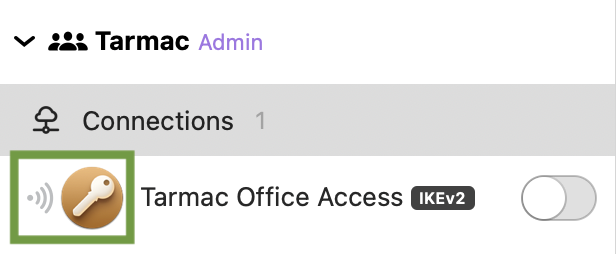
Once created, your team will appear in the VPN Tracker sidebar. This will be your central hub for managing all company VPNs and user access:
Configure and Share VPN Connections
With your team in place, you can start setting up your company’s VPN.
Let’s say your office uses a Zyxel USG Flex 100H firewall and you want to create a secure IKEv2 connection for remote employees.
- In the sidebar, select your team.
- Go to Connections > Create connection.
- Choose your vendor, device, and protocol from the list.
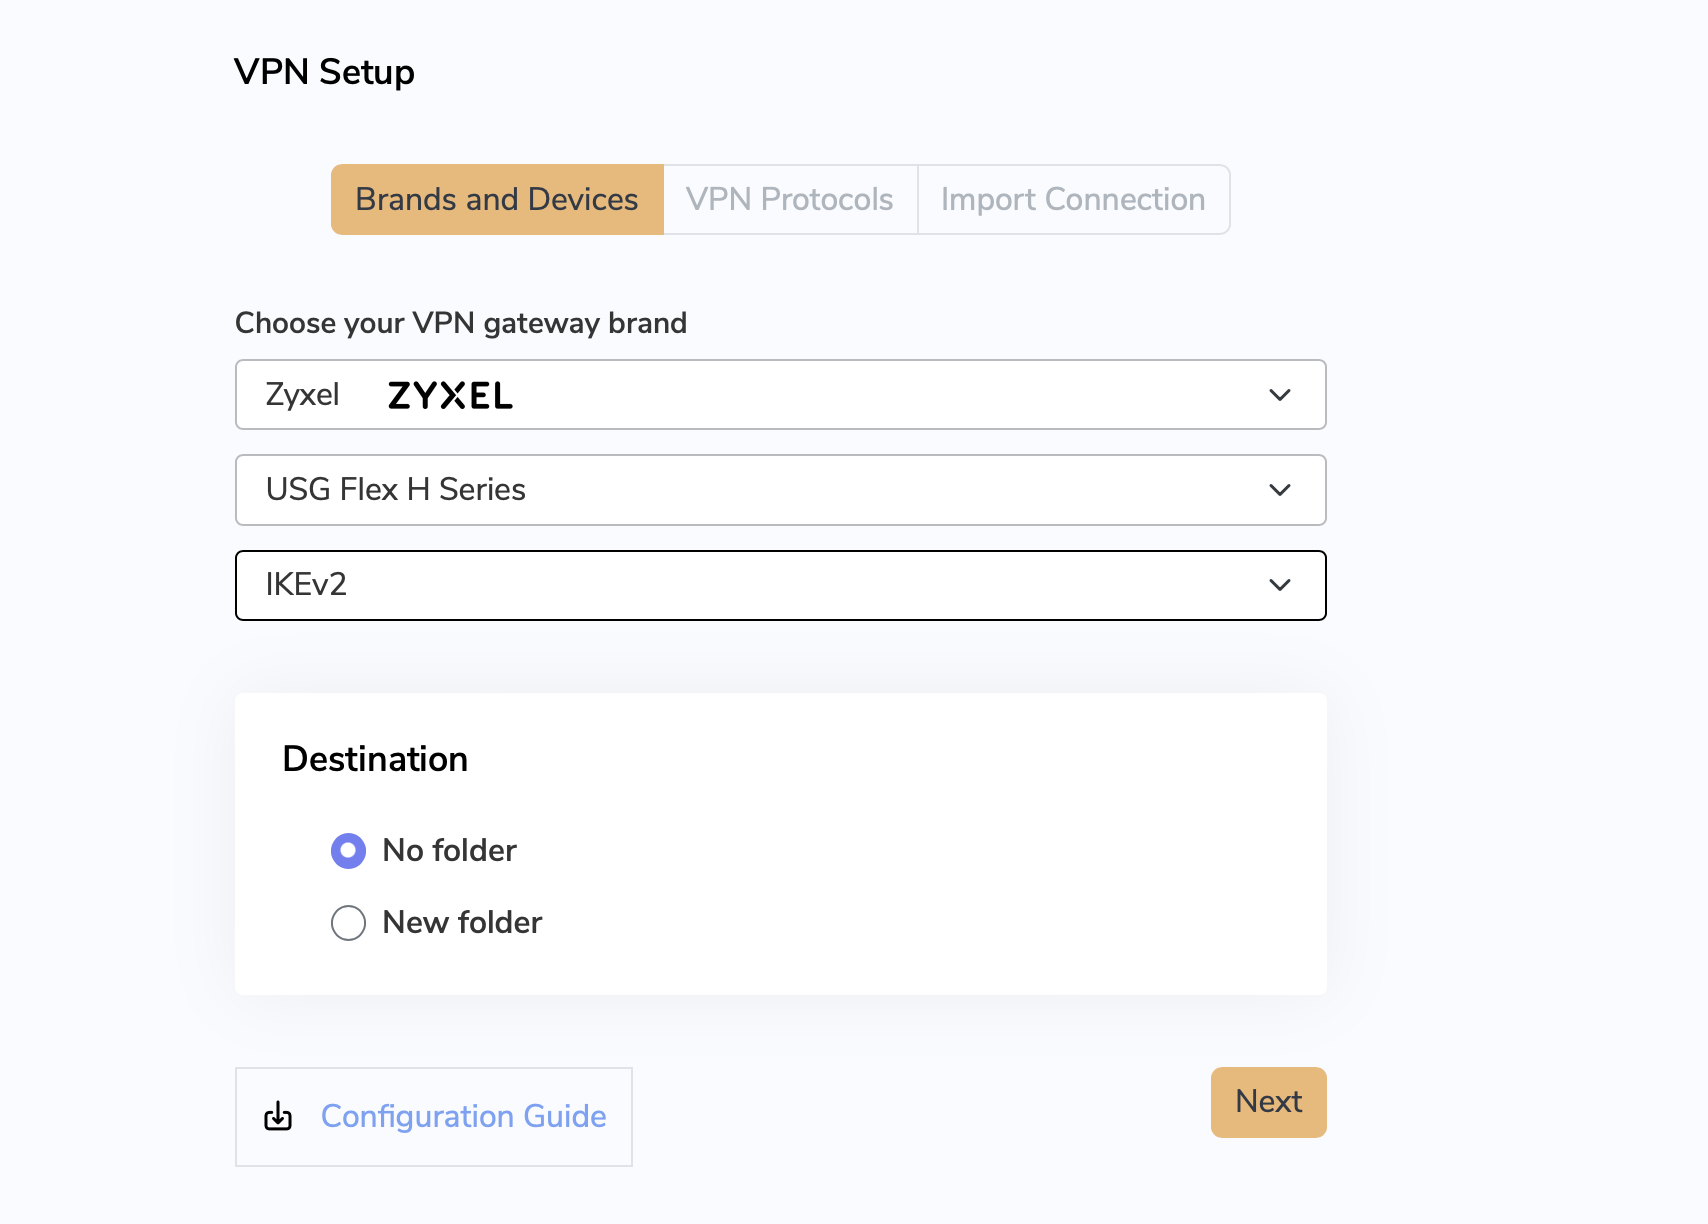
You can organize connections into folders — for example, by department or location (e.g., “Head Office” or “Warehouse VPN”).
Next, enter your VPN configuration details:.
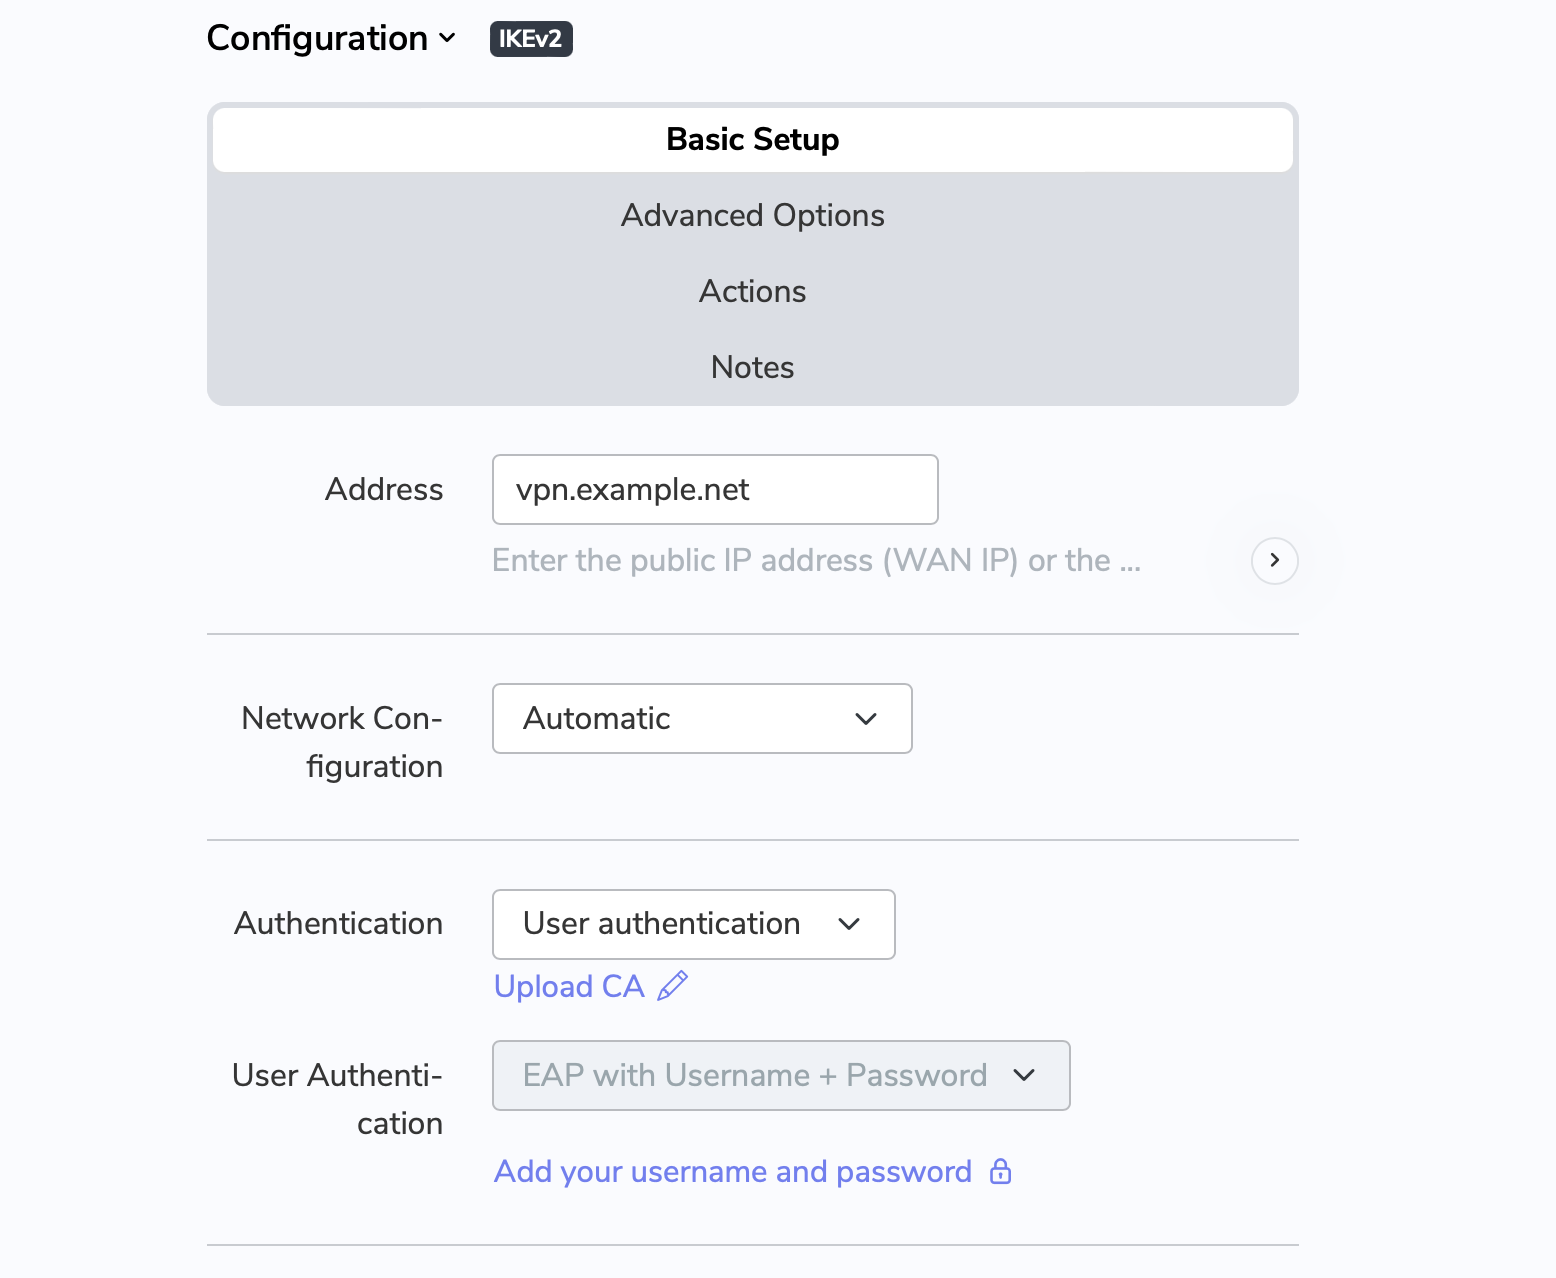
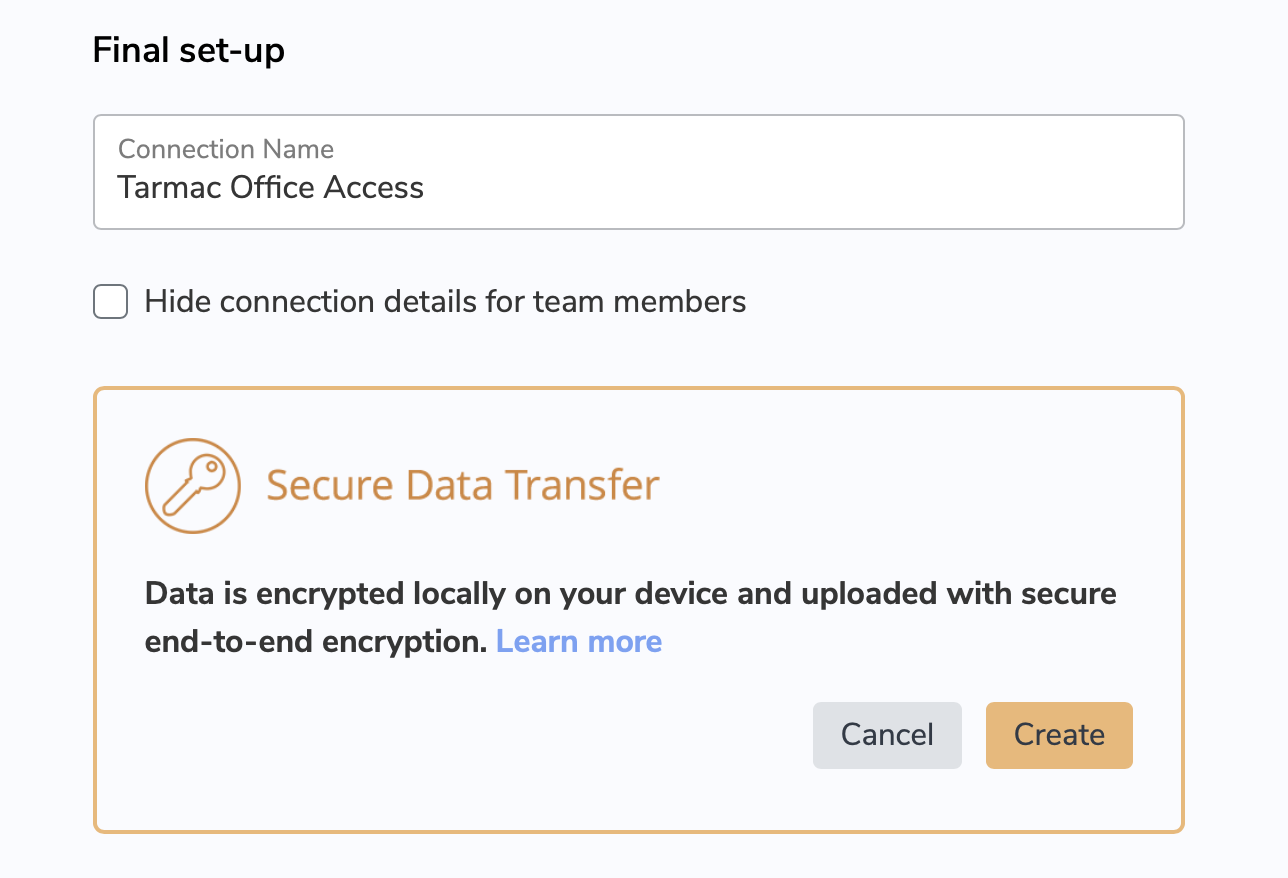
Once complete, give your connection a recognizable name such as “Tarmac Office Access”
If needed, you can choose to hide configuration details from users to keep settings secure. Finally, click Create to add the connection to your team.
Preconfigure Login Details
Your new connection remains unpublished while you prepare the rollout, so it is not yet visible to team members. This gives you time to test the connection and prefill details such as certificates, usernames, and shared secrets.
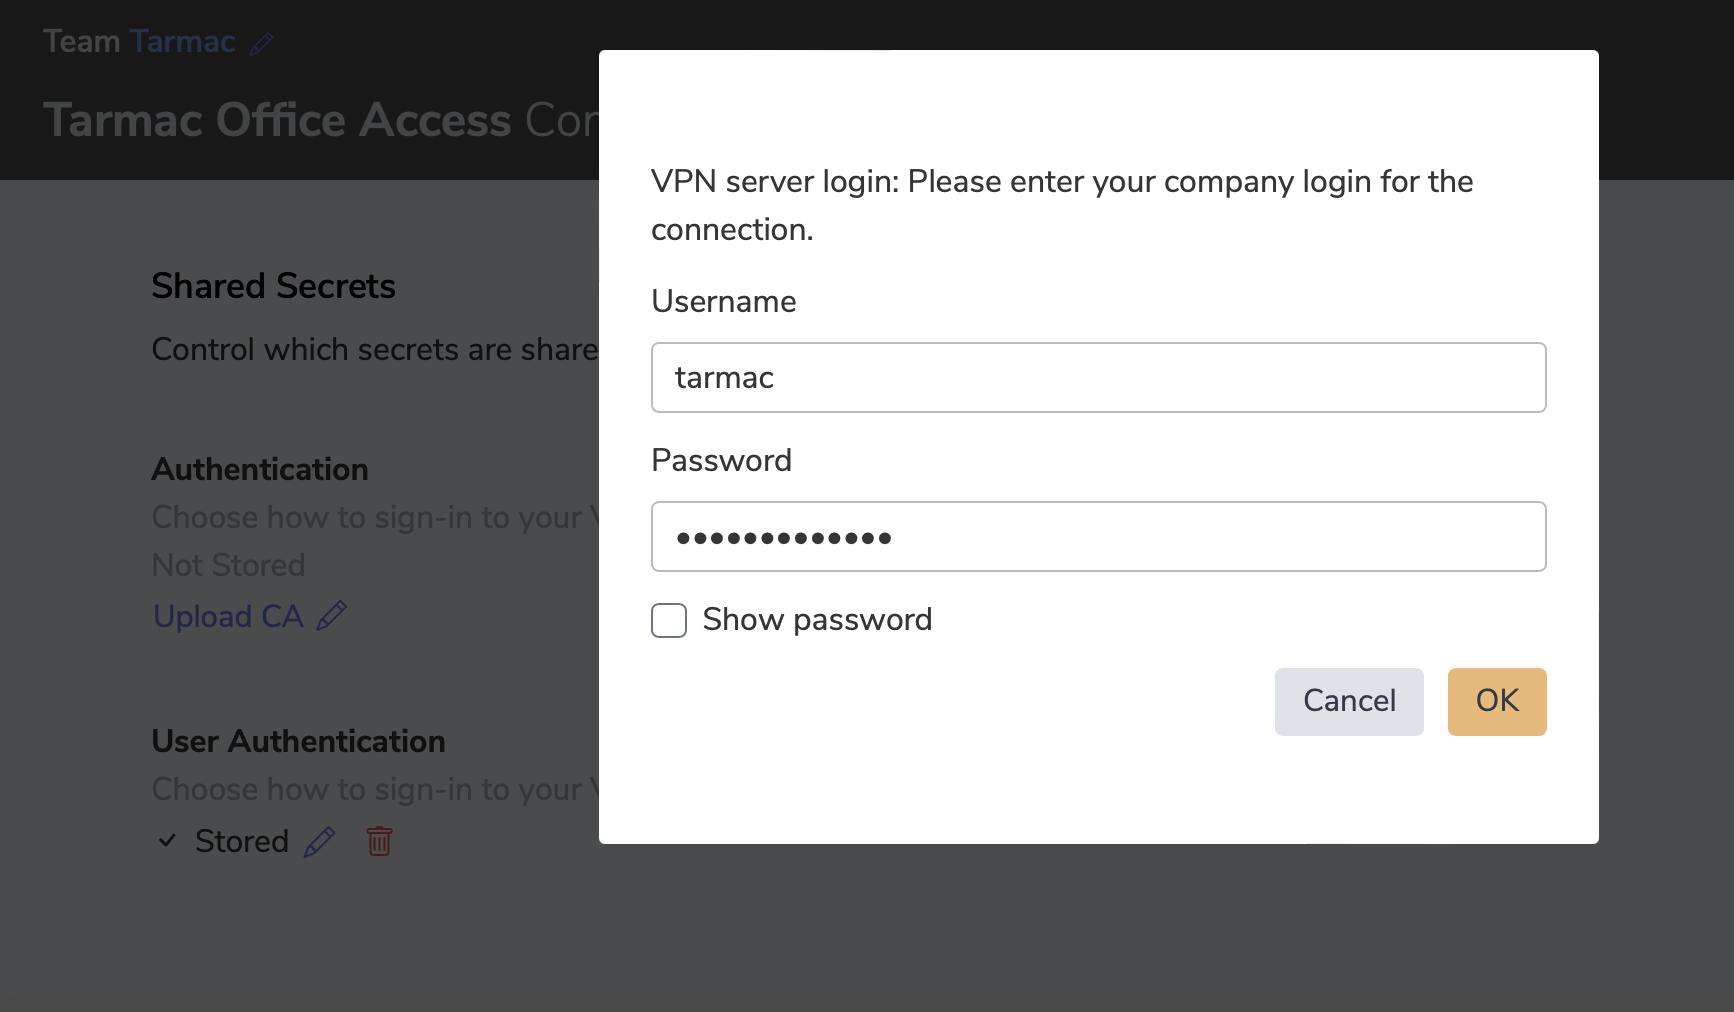
Under the Personalize tab, add the necessary credentials. This way, employees can connect without having to track down settings or passwords.
Invite Users, Assign Plans, and Share the Connection in One Go
With the connection prepared, you can complete each user’s onboarding in one smooth sequence. You do not need to wait for a colleague to accept the invitation before assigning their VPN Tracker plan.
- Go to the Members tab.
- Click Invite members.
- Enter the email addresses of the employees who need remote access and send the invitations.
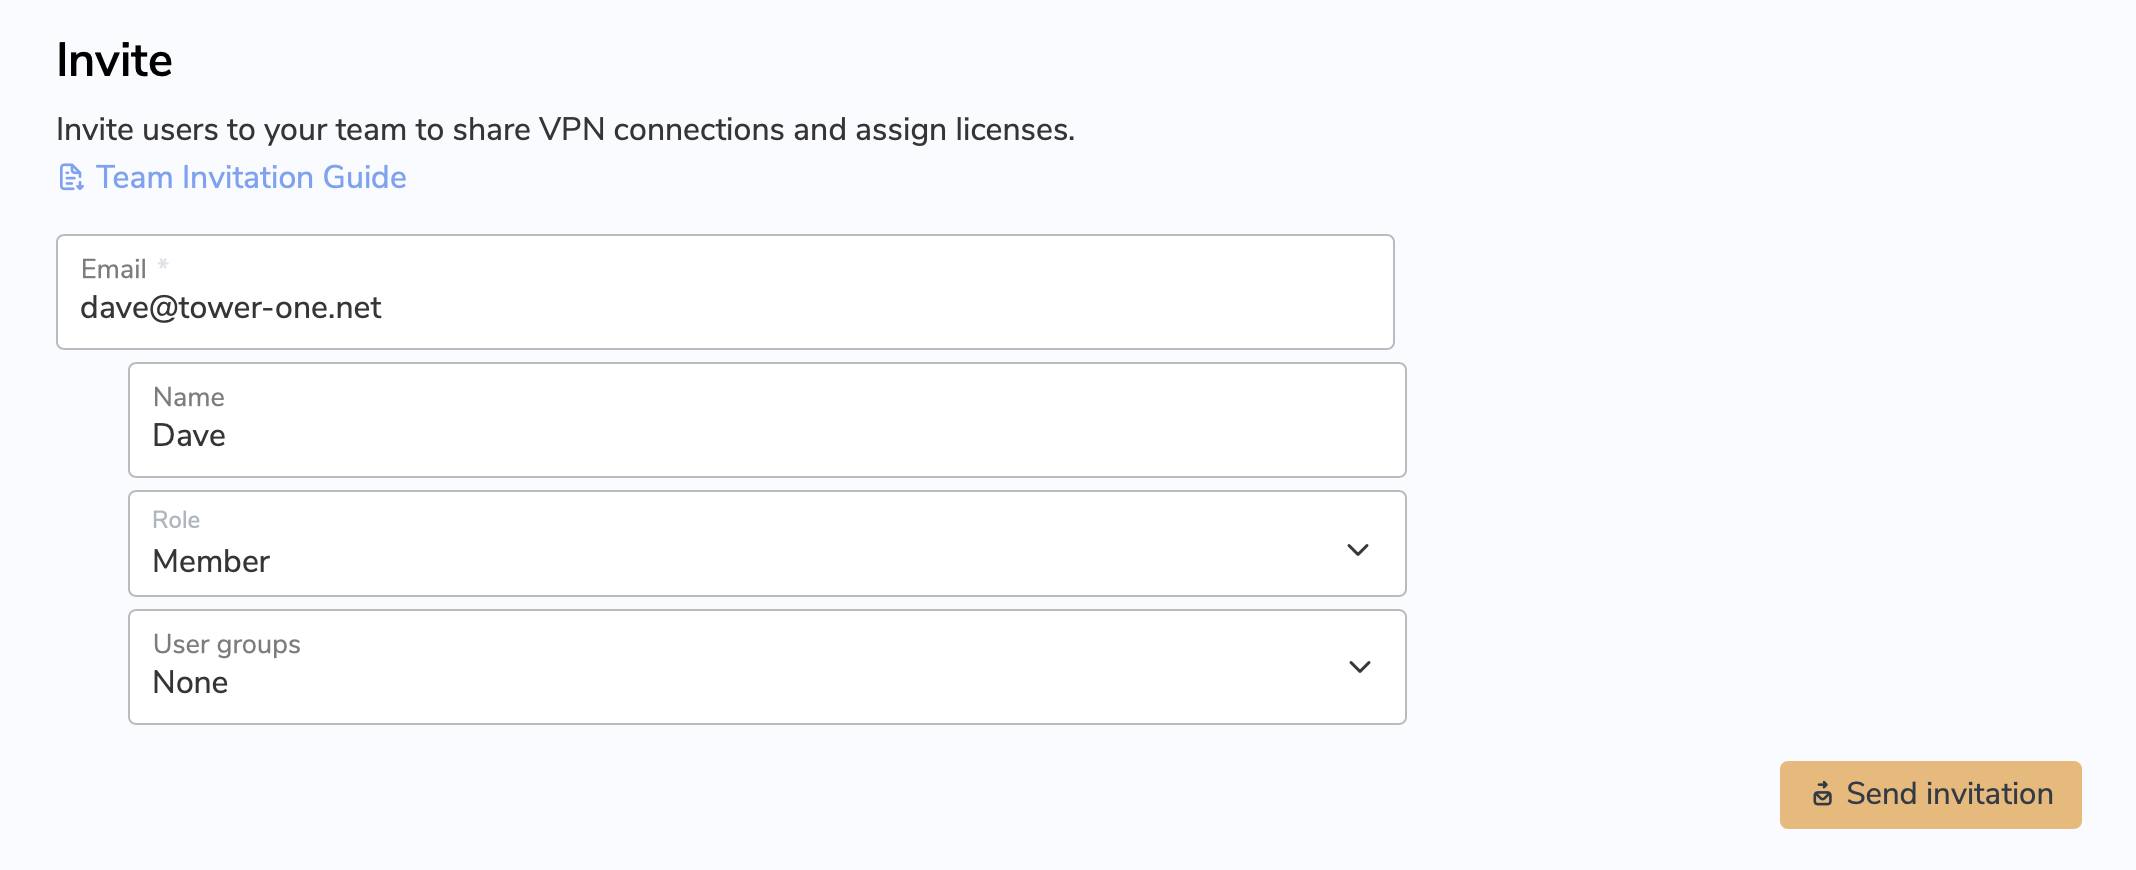
You can also assign roles when inviting users:
- Member – can connect using shared VPNs
- Admin – can manage connections, teams, and licenses
- Billing – can access invoices and manage subscription plans
For example, you might assign your accounting lead the Billing role so they can view invoices, while IT staff remain Admins.
If you still need plans, go to Team Plans & Billing, click Add plans now, and choose the required number of licenses in the VPN Tracker Store. Admins or users with the Billing role can manage plans.
Now finish the setup for each invited user:
- Return to the Members tab. Pending invitees already appear in the member list.
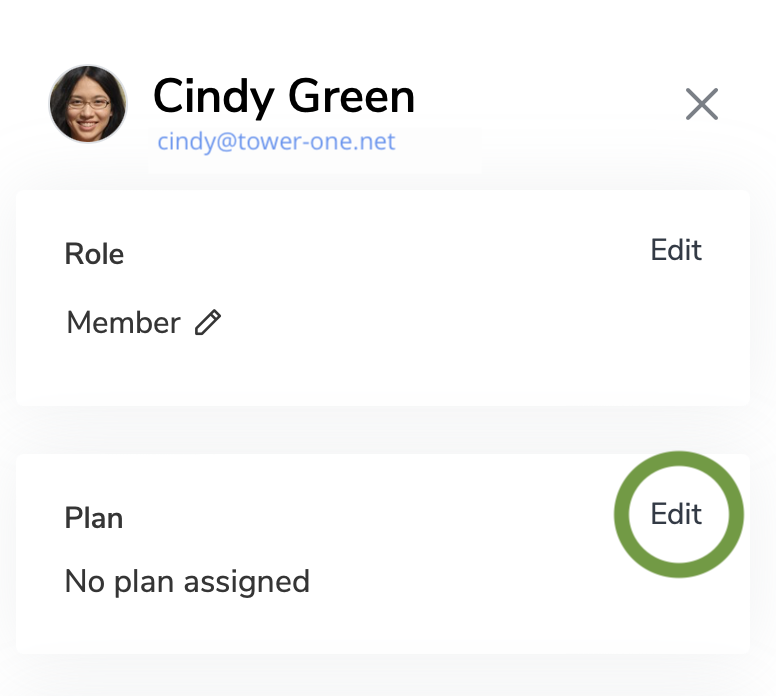
- Select an invited user and open Settings.
- Under Plan, assign a VPN Tracker plan immediately — even while the invitation is still pending.
- If you use User Groups, add the user to the appropriate group for their connection access.
Set Access Controls and Publish
With the users, roles, and plans prepared, the final step is to choose who can use the connection:
- Select your connection.
- Go to Connections > Edit > Access.
- Allow access for all team members, or restrict access to specific User Groups such as “IT Admins” or “Remote Staff”.
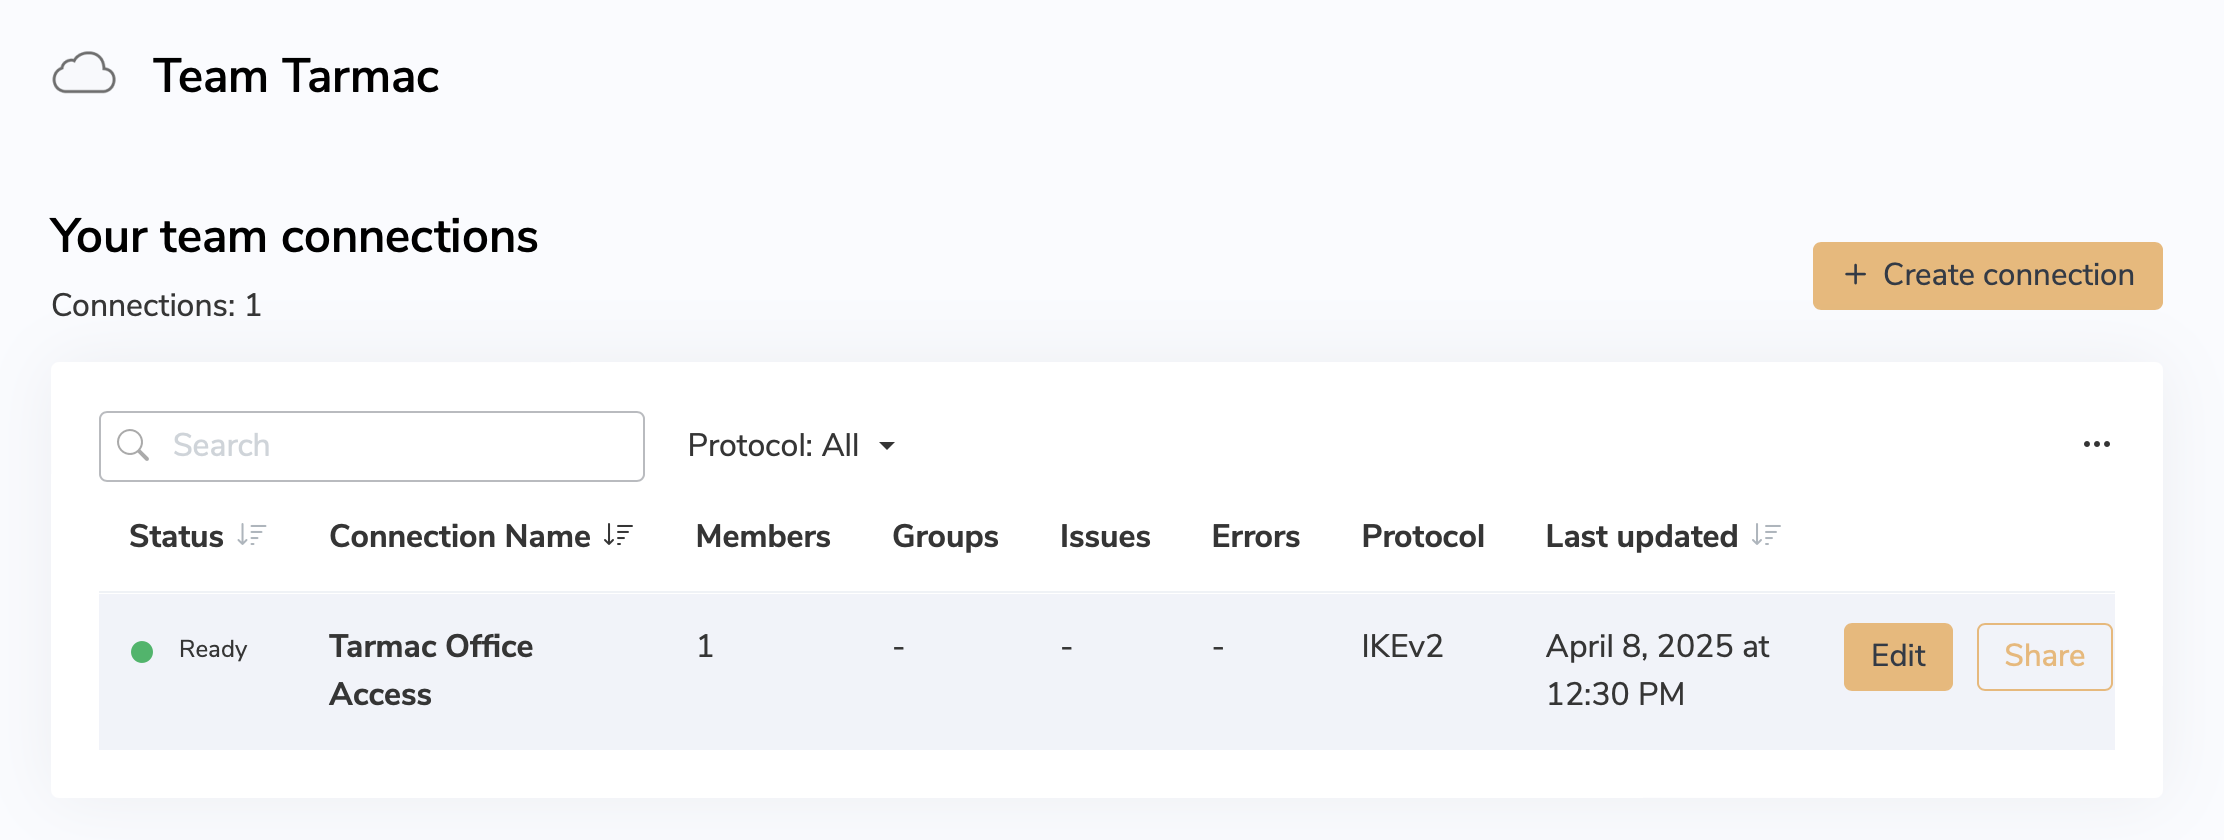
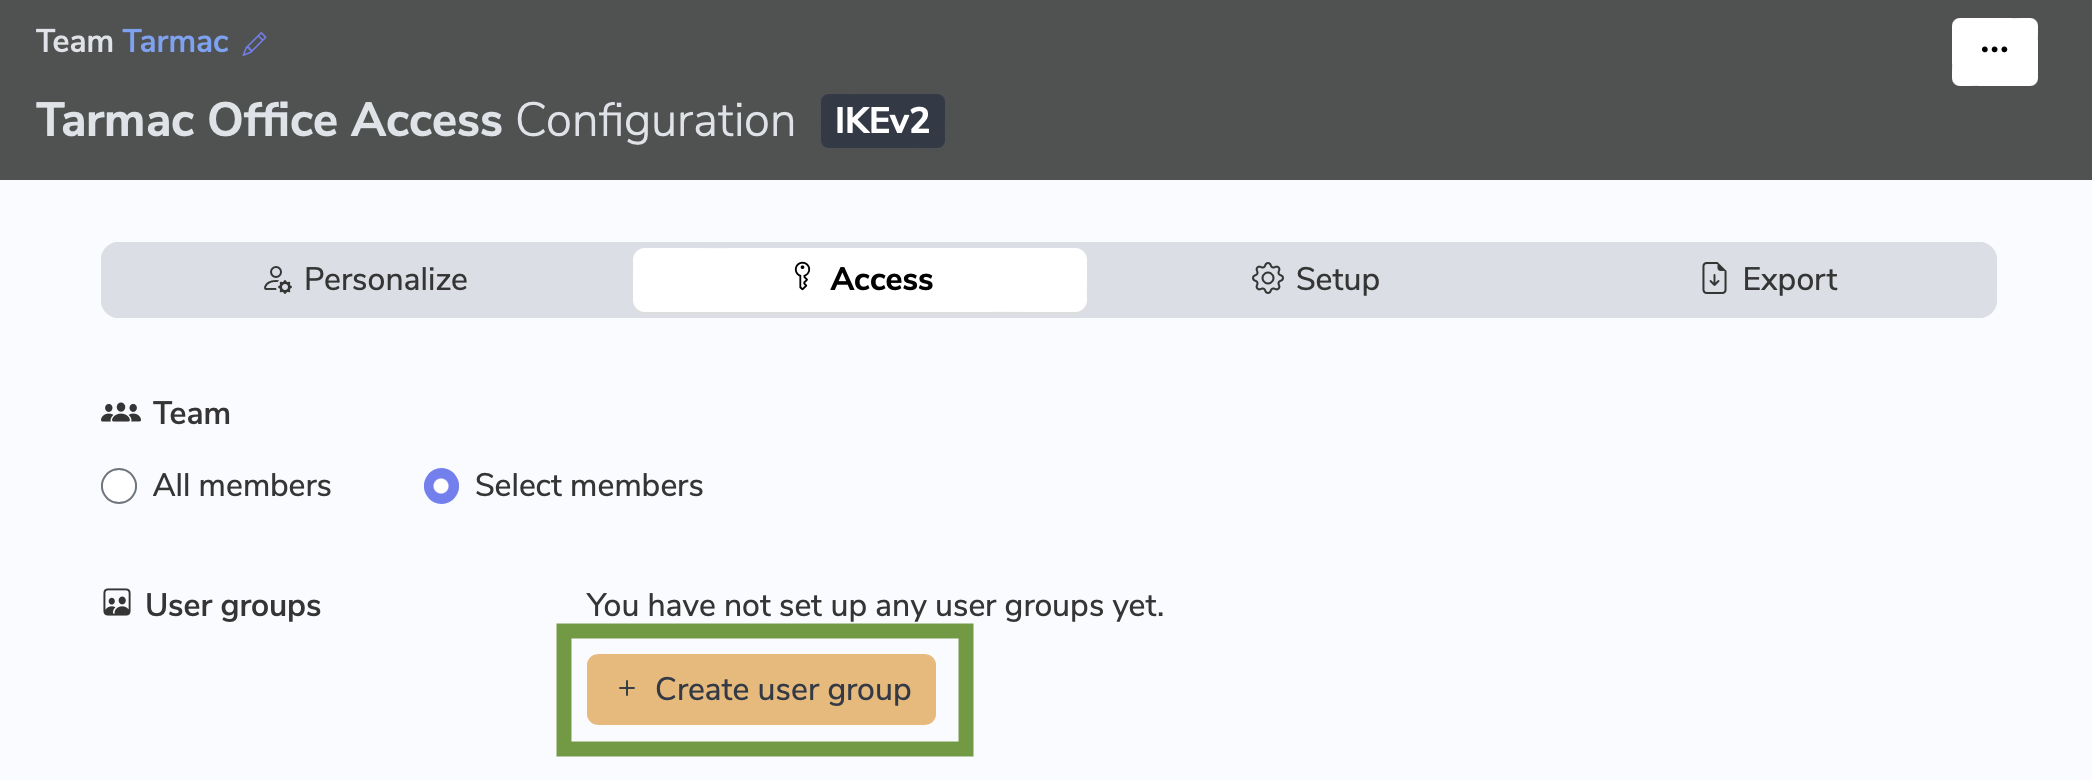
Once everything is ready, publish the connection. It will be visible to everyone who has access.

That is the complete rollout: invite, assign the plan, configure access, and publish — all in one uninterrupted admin workflow. When colleagues accept their invitations and sign in, their assigned plan and shared VPN connection are ready to use.
Need to Add More Connections?
As your company grows, simply repeat these steps to share VPN connections for different setups — for example, for different office locations or servers.
Everything stays organized in one secure VPN Tracker workspace.
Update connection settings
You have shared a VPN Connection and need to update the pre-shared key or network range? With VPN Tracker TeamCloud you can easily roll out connection changes to your team - with no enduser action required. This means any time you update or share VPN connection changes, your whole team stays in sync automatically.
Open the VPN Tracker app and go to Connections in the sidebar. Here you will see all your team's connections. Click on Edit to update the configuration:
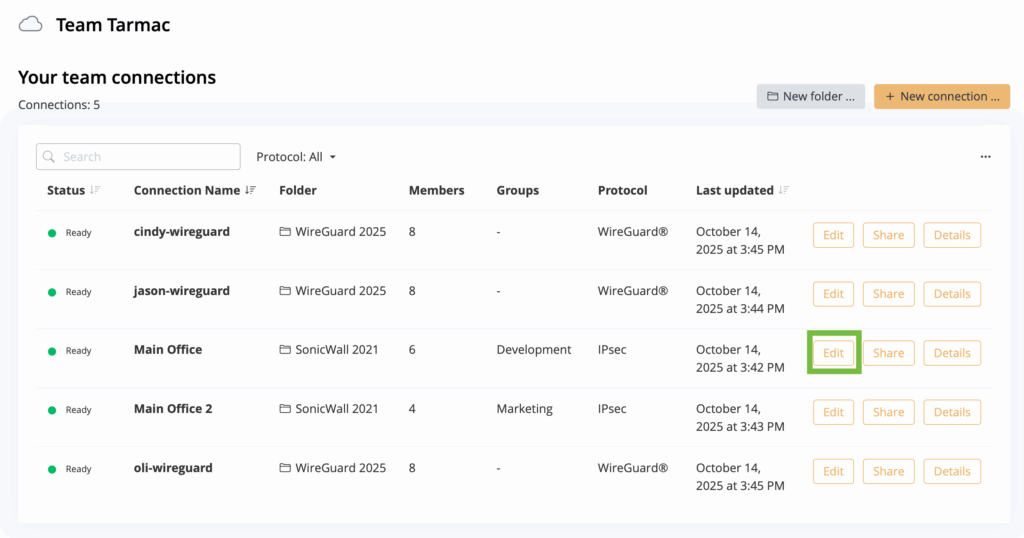
Edit an existing Team connection
Switch to the Setup tab to make changes to the VPN configuration. When you've finished, click Save to update the connection and seamlessly roll out changes for all users:
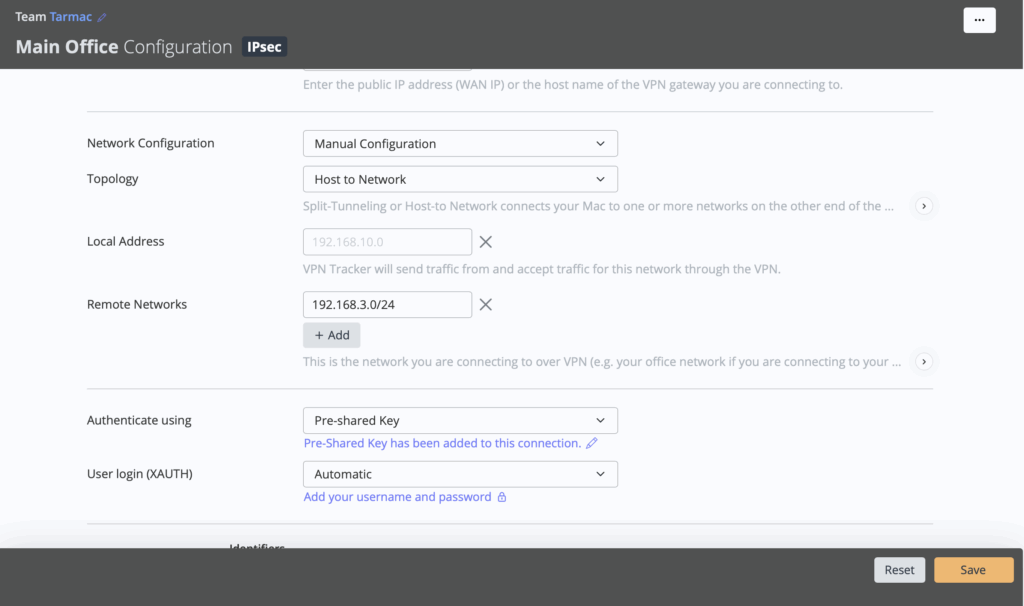
Update the VPN remotely and seamlessly roll out changes to users
Need to test your changes first? Use the slider to temporarily unpublish the connection before rolling out the new configuration to users.

Revoke Access for Individual Team Members
When someone changes roles or leaves your organization, you can revoke their VPN access centrally without disrupting the rest of the team.
Revoke access to one VPN connection
- Select the shared connection in VPN Tracker.
- Go to Connections > Edit > Access.
- Remove the individual team member from the connection’s access list, or remove them from the User Group that receives the connection.
- Save your changes. TeamCloud applies the updated access settings remotely.
This removes access for that person while everyone else can continue using the connection as before.
Remove all team access for a departing user
- Open the Members tab and select the team member.
- Open Settings and revoke their assigned VPN Tracker plan so it can be reassigned.
- Click Remove to remove the user from the team and revoke their TeamCloud access.
Important for Managers: Before removing a Manager, make sure another trusted team member has the Manager role. Then change the departing user’s role to Member, save the change, and remove them from the team.
Delete a shared VPN connection
If you want to remove a shared VPN connection from your team, you can do so in the connections overview. Deleting a connection will stop sharing that VPN connection with your team across Mac, iOS, and web.
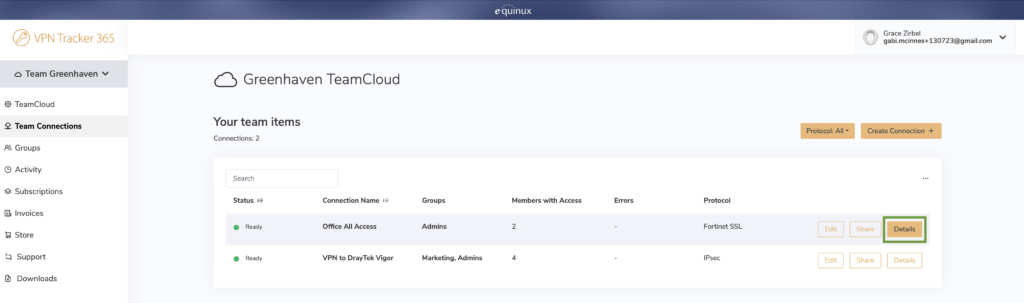
Choose the VPN connection you want to delete and click the Details button:
In the details view, scroll down to the bottom of the panel to delete the connection:
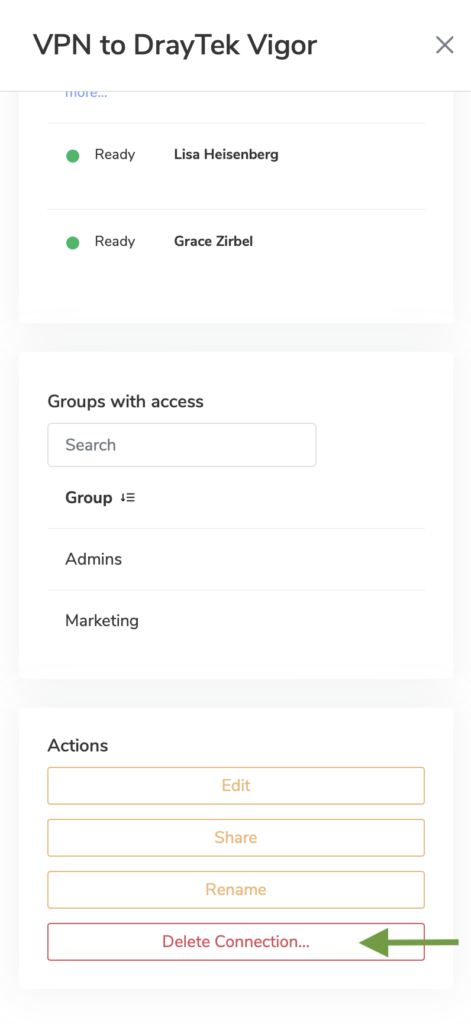
Delete a team connection
Alternatively, right-click on a TeamCloud connection in the VPN Tracker for Mac app and select Remove from TeamCloud to delete for all users:
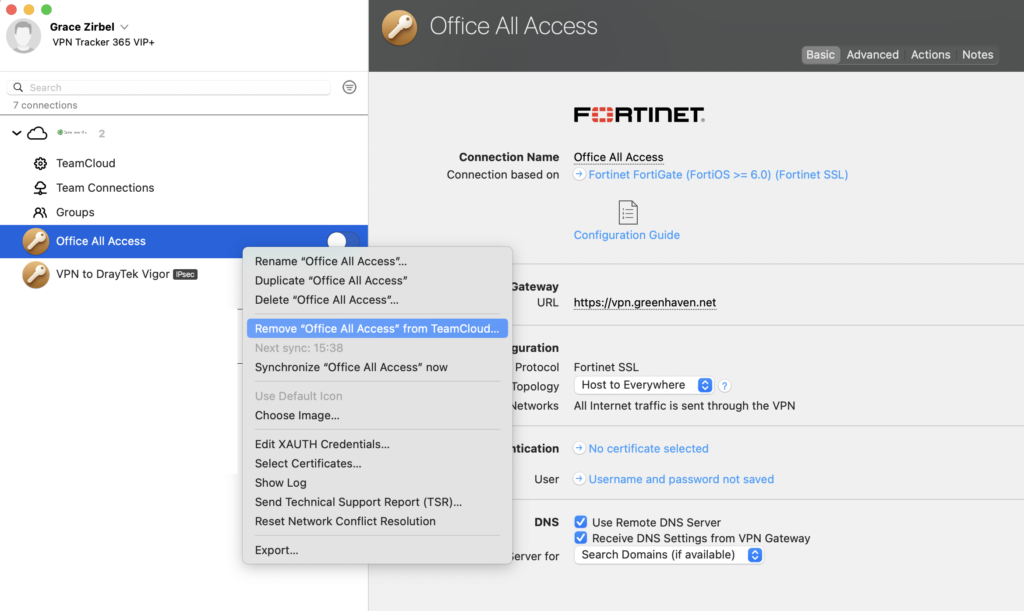
Delete a TeamCloud connection in VPN Tracker for Mac
Why IT Teams Choose VPN Tracker
VPN Tracker makes managing VPN access across your organization simple, secure, and scalable.
Key Benefits for IT Admins:
- Save time with centralized setup and rollout
- Manage all users and VPNs from one interface
- Full support for major VPN protocols (IKEv1 & 2, WireGuard®, OpenVPN, SonicWall SSL, and more)
- Role-based access controls and audit logs for Zero Trust compliance
- Compatible with top VPN gateways including Cisco, Fortinet, SonicWall, Sophos, and Zyxel
- Simplified billing and license management with role-based permissions
Related content
- Migrate to WireGuard VPN
- Apply Zero Trust Principles to Your VPN
- Secure Home Office Setup for Mac and iOS
- Choosing a VPN Client – What to Look Out For
We Can Help You Set Up Team Access
Need help planning a smooth VPN rollout? Our VPN consultants can help you create your team, assign roles and plans, organize access groups, and prepare shared VPN connections so everyone has the right access from day one.
Get help setting up team access →