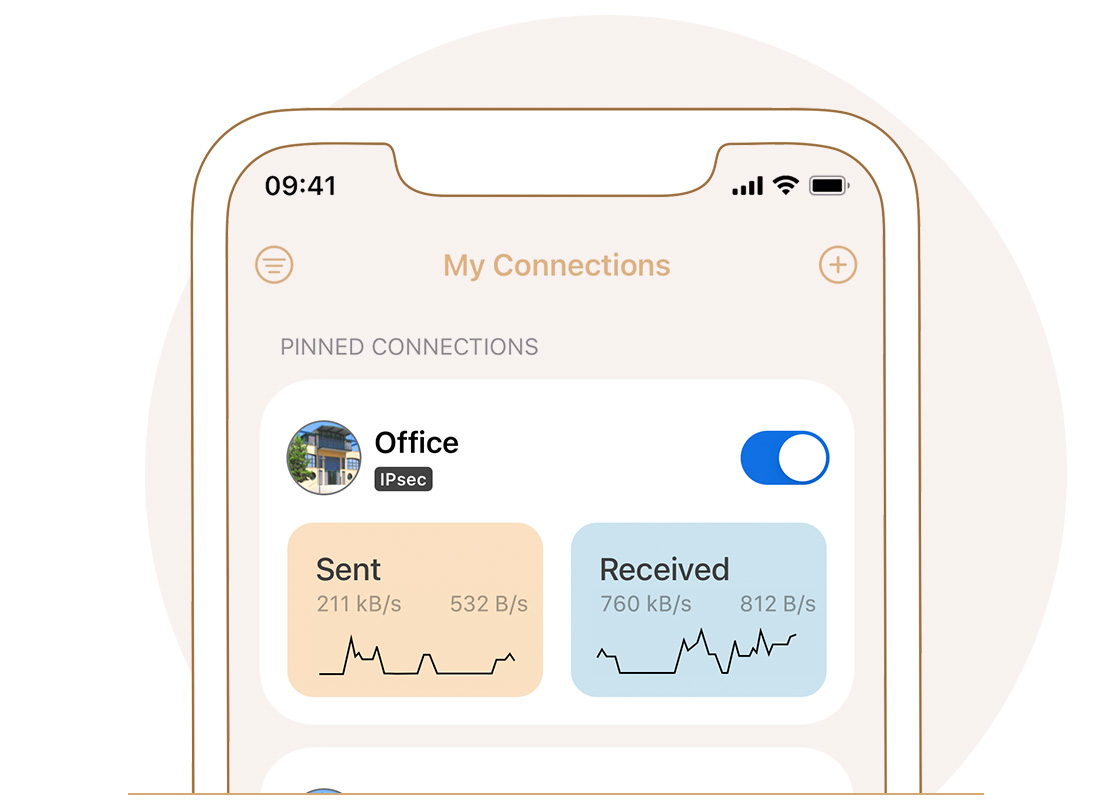
Learn how to connect to pfSense VPN on Mac. Use this step-by-step guide to set up VPN with your Netgate pfSense appliance. We cover configuration on your device, connecting with VPN Tracker, and rolling out VPN access for your team.
Guide Contents
- About Netgate pfSense Appliances
- Supported pfSense Appliances
- Supported VPN Protocols
- Configure OpenVPN server for Netgate pfSense
- Configure IKEv2 VPN for Netgate pfSense
- How to Set Up WireGuard on Netgate pfSense
- Bonus: Using VPN Tracker Team Features for WireGuard
About Netgate pfSense Appliances
Netgate pfSense appliances are powerful, flexible firewall and VPN solutions for networks of all sizes. With models ranging from compact devices for small offices to enterprise-grade appliances, pfSense offers reliable network security and connectivity features. Each device is powered by pfSense Plus software, which provides advanced routing, firewall, and VPN capabilities.
Connect to pfSense VPN on Mac: Supported Devices
VPN Tracker works with all current Netgate pfSense appliances. This includes:
- Netgate 1100
- Netgate 2100
- Netgate 3100
- Netgate 4200
- Netgate 6100
- Netgate 6200
- Netgate 7100
- Netgate 8100
- PFSense Plus
- PFSense CE

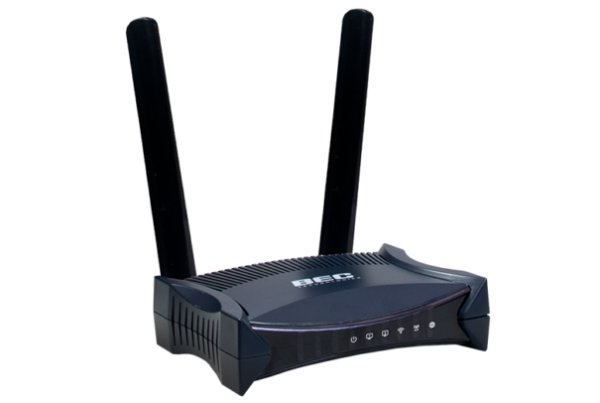
Connect to pfSense VPN on Mac – including Netgate 1100
If your device is a different Netgate pfSense appliance, there’s a good chance it will still work with VPN Tracker. For guidance, refer to the official VPN Tracker documentation.
Supported VPN Protocols
pfSense appliances support a wide range of VPN protocols to meet different networking needs. These include:
OpenVPN Configuration on pfSense
This guide will walk you through setting up an OpenVPN server on pfSense, creating certificates, and exporting client configurations to connect in VPN Tracker for Mac, iPhone and iPad.
Step 1: Create CA and Server Certificate
A Certificate Authority (CA) allows pfSense to issue trusted certificates. The server certificate identifies the VPN server to the VPN client.
-
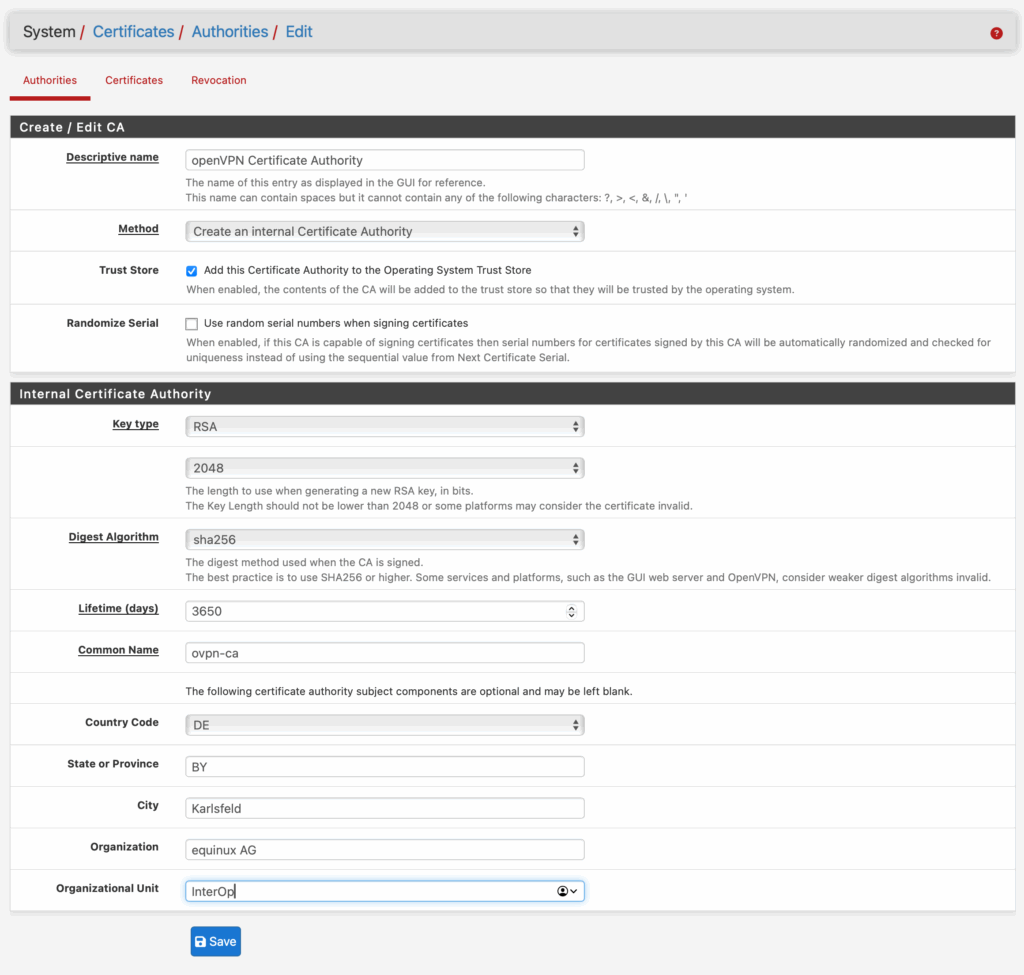
- To begin, navigate to System → Certificates → Authorities.
- Click + Add to create a new CA
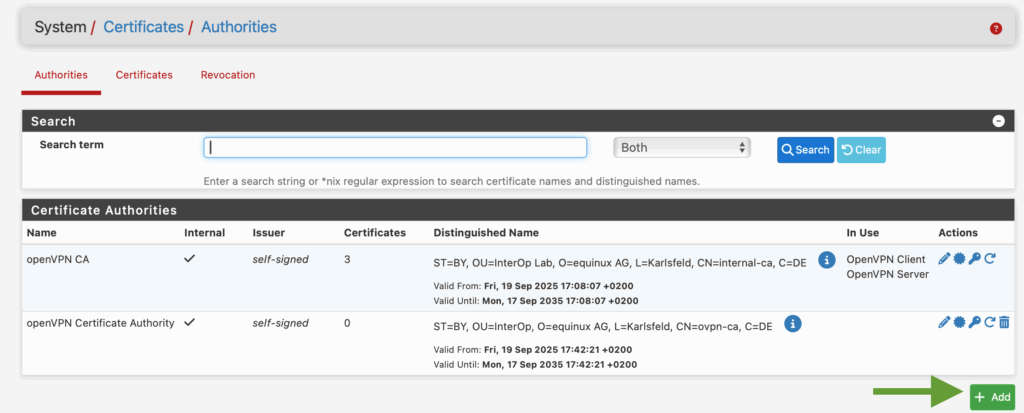
Click to create a new CA for OpenVPN
- Enter the required information and hit Save
- Move to the Certificates tab and click +Add
- Under Method, choose Create an internal certificate
- Set Certificate Type to Server Certificate
- Then, select the CA you created earlier
- Give it a clear name (e.g. OpenVPN-Server-Cert) and save
Step 2: Add Users and Generate User Certificates
A user certificate is unique to the VPN user (i.e. your team members) and identifies each user to the VPN client (i.e. VPN Tracker.)
- Go to System > User Manager > Users
- Click +Add to add a new user profile
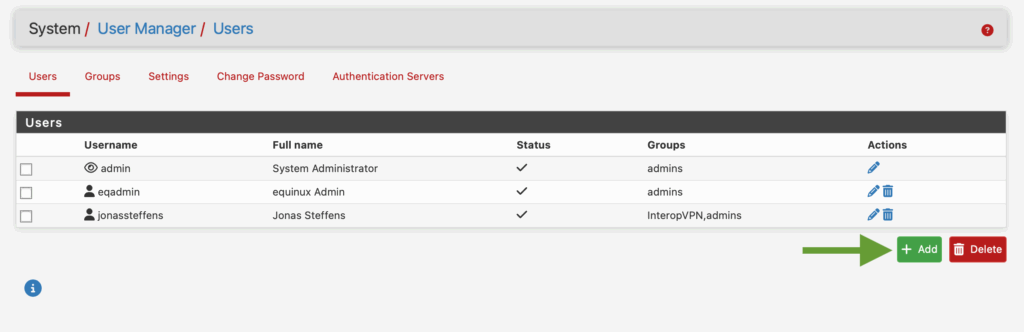
Click to add a new user
- Enter the user's settings and define their user group(s). Then, check the box Click to create a user certificate
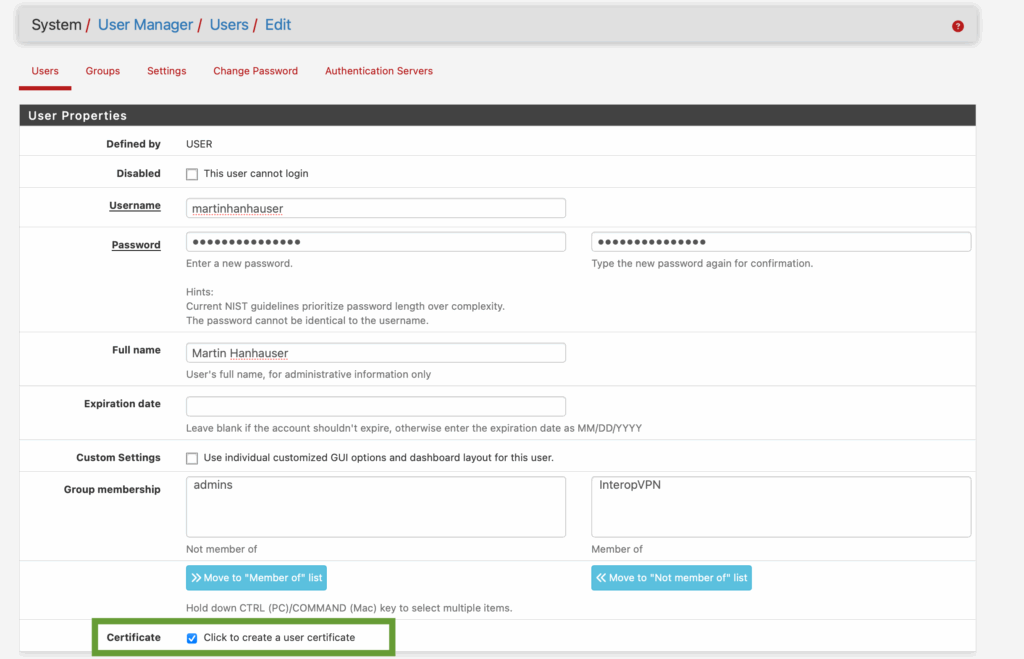
Check the box to create a user certificate
- Under Create Certificate for User, you can fill in the information – i.e. Name and certificate lifetime – to generate a personalized user certificate
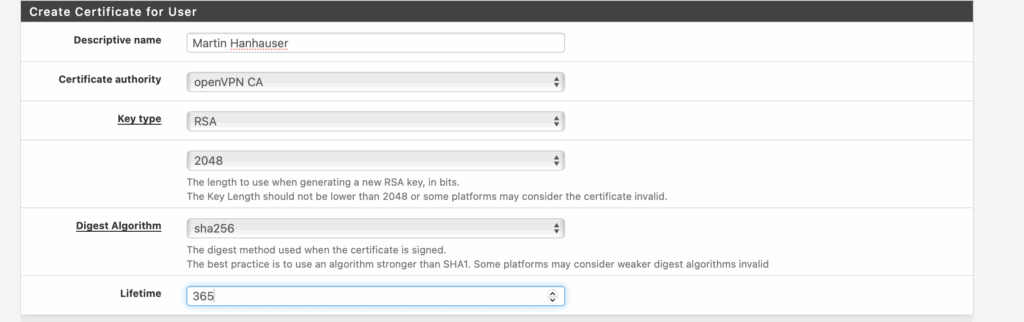
Fill in properties for the user certificate
- Your newly created user will appear in the User Manager. Repeat this process to add further users
Step 3: Set Up the OpenVPN Server Using the Wizard
The OpenVPN wizard simplifies server configuration, guiding you through network settings, protocols, and authentication. This ensures that the VPN is secure and properly integrated with pfSense.
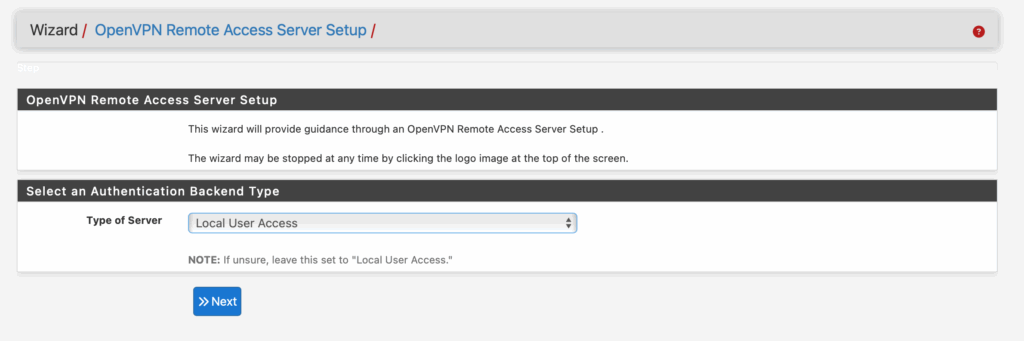
Note: This setup guide refers to the Local User Access VPN configuration option.
If you choose LDAP or RADIUS authentication, additional steps will appear in the wizard. For Local User Access, the wizard skips directly from Step 1 to Step 5 — this is expected behavior.
- Go to VPN → OpenVPN → Wizards
- For Type of Server, select Local User Access from the dropdown
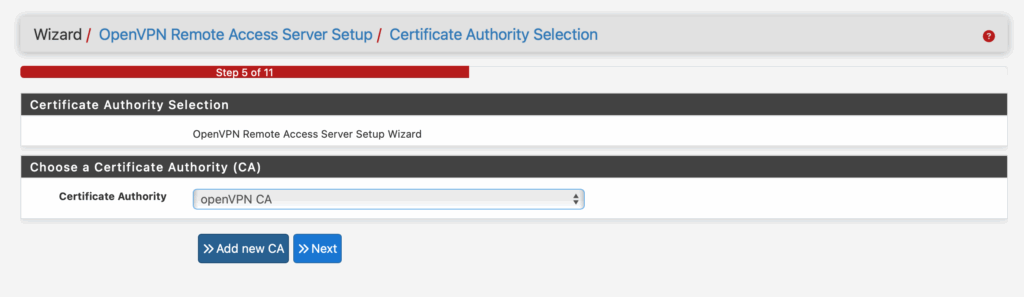
- Next, choose the Certificate Authority (CA) you created earlier
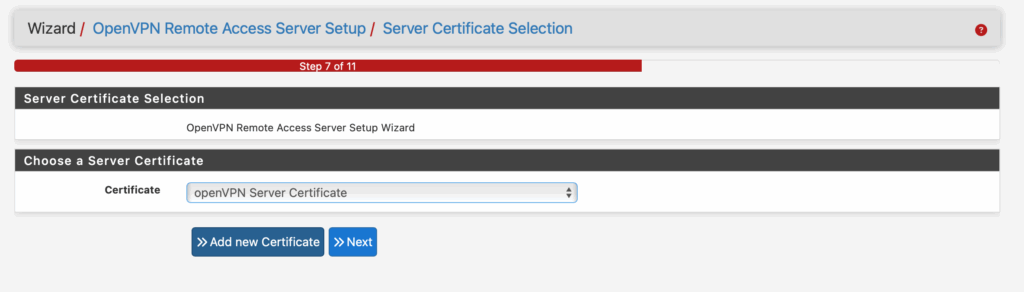
- Then, select the Server Certificate you created
- In the next step, give your server a name for reference (e.g. ovpn Server) and enter the port for the VPN. VPN Tracker uses the default port 1194
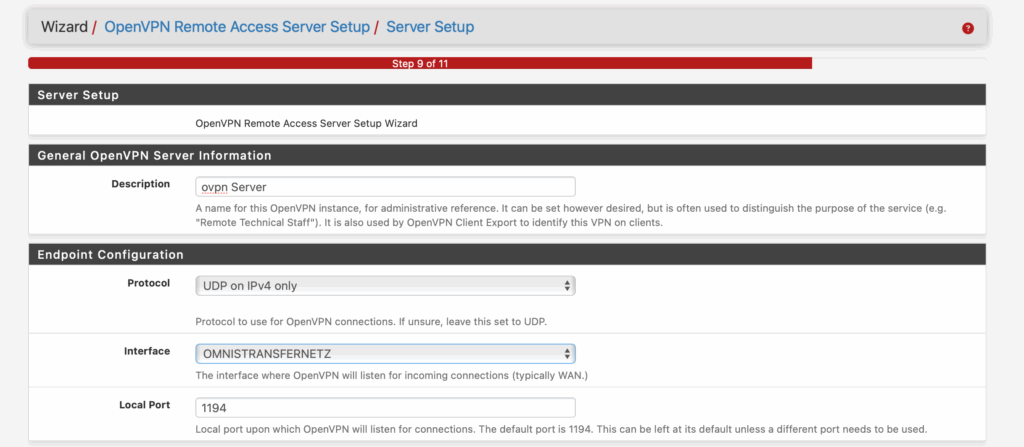
- The OpenVPN encryption settings can be kept as default
- Next, specify the IPv4 Tunnel Network, which defines the private IP range used inside the VPN tunnel, and the IPv4 Local Network, which is the internal network your VPN users will access — in most cases, this will be your LAN
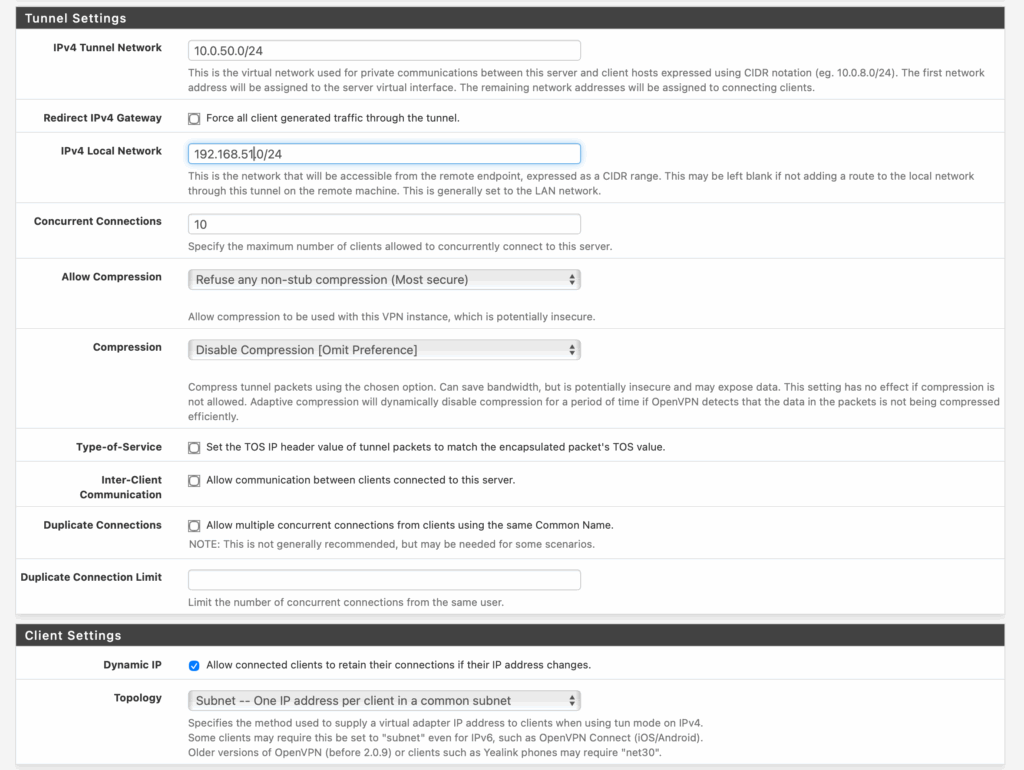
For this setup, you can leave these options at their defaults — pfSense will automatically apply suitable settings.
- Review and complete the wizard to apply the OpenVPN server configuration
Step 4: Export the Client Configuration
VPN clients need the correct configuration files to connect. The Client Export Utility generates ready-to-use profiles for VPN Tracker, saving you from manual configuration errors.
- Install the OpenVPN Client Export Utility from the pfSense package manager

Install the exporter to be able to export OpenVPN configuration files from your pfSense device
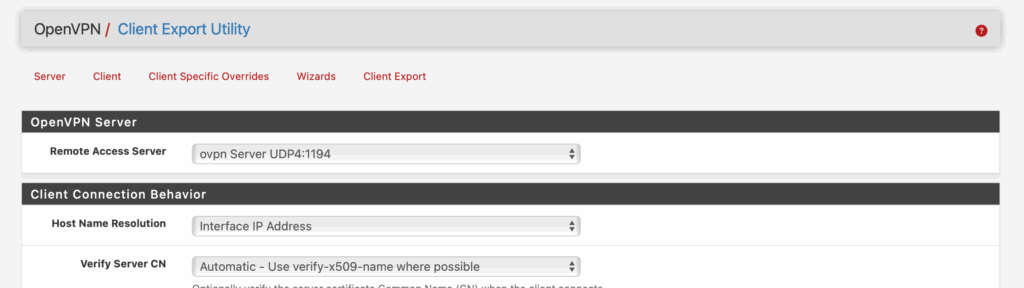
- Go to VPN → OpenVPN → Client Export
- Remote Access Server: Choose the OpenVPN server you created earlier
- Scroll down and select the preferred VPN user. Then, export the Most Clients configuration (compatibility with macOS confirmed)
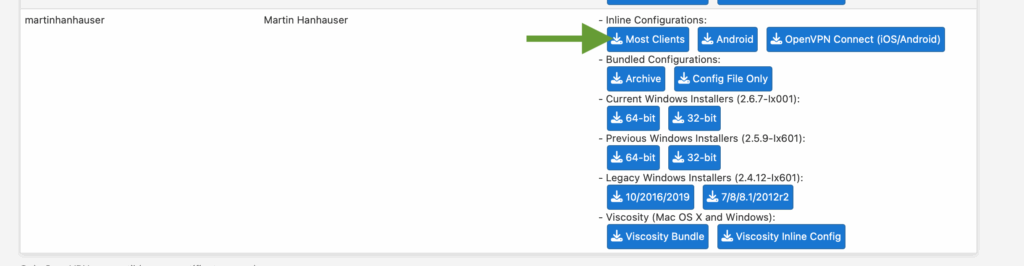
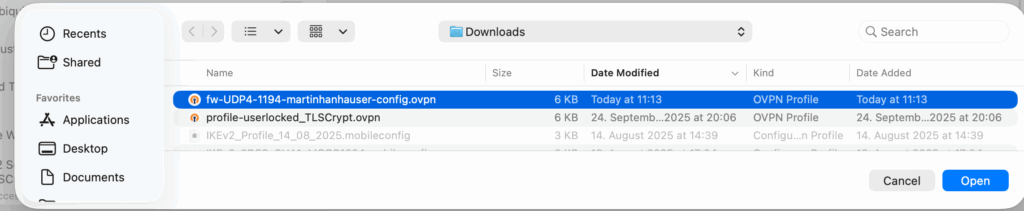
- Your configuration file will be downloaded onto your Mac, ready to use with VPN Tracker
Step 5: Import Configuration into VPN Tracker
VPN Tracker allows you to quickly import the exported OpenVPN configuration file to connect to your pfSense server on Mac, iPhone and iPad.
- Open the VPN Tracker Connection Creator for pfSense OpenVPN
- Upload the previously exported .ovpn file
- Save the connection in your account to connect to your pfSense VPN on Mac, iPhone and iPad in VPN Tracker
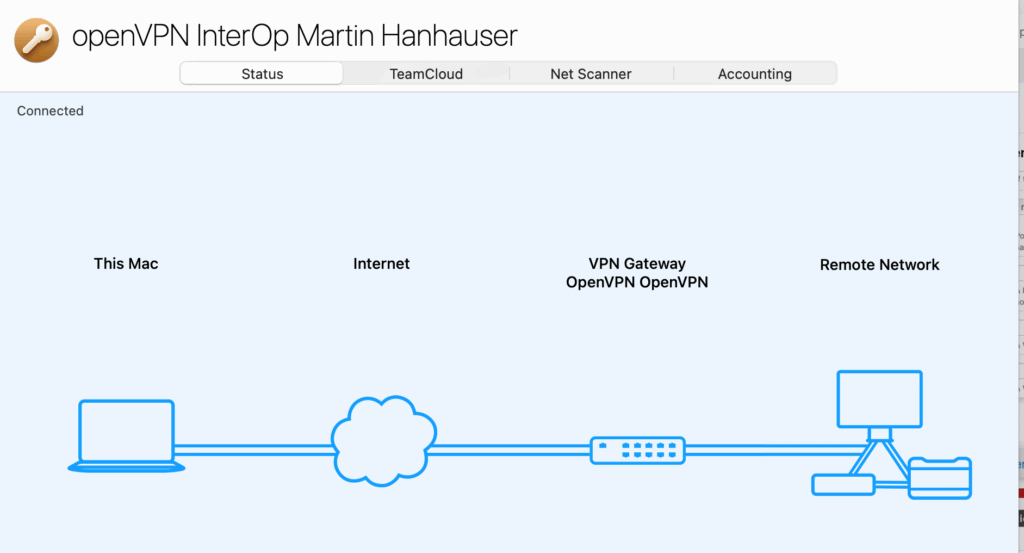
Success! Connect to your Netgate pfSense OpenVPN in VPN Tracker
Tip: The first time you try to connect in VPN Tracker, you will need to enter the username and password for the user you created during the VPN setup on your pfSense device. Remember to store your login details in your Keychain for future use!
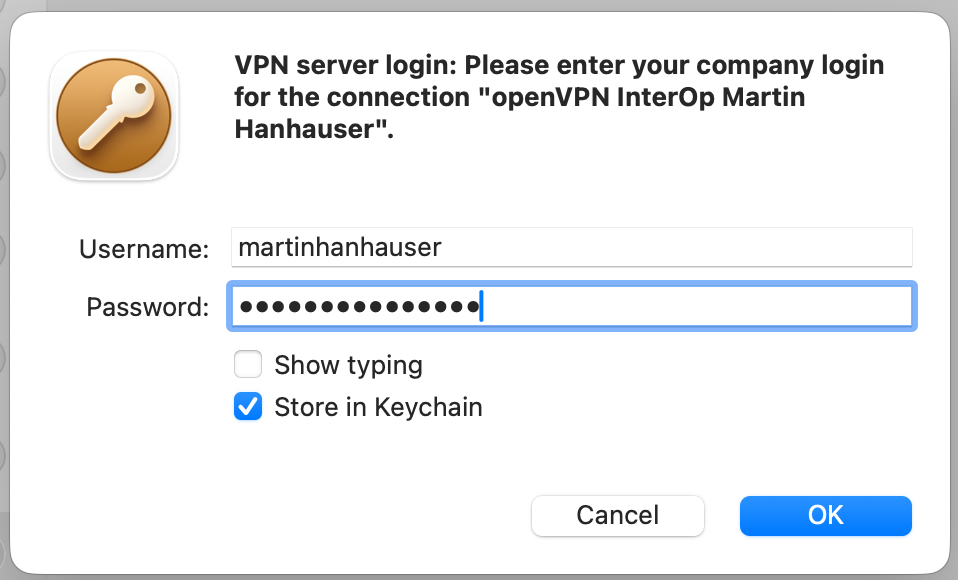
Enter your VPN username and password to connect to Netgate pfSense VPN in VPN Tracker
How to Set Up an IKEv2 VPN Tunnel on your Netgate pfSense
Follow these steps to configure a mobile IKEv2 tunnel using Pre-Shared Keys and KeyID identifiers.
1. Mobile Client Configuration
Navigate to VPN > IPsec > Mobile Clients
- Check Enable IPsec Mobile Client Support.
- User Authentication: Local Database.
- Virtual Address Pool: Check "Provide a virtual IP address".
- Network: Enter a client IP range, for example: 10.0.52.0 with a 24 mask.
- Click Save and Apply Changes.
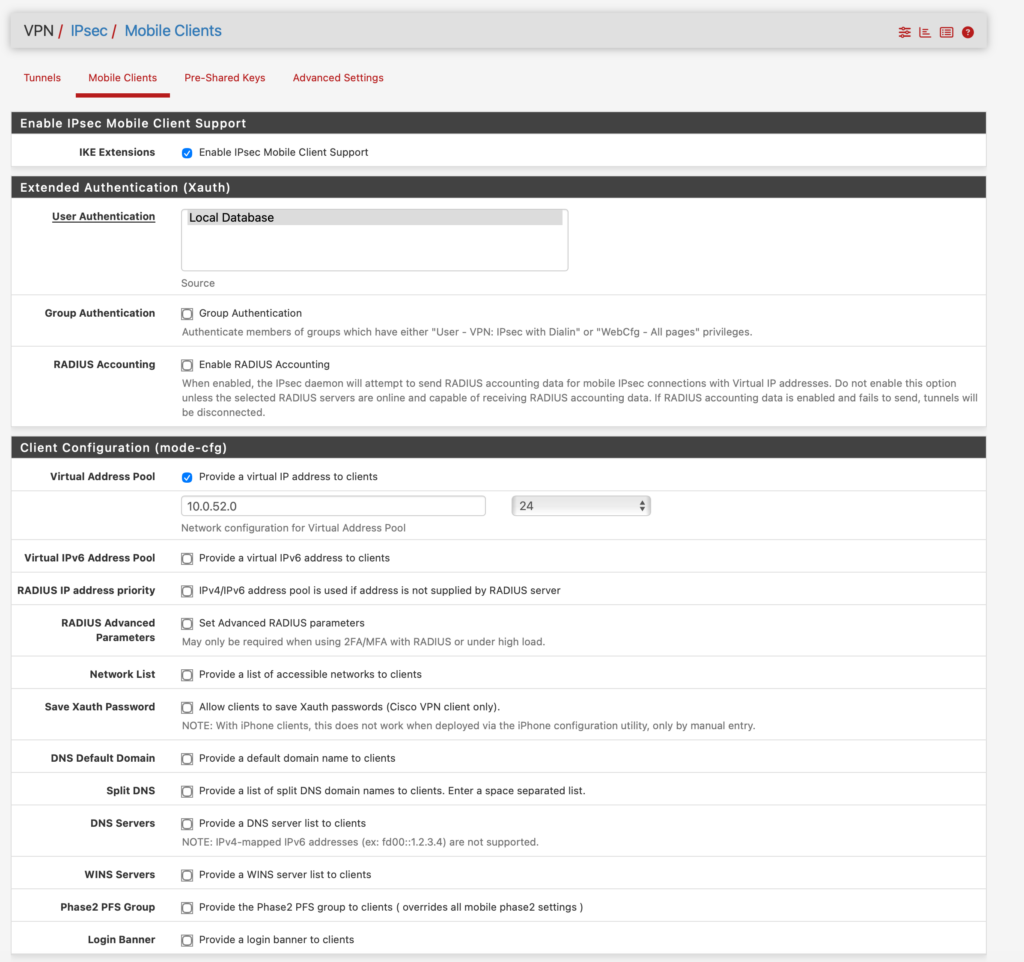
Get started with the IPsec Mobile Client Config
2. Phase 1: Gateway Handshake
You'll now see a warning to set up Phase 1 for your IPsec connection. Go ahead and click Add P1 in the IPsec Tunnels tab:
- Key Exchange Version: IKEv2
- Interface: Choose your WAN interface
- Phase 1 Authentication Method: Mutual PSK + XAUTH
- My Identifier: KeyID (here fw.interop)*
- Peer Identifier: KeyID (here, client.interop)*
- Pre-Shared Key: [Your Secure Secret]
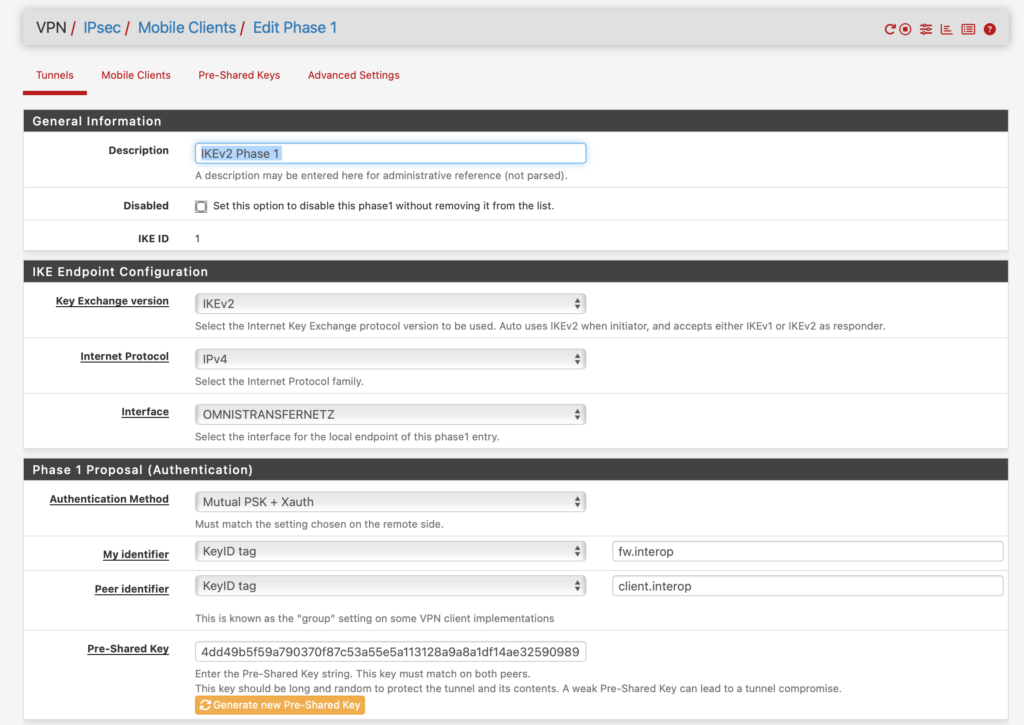
Set up Phase 1 for your new IKEv2 tunnel
3. Phase 2: Traffic Selectors
Next we need to set up Phase 1. Inside the P1 entry, click Show Phase 2 Entries > Add P2:
- Mode: Tunnel IPv4
- Local Network: LAN Subnet (the network you need to access).
- Encryption: For AES, select 256-bits and leave the other settings as default.
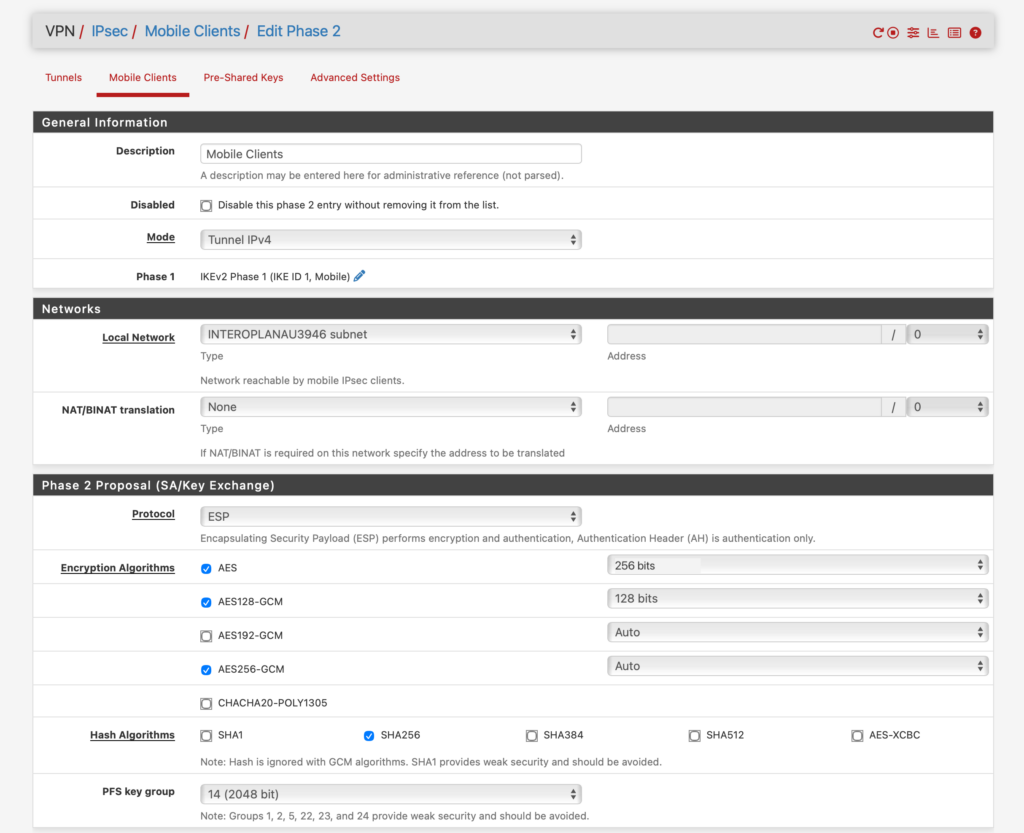
Set up Phase 2 for your IKEv2 tunnel
- Click Save and Apply Changes.
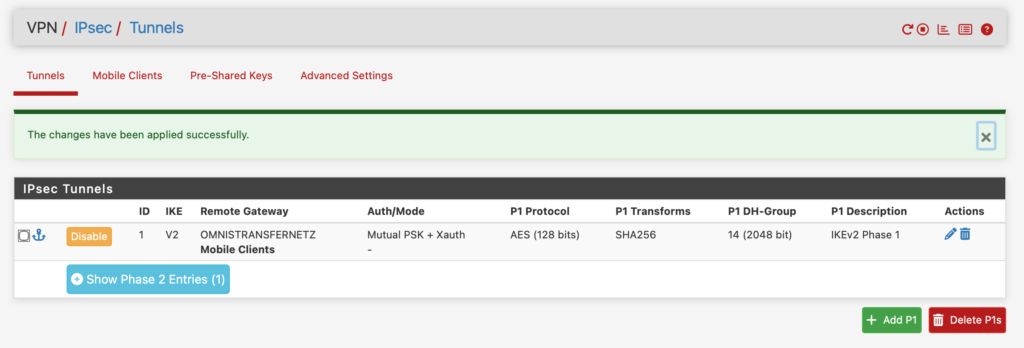
New IPsec (IKEv2) VPN tunnel on Netgate pfSense
*Important Note: In VPN Tracker, ensure your Remote Identifier matches the pfSense My Identifier, and your Local Identifier matches the pfSense Peer Identifier.
Connect to Netgate pfSense IKEv2 VPN on Mac & iOS
Now you've configured your tunnel, it's time to get connected in VPN Tracker. Follow these steps to use VPN Tracker to connect to Netgate pfSense VPN on Mac, iPhone and iPad.
- Open the VPN Tracker Connection Creator for Netgate pfSense IKEv2
- In the fields provided, fill out the corresponding information for your IKEv2 tunnel
- Click Save to save the new connection in your VPN Tracker account, ready to connect in VPN Tracker for Mac, iPhone & iPad
Netgate pfSense mobileconfig Setup for IKEv2
VPN Tracker also supports direct import of Apple .mobileconfig files, allowing for one-click setup on macOS.
If your pfSense device supports export as .mobileconfig, follow the steps below to import your connection:
- Open the VPN Tracker File Importer
- Drag and drop the .mobileconfig file into the space provided
- VPN Tracker will now automatically parse the IKEv2 settings, Identifiers, and Encryption levels
Next steps: Save the connection to your TeamCloud to instantly roll it out to your team.
How to Set Up WireGuard on Your pfSense Appliance
WireGuard is a modern, lightweight VPN protocol that’s fast, secure, and easy to configure. With pfSense, you can use WireGuard to provide remote access for Macs, iPhones, and iPads — and connect seamlessly using VPN Tracker.
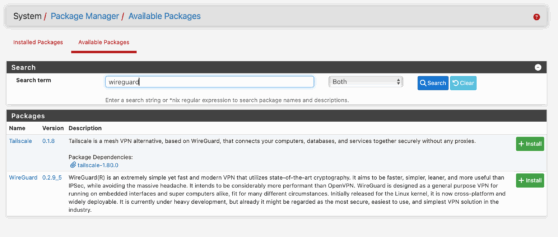
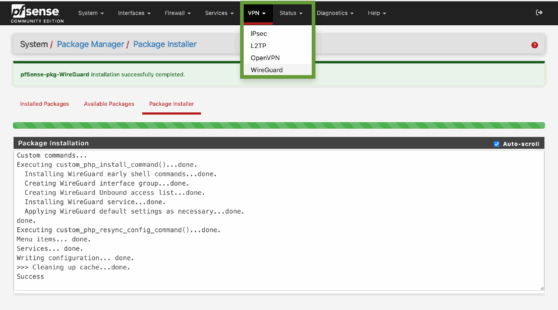
Important note: If you don’t see WireGuard as an option in the VPN menu, you may need to install the WireGuard package first.
To install the package:
- Log in to the pfSense web interface as an administrator
- Go to System > Package Manager > Available Packages
- Search WireGuard in the list and click + Install
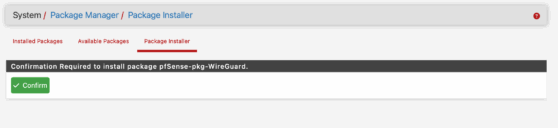
- Click Confirm to start installation, then wait for the package to complete before continuing
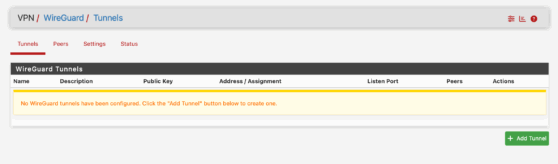
Configuring a WireGuard VPN server on pfSense
Once the package is installed, you can configure WireGuard on your pfSense appliance:
- In the admin interface, go to VPN > WireGuard
- Click + Add Tunnel to create a new WireGuard tunnel
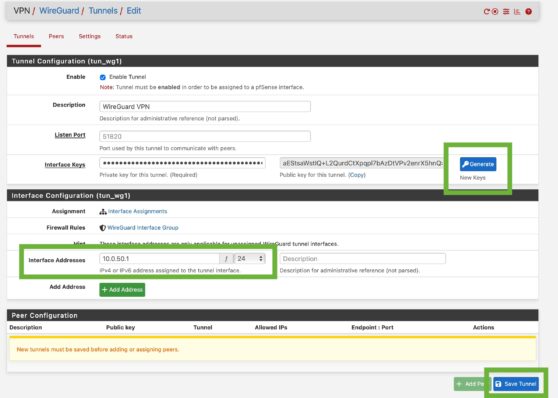
- Click the blue Generate button to create a public/private key pair for your tunnel and assign an internal tunnel address (for example: 10.0.50.1/24) for the WireGuard interface and click Save and Apply Changes
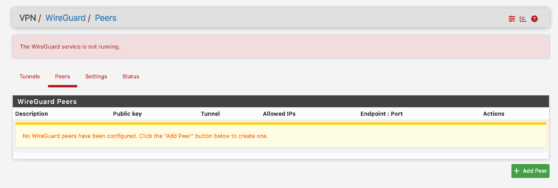
- Switch to the Peers tab. Here, you’ll add a peer for each device that will connect (such as your Mac running VPN Tracker).
- Choose your new WireGuard tunnel from the dropdown
- Enter a peer description
- Generate a PSK and Copy'n'Paste it to the Public Key field
- Regenerate a PSK or just delete the former PSK
- Add an allowed IP which is part of the network of the tunnel interface, e.g. 10.0.51.2/24)
- Add a description (just for reference)
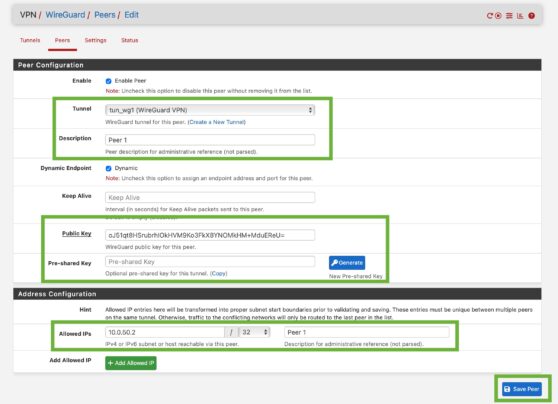
- Save each peer and Apply Changes to finalise the peers
- Generate the client configuration files
Tip: Each configuration file contains the keys and connection details needed to connect a client device. You’ll use these files in the next step when setting up your connection in VPN Tracker.
Once the configuration files are ready, you can import them directly into VPN Tracker on your Mac, iPhone, or iPad to start using your WireGuard VPN. For advanced firewall or NAT adjustments, we also advise you refer to the official pfSense documentation.
Connect to pfSense VPN on Mac in VPN Tracker: WireGuard
WireGuard setup complete? VPN Tracker makes it easy to connect to pfSense VPN on Mac, iPhone, or iPad. To get started with your new WireGuard VPN:
- Open the VPN Tracker Connection Creator for WireGuard
- Add your WireGuard configuration file from pfSense. You can upload the file or scan the QR code generated by your appliance
- Save the connection securely in your VPN Tracker account
- Start the VPN connection to securely access your network

Upload your WireGuard configuration file to connect to pfSense VPN on Mac in VPN Tracker
Your pfSense WireGuard VPN is now ready for use on all your Apple devices.
Connect to pfSense WireGuard VPN on Mac
Using VPN Tracker Team Features for WireGuard
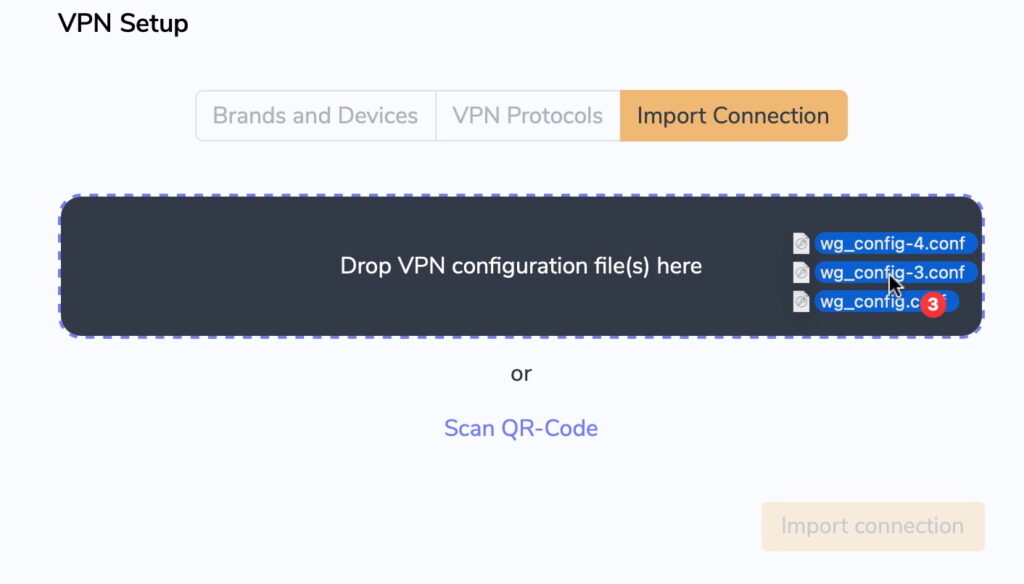
WireGuard configurations often generate multiple individual files when setting up VPN access for your team. With VPN Tracker, you can streamline this process by importing all the files at once. In VPN Tracker for Mac, go to Connections, select + Create Connection > Import Connection, and drag and drop your WireGuard configuration files directly into VPN Tracker.
Rolling out these connections to team members is quick and secure. Select a WireGuard connection, go to Configure > Access, then search for the team member and check the box to assign it. Each team member instantly gets their own personalized WireGuard connection, without having to manually handle configuration files.
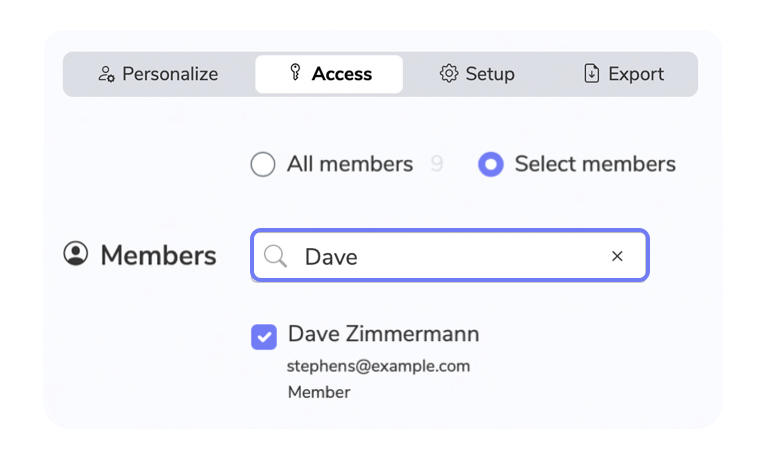
For example, if your IT team is setting up secure remote access for ten consultants, you can import all ten WireGuard configs in one step and assign each consultant their own connection. This ensures they have secure access to your network while keeping management simple and scalable.
Learn more about sharing WireGuard VPN connections with your team →
Why Use VPN Tracker to Connect to pfSense on Mac?
VPN Tracker is the best secure remote access solution for Mac, iPhone and iPad and is compatible with the most popular VPN gateways, including Netgate pfSense, UniFi, TP Link, Draytek, and many more.
Your VPN Tracker benefits
- Securely connect with your home and office networks
- Use your own gateway
- Preconfigured profiles for 300+ VPN devices
- Expert productivity features for teams
- For Mac, iPhone, iPad
- Explore all features