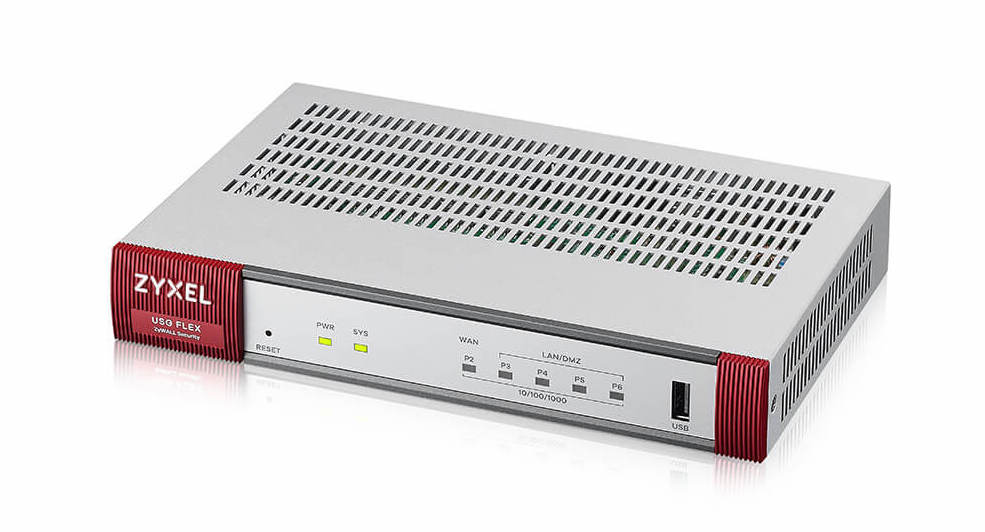
Zyxel USG Flex and USG Flex H series are sophisticated firewall solutions for small business and home office users, all the way up to larger enterprises. With support for both IKEv1 and IKEv2 VPN, as well as SSL VPN, users can easily set up secure remote access to their home or company network.
Configure VPN for Zyxel USG Flex
In this guide, we take you through the ins and outs of configuring IKEv2 VPN for a Zyxel USG Flex firewall, plus how to set up secure remote access in VPN Tracker for Mac, iPhone and iPad.
Jump to:
- Zyxel Wizard setup (e.g. USG FLEX 50)
- Zyxel USG FLEX H Series (Manual setup)
- Connecting in VPN Tracker
Create a new IKEv2 tunnel for Zyxel USG Flex (Zyxel Connection Wizard)
Please note, the setup information in this section is relevant for the following Zyxel device models which offer a VPN setup wizard:
- USG FLEX 50 (USG20-VPN)
- USG FLEX 50AX
- USG20W-VPN
Setting up VPN on your Zyxel USG Flex device is easy, thanks to the step-by-step wizard. To access the wizard, log in to the user interface of your USG Flex and click on the magic wand icon:

Click the magic wand icon to access the wizard
You will now see the Quick Setup window. Choose Remote Access VPN Setup to start setting up VPN:

Open the Remote Access setup for VPN
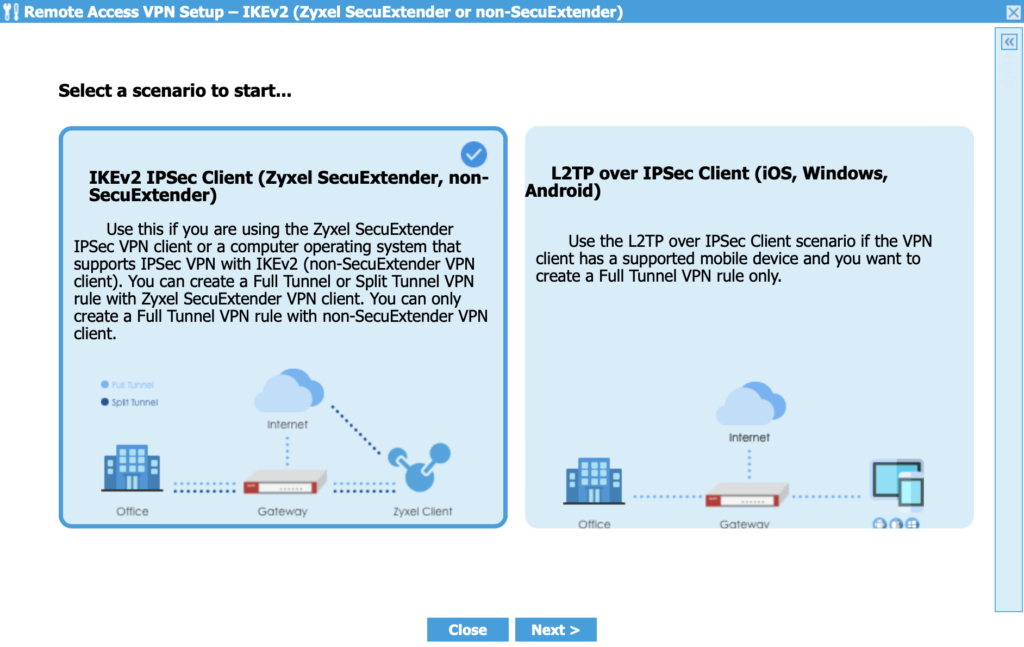
For scenario, choose IKEv2 IPSec Client:
You now have the option to choose your network traffic configuration. As a default, the USG Flex will tunnel all internet traffic through the VPN (full tunnel / host-to-everywhere.) For faster performance and better compatibility with local network resources, use split tunnelling to specify exactly which networks are to be used with the VPN tunnel.
To enable split tunnelling, check the box next to Split Tunnel and choose your LAN network from the dropdown:
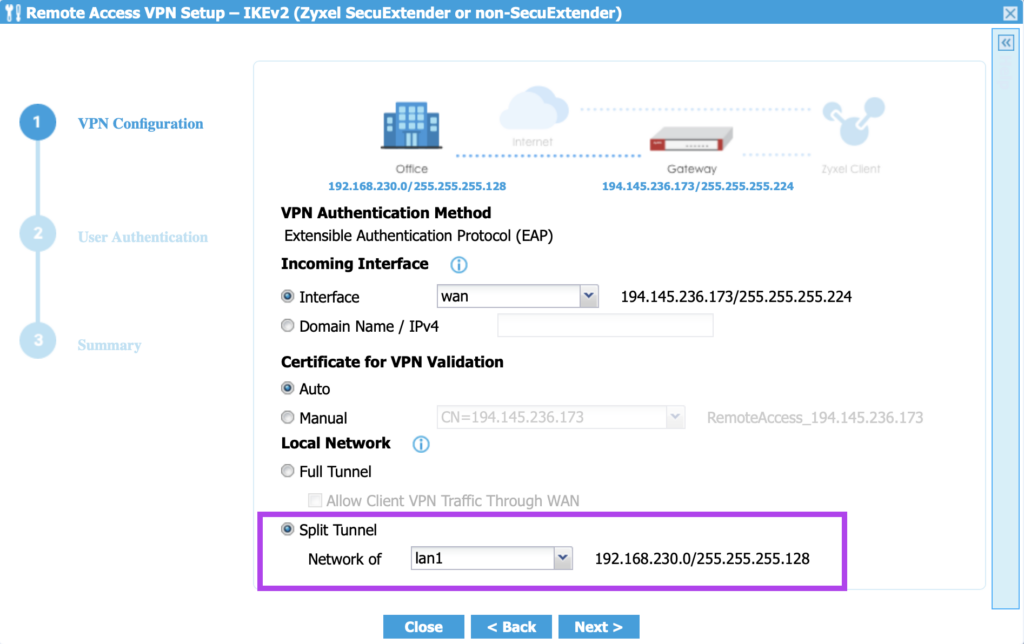
Choose Split Tunnel for more efficient VPN
Next, go to IP Address Pool. Choose Custom to specify the remote network you are connecting to via the VPN:
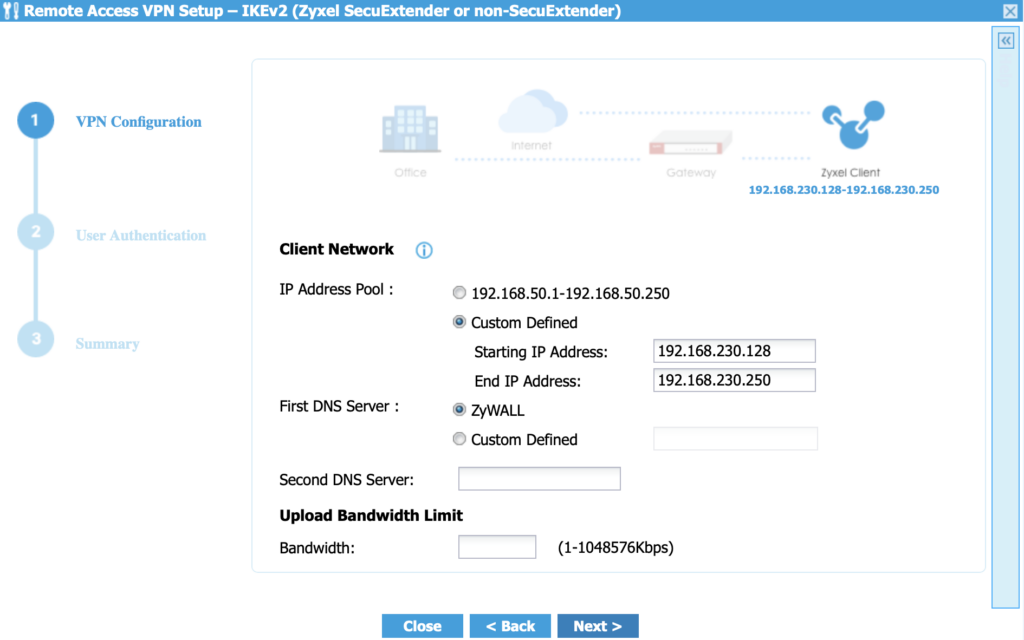
Enter the remote network range for the VPN
Important: The network range you enter here needs to lie outside of your LAN network, otherwise the connection will not work.
In this step, you also have the option to specify DNS (Domain Name Server) settings for the VPN. Remember the DNS settings you select will have to be entered into the VPN client later.
Once you have configured your network settings, you can start adding VPN users. Click to add a new user, then fill out the fields as prompted:
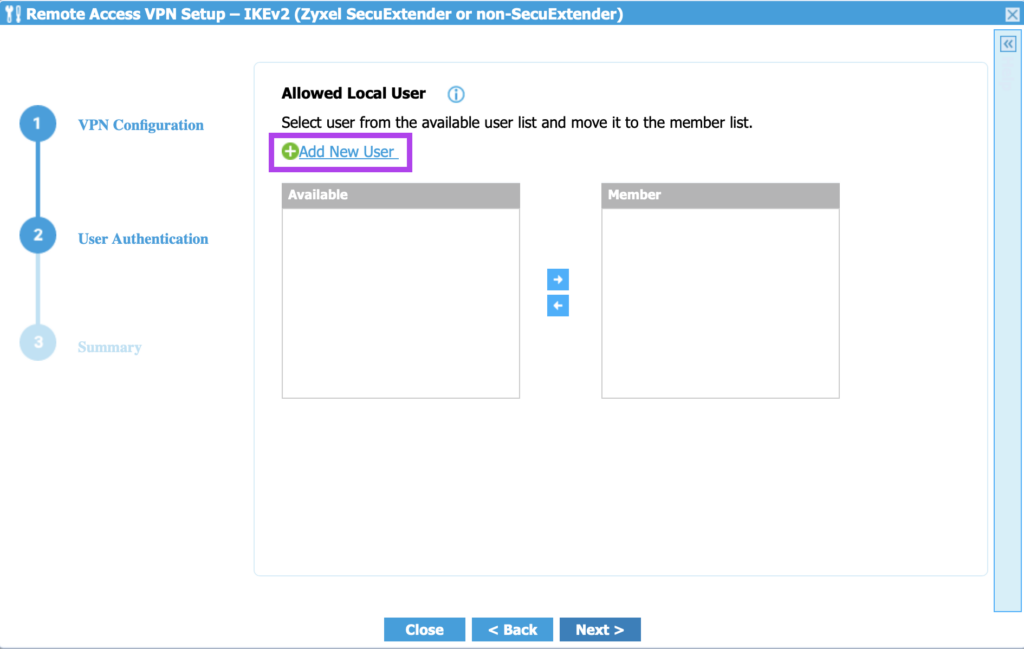
Click to add a new VPN user
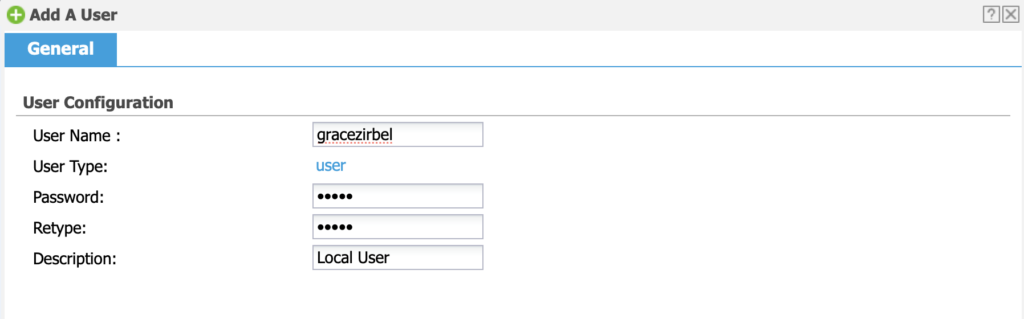
Fill out the user information
Once a new contact has been added to your available users, click the right-pointing arrow to move them to the member list for the new VPN connection:
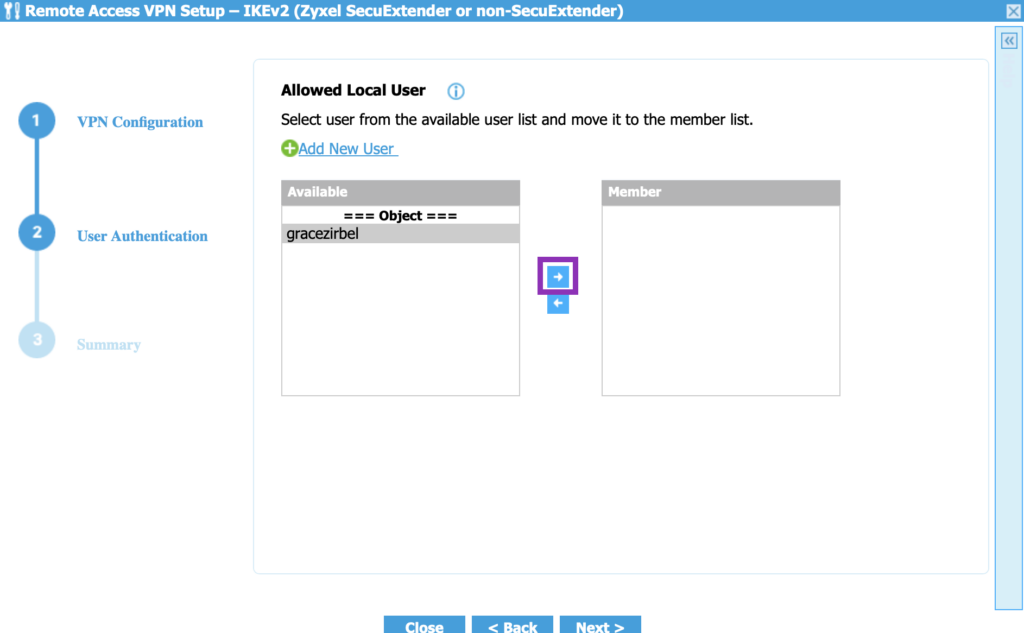
The new user will appear under "available users"
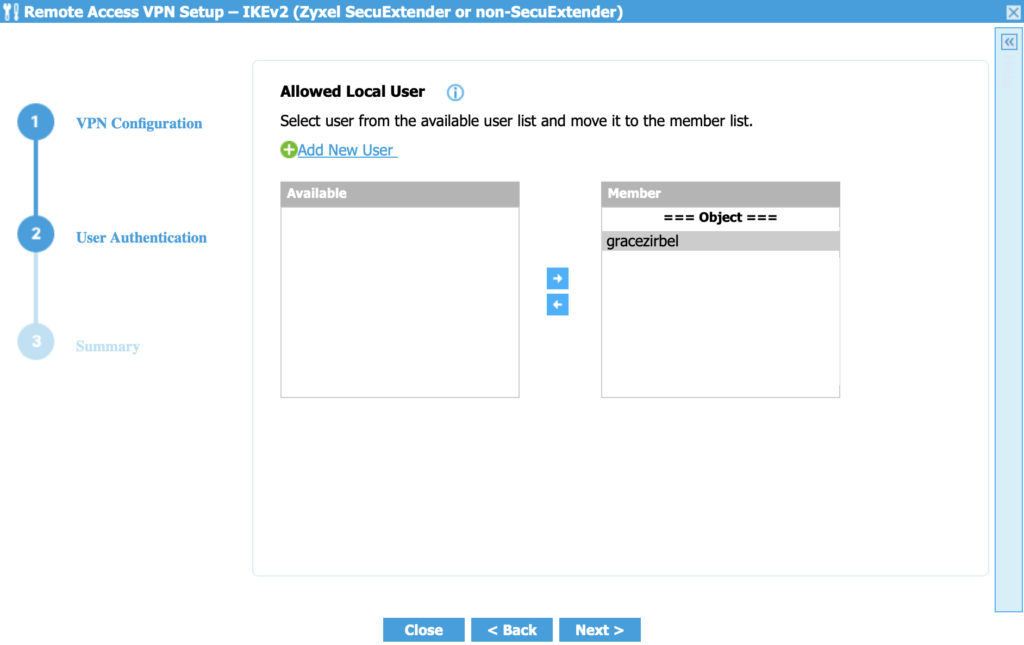
Click to move the new user to the member list for the connection
Finally, you will be shown a summary of your new connection details. If you are happy with the setup, click Save to exit the wizard:
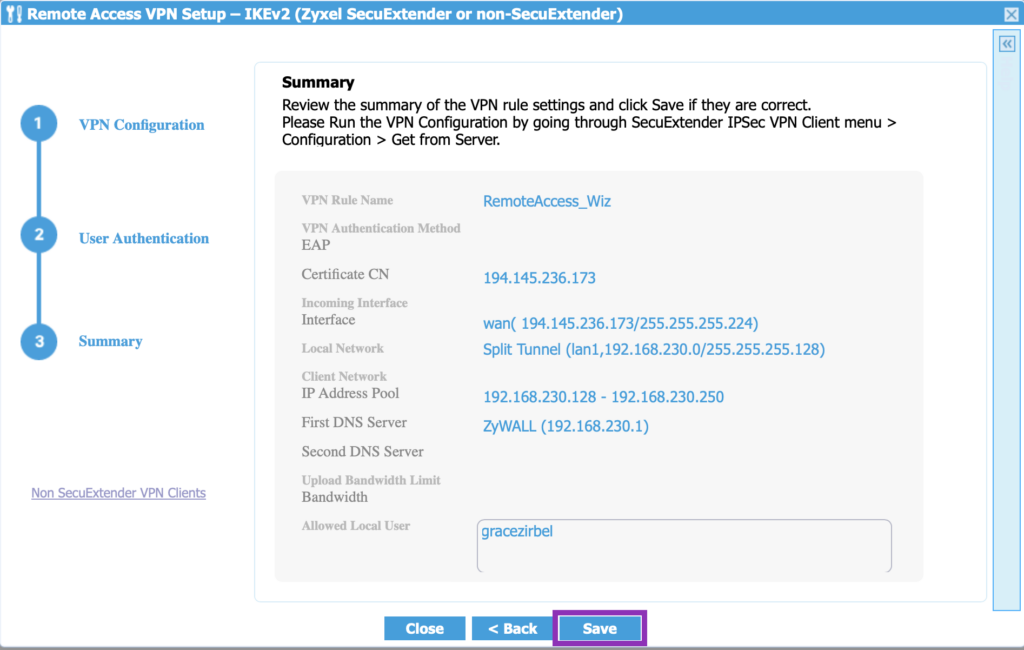
Check over your connection details and save
Create a New IKEv2 Tunnel for Zyxel USG Flex H Series (Manual Setup)
The setup information in this section is relevant for the following device models in the Zyxel USG Flex H Series:
- USG FLEX 50H
- USG FLEX 50HP
- USG FLEX 100H
- USG FLEX 100HP
- USG FLEX 200H
- USG FLEX 200HP
- USG FLEX 500H
- USG FLEX 700H
Set Up a User Group and Users for VPN
To get started, log in to your device's interface and go to User & Authentication > User/Group > User.

Click the + to add a new User. Now you can set up profiles for those who will require access to the VPN:

Important: Remember to make a note of your username and password, as you will need these later on in order to access the VPN.
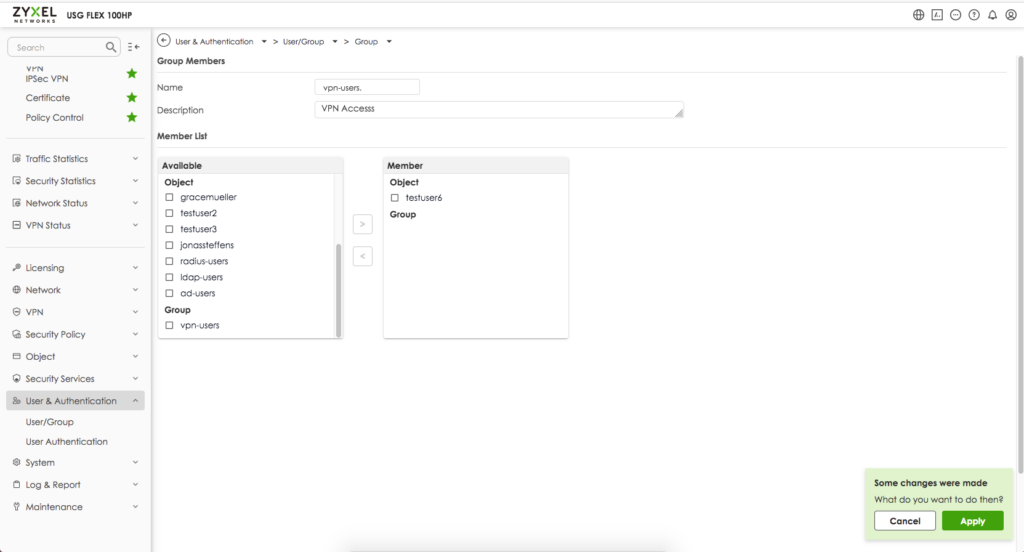
Once you've added your VPN users, you can set up a User Group. To do so, switch to the Group view and click the + to add a new Group.
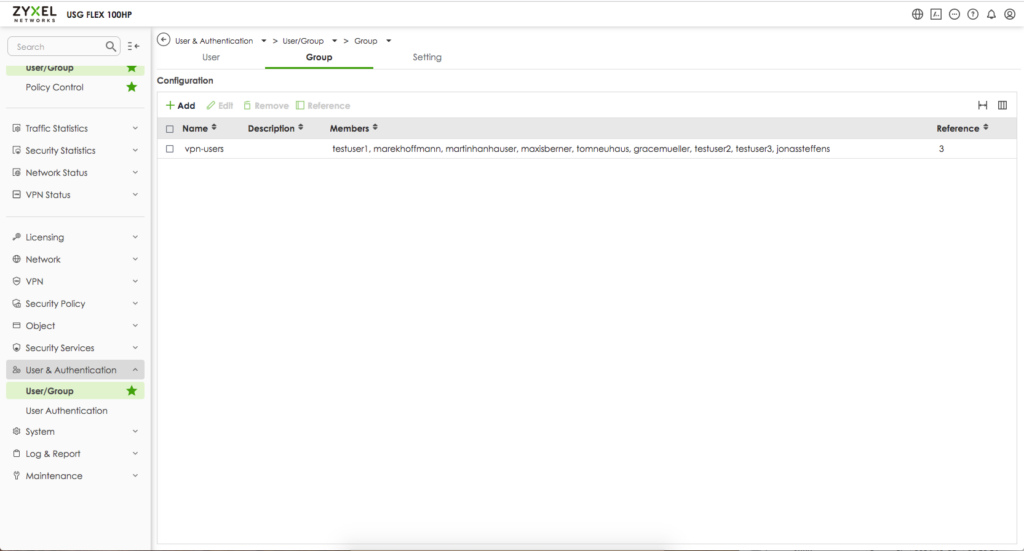
You can now give your new group a name (e.g. vpn-users.)
Next, select the User(s) you wish to include in the new User Group from the checkbox menu on the left and click Apply to save your settings:
Authentication: Create a New Certificate
In the next step, you will need to create a certificate for your VPN tunnel. This allows both the VPN client (i.e. VPN Tracker) and your Zyxel firewall to authenticate each other, ensuring that only trusted devices can connect.
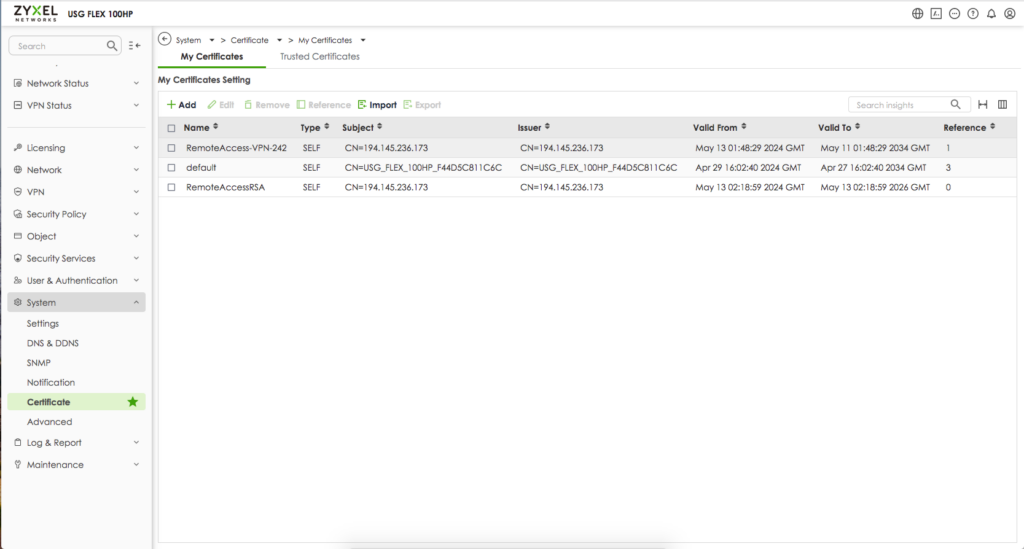
Create your certificate by going to System > Certificate > My Certificates. Then, click the + to add a new certificate:
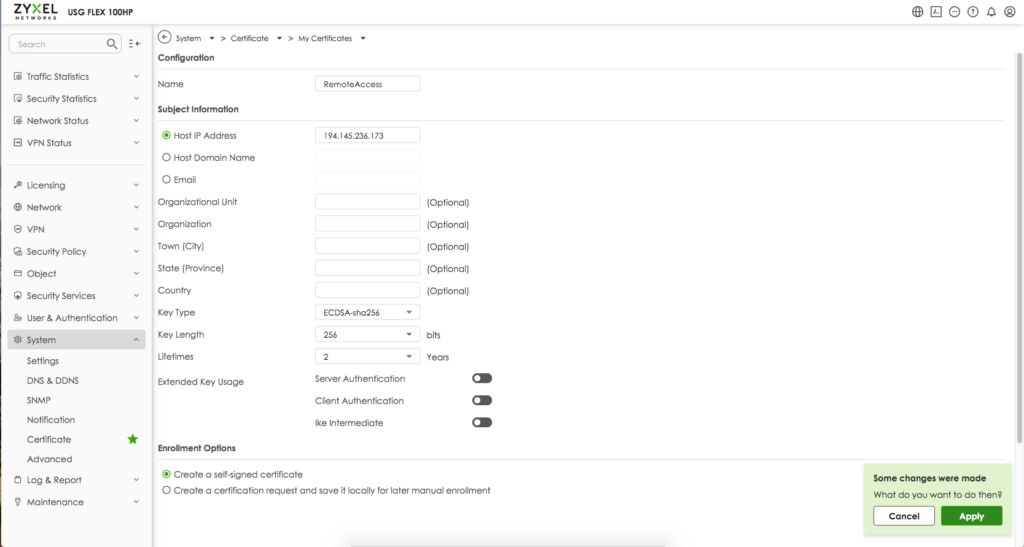
Enter a name for your certificate (i.e. RemoteAccess), then, enter the WAN address or domain name of your Zyxel device. (Tip: you can find this information under Network > Interface.) Next, determine the key type and length, as well as the validity of your certificate.
Finally, under the heading Enrollment Options, choose your certificate type. In our example, we opt for a self-signed certificate.
Click on Apply to save your new cert.
Important: Once the certificate is created, you must install and trust it on each Mac that will use the VPN.
To export the certificate, go to the My Certificates menu, select the newly created certificate and click Export.
Save the file as a .cer file and transfer it to your Mac. You can then proceed to install the new certificate on your Mac using the Keychain Access app.
Once installed, choose Always trust so you won't have any problems connecting in the client later on.
Configure Your VPN Tunnel
Now you've done the groundwork, you can proceed to set up your new IKEv2 VPN tunnel. To do so, go to VPN > IPsec VPN > Remote Access VPN.
First, activate the slider to enable VPN, then, use the dropdown to ensure WAN is selected as the incoming interface. This means external users will be able to connect to your Zyxel's network from outside the local network (e.g. when working remotely.)
Next, under the heading Certificate for VPN Validation, check Manual and select the certificate you created in the previous step.
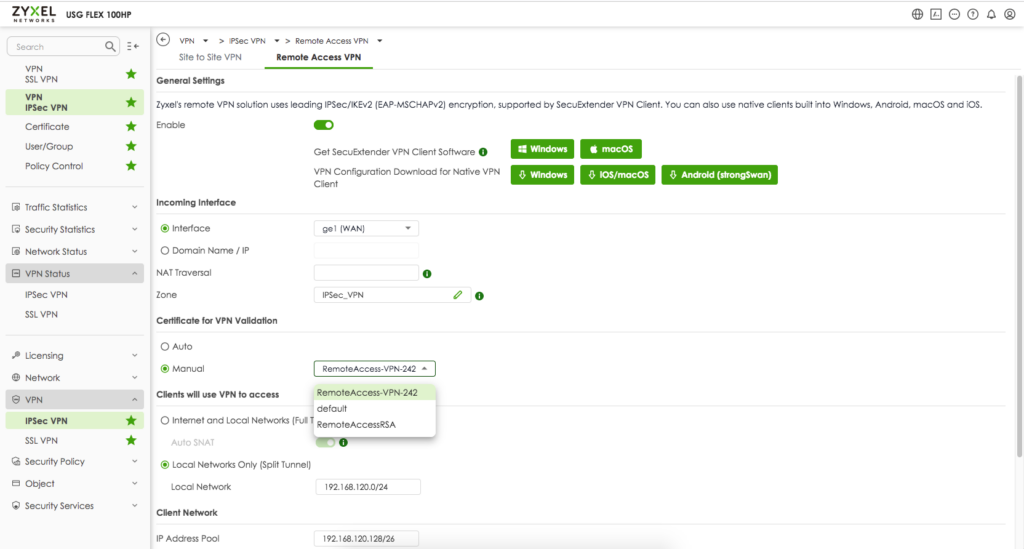
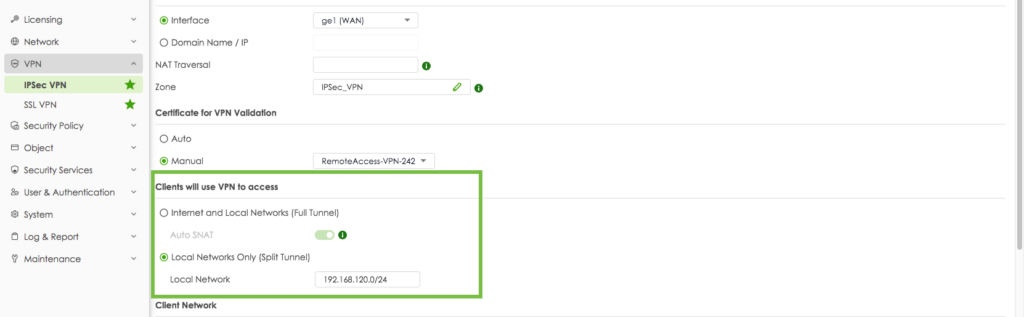
Now, under the heading Clients will use VPN to access, choose whether VPN users will have full network access or limited access to specific networks (split tunneling). If opting for split tunneling, as we have, enter the network range users should be able to access in the space provided.
Good to know: Split tunneling can improve performance by allowing users to access the internet directly while still being able to reach necessary internal resources over the VPN.
Next, under the heading Authentication, select the User Group you created in the first step of this guide. These are the users who will have access to the VPN tunnel.
Finally, you can now configure the advanced settings for your IKEv2 VPN tunnel. Please refer to the screenshot below for our recommendation for use with VPN Tracker:
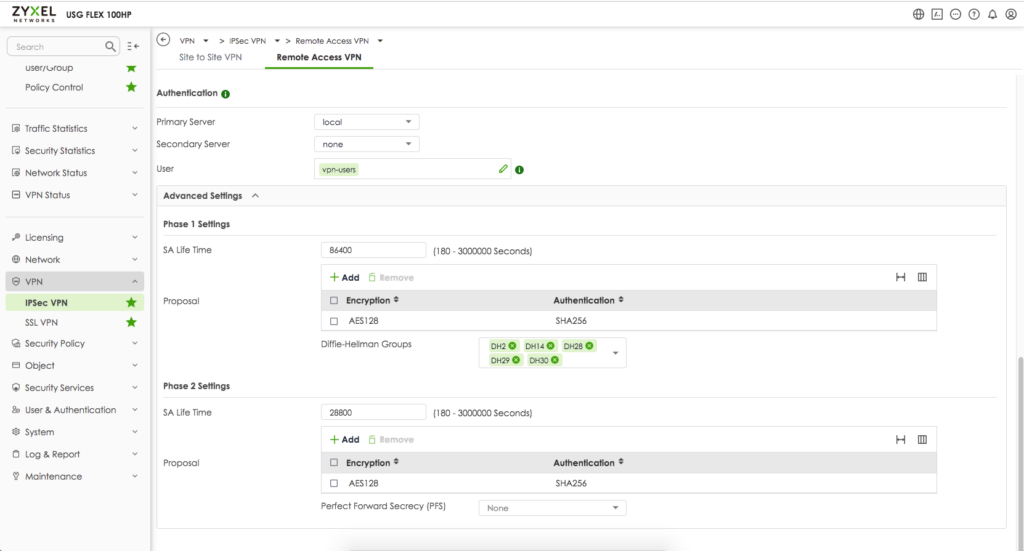
When you are done, click Apply to save your changes.
Connect to Zyxel USG Flex VPN on Mac & iOS in VPN Tracker
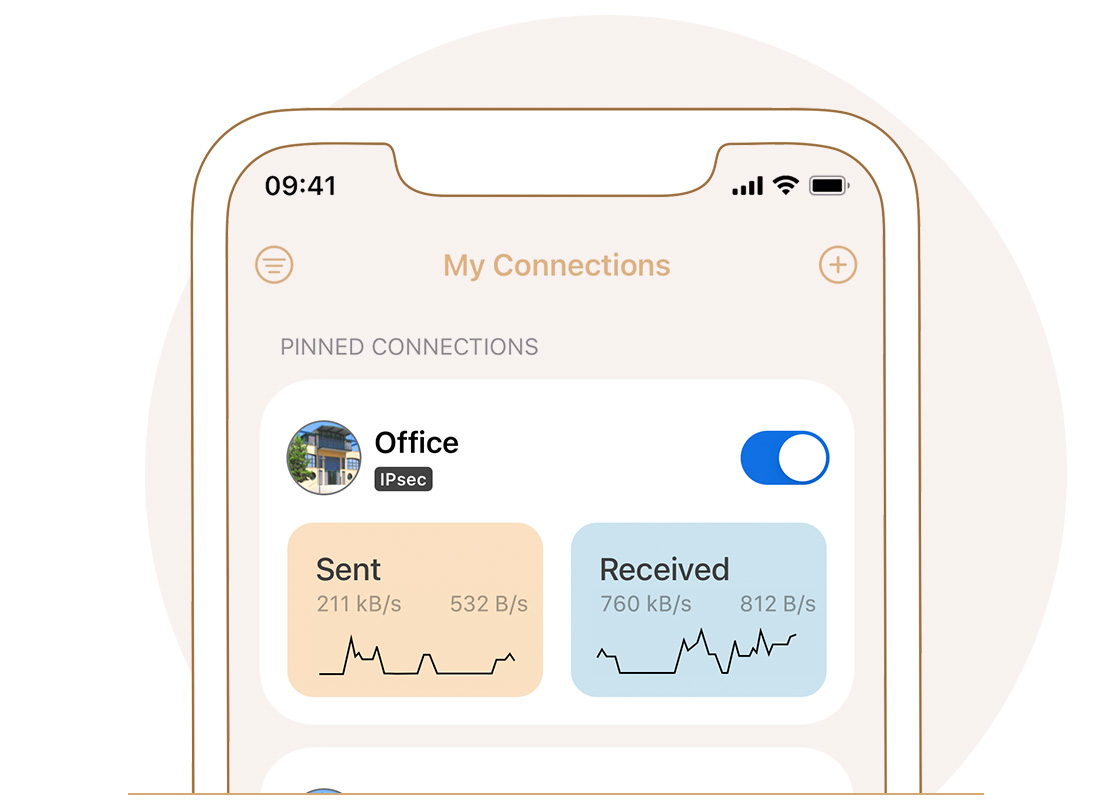
In order to connect to your new Zyxel IKEv2 VPN tunnel, you will need a VPN client. VPN Tracker is the leading VPN client for macOS and iOS, so you can get secure remote access on all your devices.
The VPN Tracker setup wizard for Zyxel USG Flex enables you to get connected to your VPN in seconds. Simply enter your gateway's IP address, login with your user credentials and go!
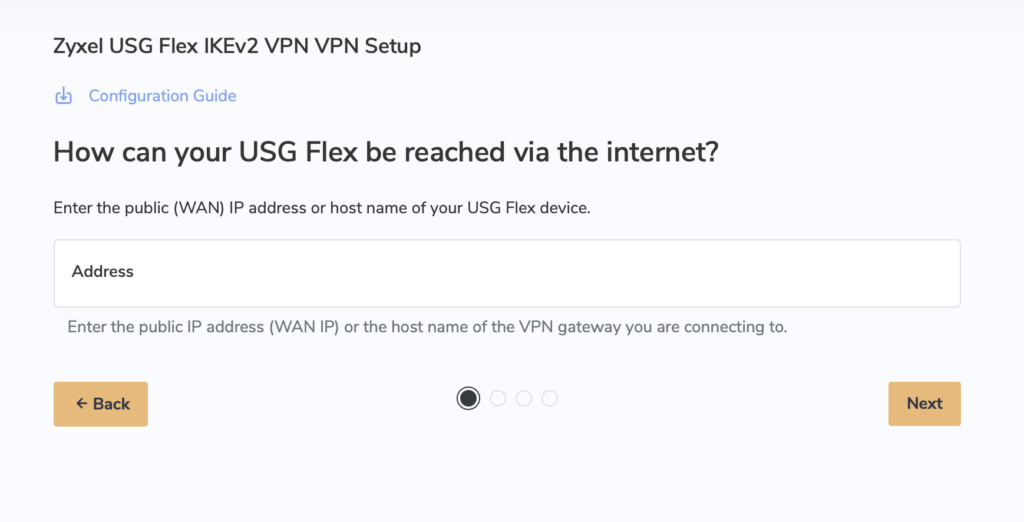
Follow the steps in the VPN Tracker wizard to set up your Zyxel IKEv2 connection
Your VPN Tracker benefits
- Secure remote access to your company network, home office, and Smart Home - all in one app
- Use your own VPN gateway
-
Ready-made profiles for 300+ VPN devices
- Configuration wizard for a smooth and fast setup
- For Mac, iPhone, iPad
- Discover all features