VPN Tracker Team Setup is perfectly optimized for professional teams, from small businesses all the way up to enterprise-level organizations.
Are you a team manager or IT admin? This step-by-step VPN Tracker Team Setup guide shows you how to create your team, assign licenses, and start using TeamCloud productivity features. With secure, cloud-based connection sharing, advanced team management tools, and zero-trust access controls, VPN Tracker Team Setup gives your business the best foundation for secure remote access.
Menu:
- Enterprise rollout with VPN Tracker Team Setup
- Create a VPN Tracker Team Setup account
- Set up your VPN Tracker Team
- Purchasing licenses for VPN Tracker Team Setup
- Assigning plans in VPN Tracker Team Setup
- VPN Tracker Team Management
- Additional VPN Tracker Team Setup settings
- Payments and subscriptions in VPN Tracker Team Setup
- Access invoices in VPN Tracker Team Setup
Enterprise rollout
Before you start: Find out how to remotely install VPN Tracker for your team and create a custom onboarding workflow in our VPN enterprise rollout guide →
Create a VPN Tracker Team Setup account
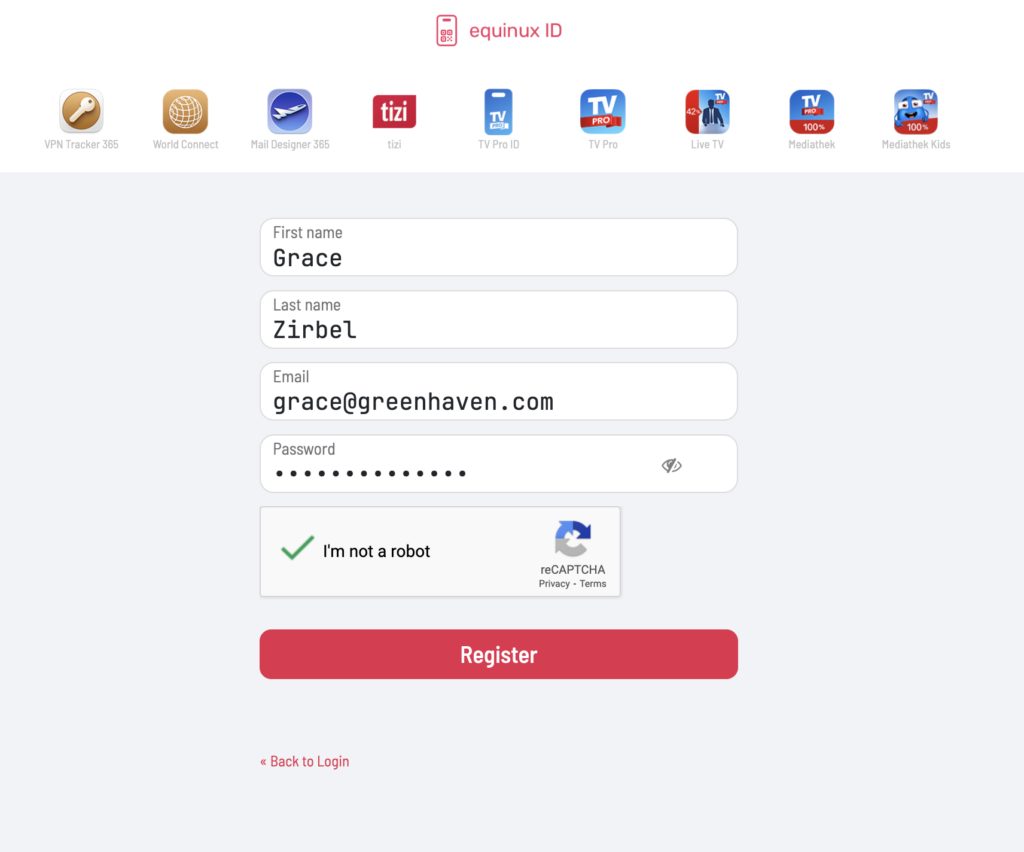
To begin your VPN Tracker Team Setup, you first need to create a VPN Tracker account. This account is the foundation for adding team members, assigning plans, and managing all your TeamCloud features. If you haven’t already, set up a free account today at my.vpntracker.com.
Create your VPN Tracker Team Setup account
Setting up your VPN team management
Once you have created a VPN Tracker account, the next step in your VPN Tracker Team Setup is to create your team and start adding plans and users right away.
At my.vpntracker.com, click on the dropdown arrow next to Personal, then select Set up Team to begin the VPN team management process:
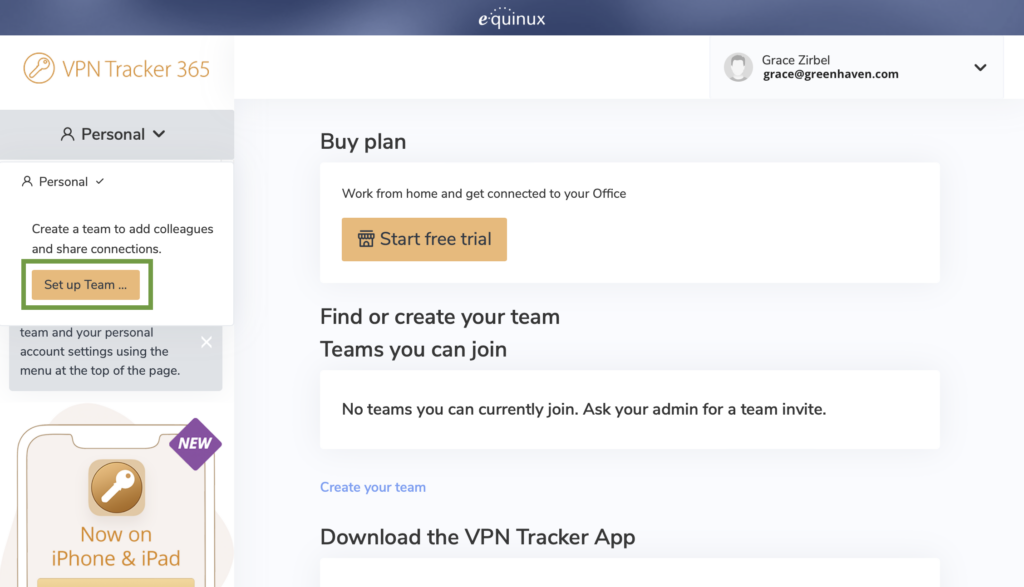
Set up a new VPN Tracker Team
Give your team a name, then add your first team members. During VPN team management, you can enter a name and email address for each member and assign a role. Roles define what actions team members are authorized to perform (for example, editing VPN connections or accessing invoices):
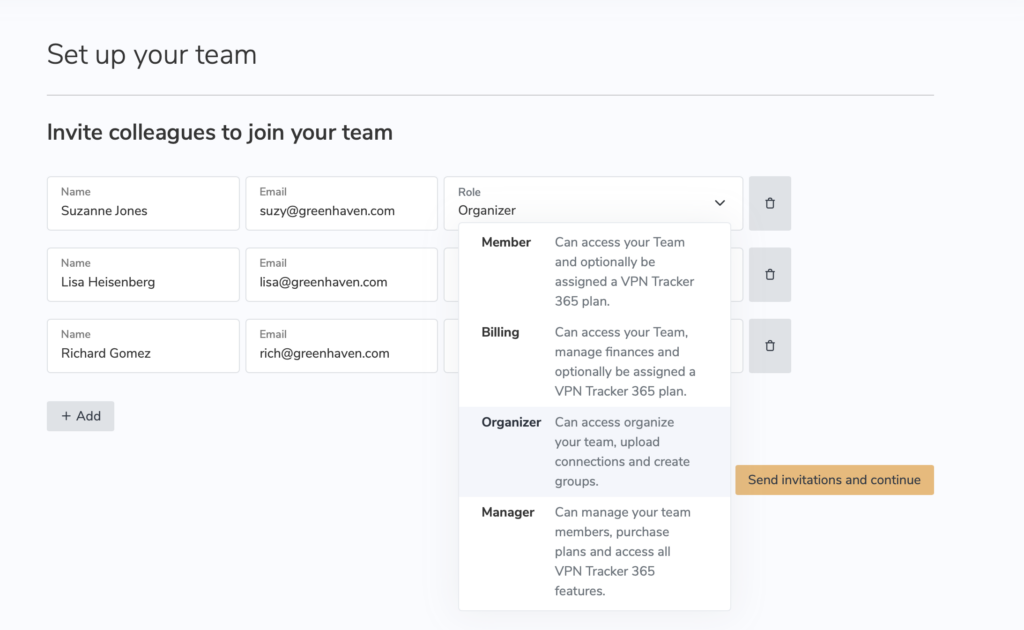
Invite members and select roles in VPN Tracker Team Setup
Invited members will then receive an invitation email to join your VPN Tracker Team Setup:
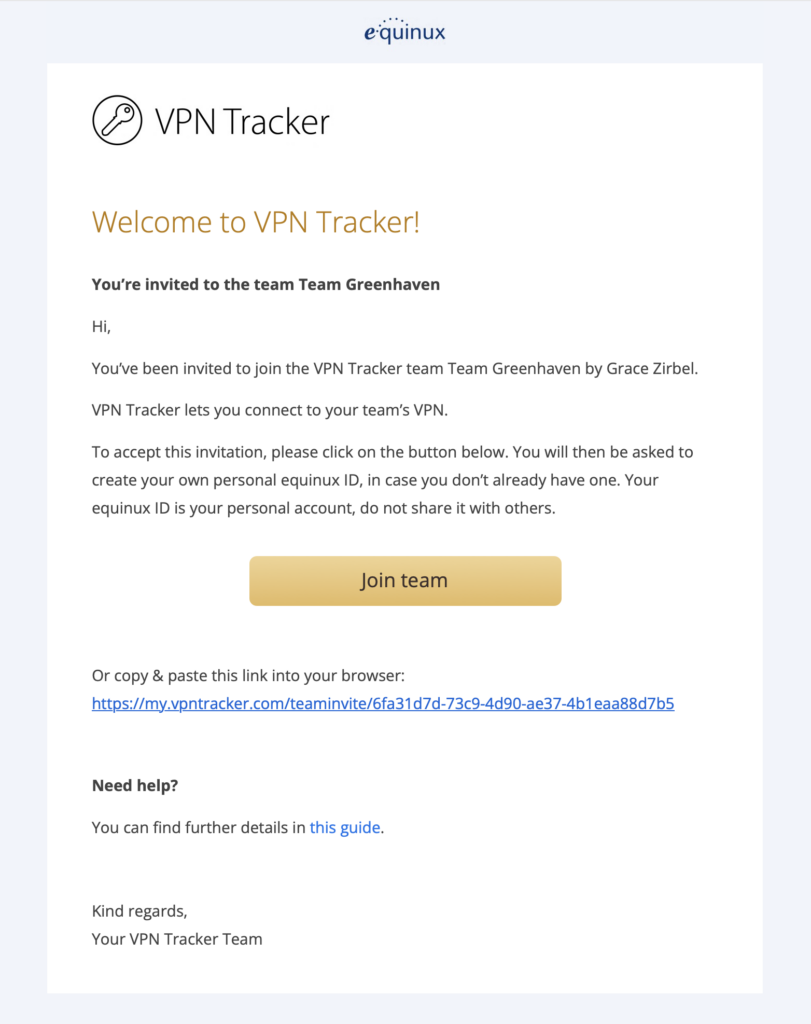
New members will be sent a VPN Tracker Team Setup invitation email
Additional onboarding methods for VPN team management:
Need to bulk invite team members? Before completing your VPN Tracker Team Setup, you can add team domains. Company email domains will automatically recognize your team when new members create an account using their company address.
You will also receive a personalized join link for your VPN team management, which you can share on your company intranet or bulletin board:
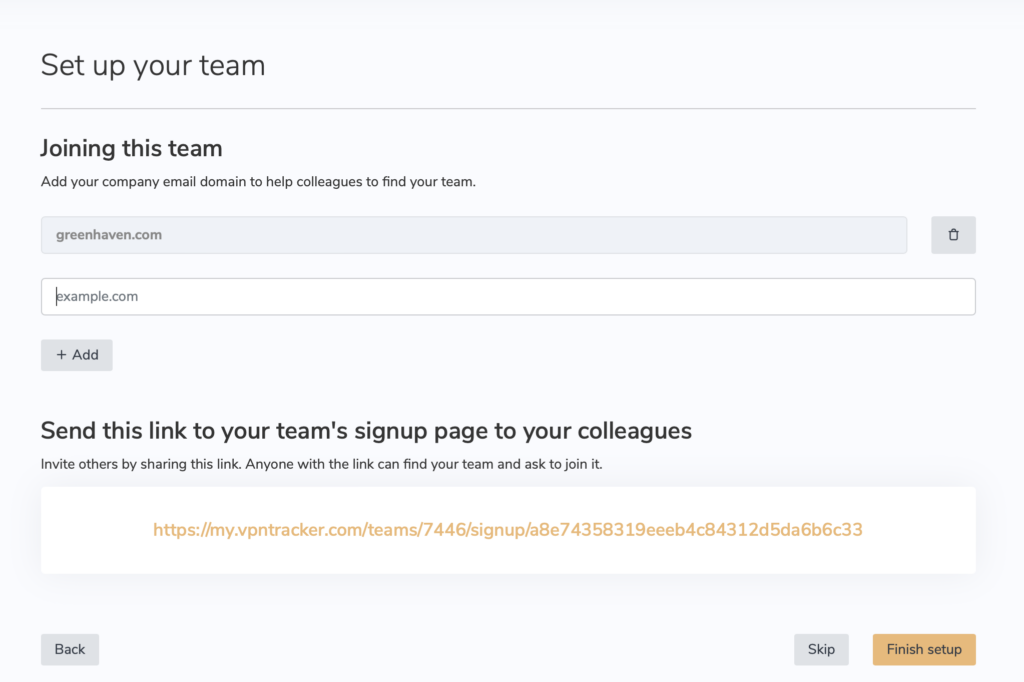
Additional onboarding measures for new VPN Tracker Team Setup users
Finally, click on Finish setup to complete your VPN Tracker Team Setup and get your team ready for secure VPN access.
Purchasing licenses for VPN team management
After completing your VPN Tracker Team Setup, the next step is to purchase licenses for your team members. Each member requires their own license in order to use VPN Tracker. Flexible license options are available for Mac, iOS, or both, so you can tailor your setup to your company’s needs.
To add licenses during your VPN team management, go to your team’s overview page. Under the heading Licenses, you will see different plan options. Click Add Plans to be redirected to the VPN Tracker Team Store:
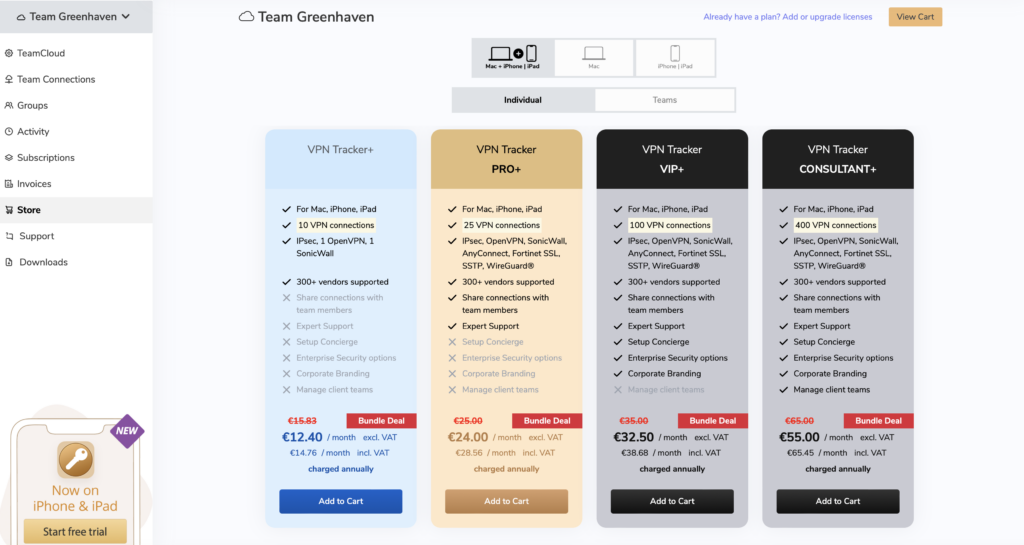
VPN Tracker Team Store (plan prices may vary from the example)
Once you have added plans for your VPN Tracker Team Setup, they will appear on your team’s start page under Licenses. Here, you can assign them directly to your team members as part of your VPN team management process:
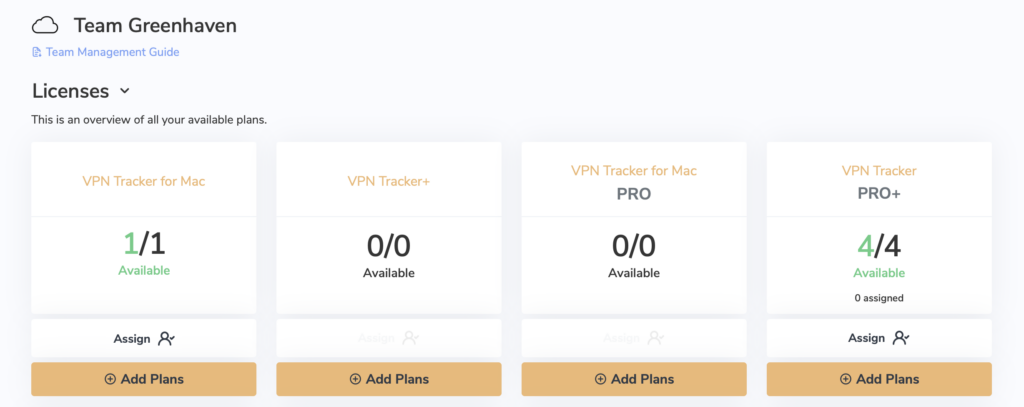
Newly purchased licenses displayed on your team’s overview page
Assigning plans in VPN Tracker Team Setup
Once a team member has accepted your invitation, the next step in your VPN Tracker Team Setup is to assign them one of your available VPN Tracker licenses.
In the team overview section of the VPN Tracker Team Setup, you will see a list of team members and their assigned roles. To allocate a plan, go to the Plans column and click to select an available license:
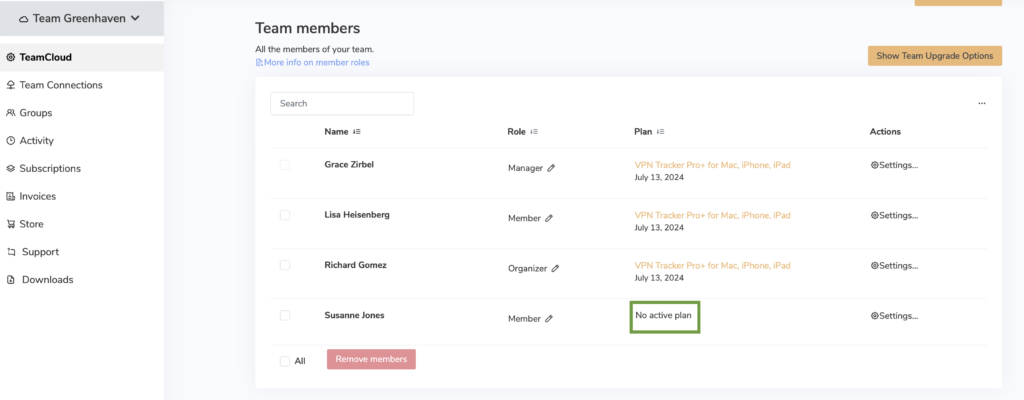
Assign licenses to members during VPN Tracker Team Setup
VPN team management features
The previous steps covered the basics of setting up a team, but VPN Tracker Team Setup also provides powerful VPN team management options. In this section, you’ll learn how to invite new members, manage existing members, and control team settings.
Want to jump to the next step? Learn how to share Team Connections in TeamCloud with VPN team management →
Inviting additional members in VPN team management
You can invite additional team members via email under the Add Users section of your Member page:
Navigate to the VPN Tracker Team Member Page in the Sidebar
Managing members in VPN Tracker Team Setup
At the top of the VPN Tracker Team Member Page, you can add users by entering their email address and sending them an invitation:
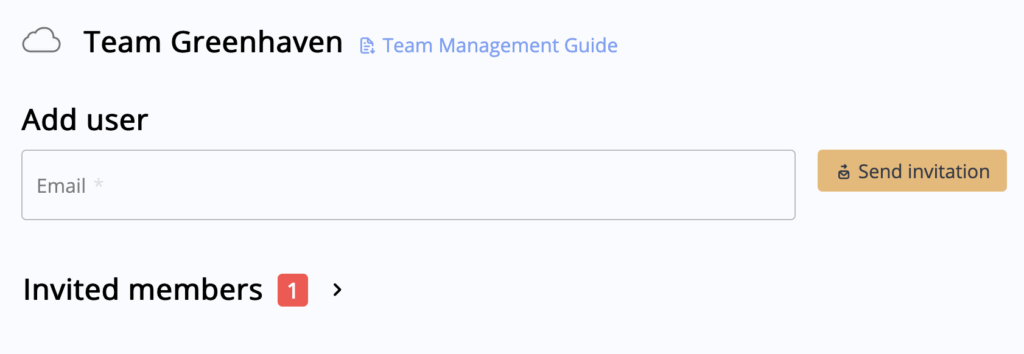
Invite new members by entering their email address in VPN Tracker Team Setup
Once you have sent an invitation, the user will appear in the Invited Members section until they accept. For additional help, send them the guide on how to join a VPN Tracker Team Setup.
Options for VPN team management
The team overview table shows details about all members in your VPN team management. To manage a team member, open the Actions tab and select Settings to bring up the action panel:
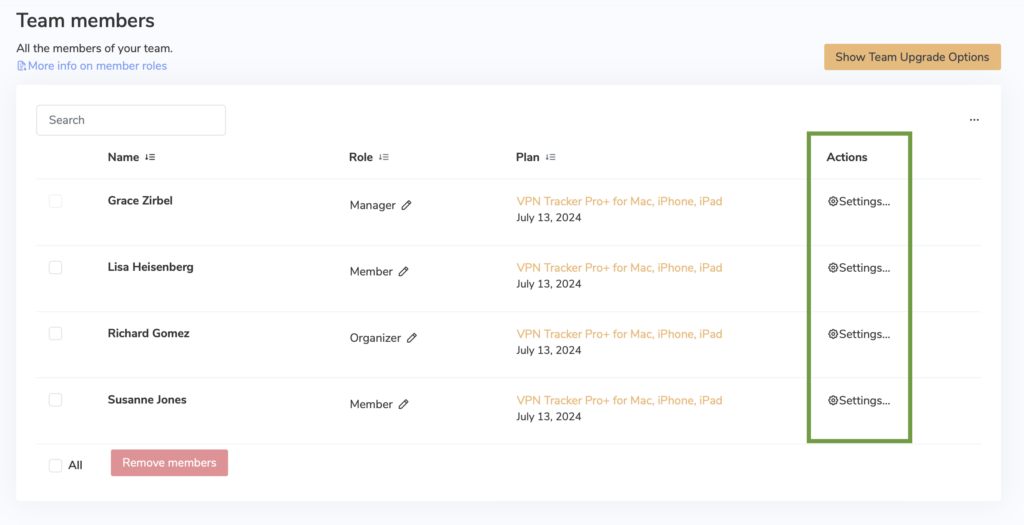
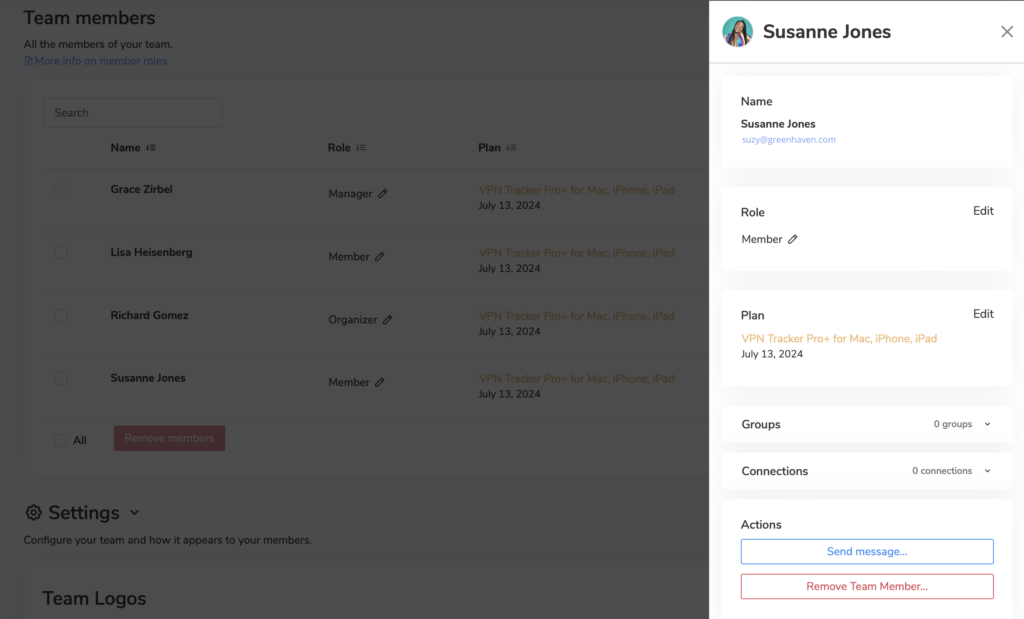
Manage users via the VPN Tracker Team Setup action panel
Here you have the option to:
- Update or revoke a user’s plan
- View the connections they have access to
- Manage user groups in your team
- Contact the user via email
- Remove them from the team (e.g. when leaving the company)
Additional VPN Tracker Team Management settings
Once you have completed your VPN Tracker Management Setup, you can apply additional settings to further customize VPN Tracker for your company and create a more professional experience for your team members.
Adding a team logo in VPN Tracker Team Setup
A team logo helps members easily recognize your team in the app sidebar and reinforces your brand identity. During your VPN Tracker Team Management, you can upload both light and dark versions of your company logo.
On your team’s overview page, scroll to Settings, where you can upload the logo files:
Upload your company logo to customize VPN Tracker Team Setup
The uploaded logo will then be displayed next to your team name in VPN Tracker. Please note that logos are only visible for VPN Tracker VIP and Team Member license holders.
Payments and subscriptions in VPN team management
In addition to assigning VPN Tracker licenses, your VPN Tracker Team Setup also includes the ability to manage subscriptions and payments through my.vpntracker.com.
Note: To access payment information, a Manager or Billing role is required.
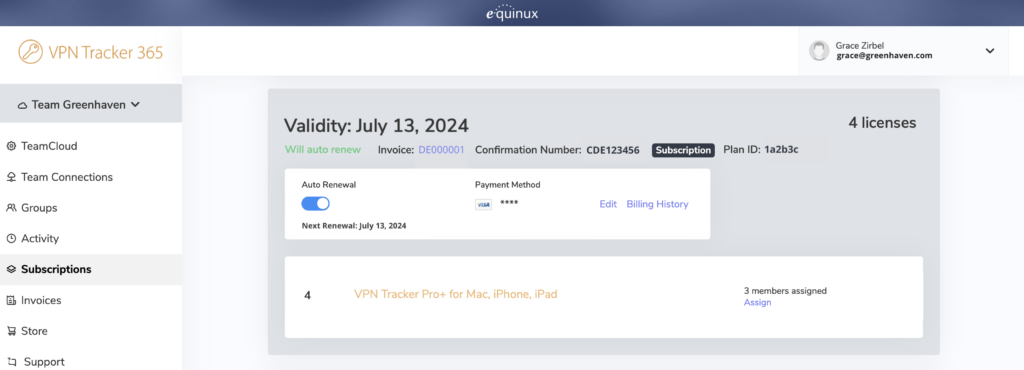
Manage subscriptions in VPN team management
To manage your current subscriptions, click Subscriptions in the sidebar menu. Here, you’ll see an overview of existing plans, purchase history, and auto-renewal details for your VPN team management:
View and manage subscriptions in VPN Tracker Team Setup
Consolidate plans in VPN Tracker Team Setup
If you have multiple plans with varying end dates, you can consolidate them into one subscription with a single end date to simplify billing. Select the plans you want to combine and click Combine Subscriptions at the bottom of the window:
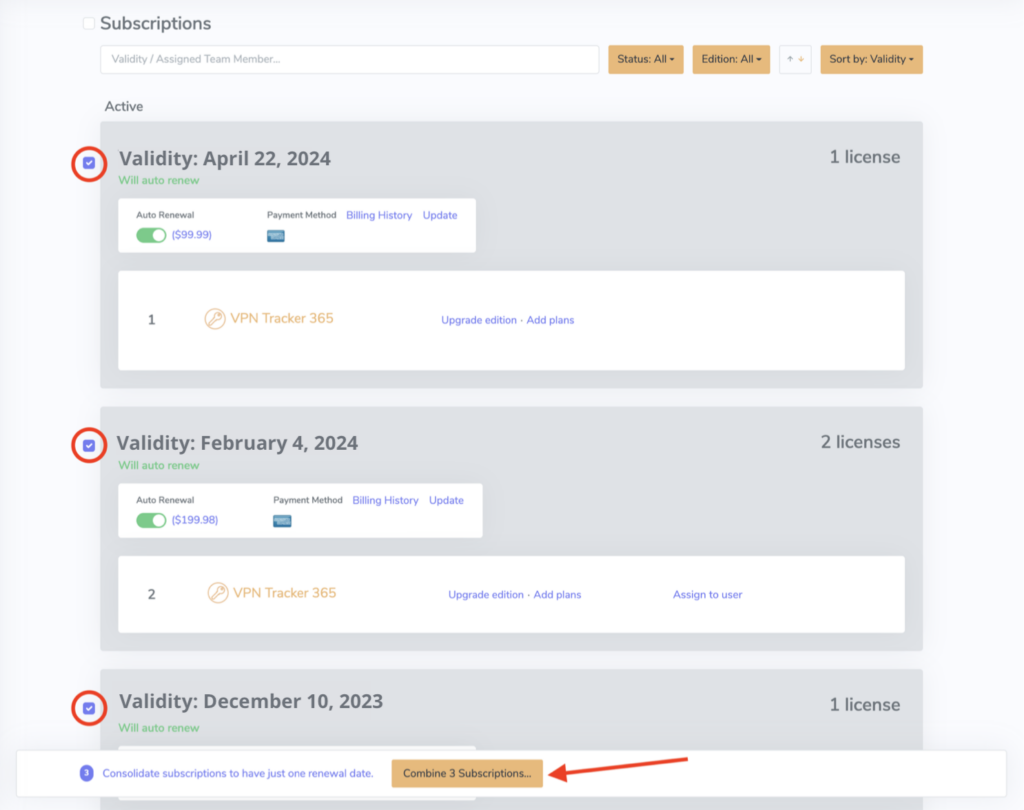
Consolidate active plans in VPN team management
Automatic renewals in VPN team management
By default, automatic renewal is activated for all subscriptions to ensure users in your VPN Tracker Team Setup don’t lose VPN access unexpectedly. To adjust auto-renewal settings, use the slider in your Subscriptions page overview:
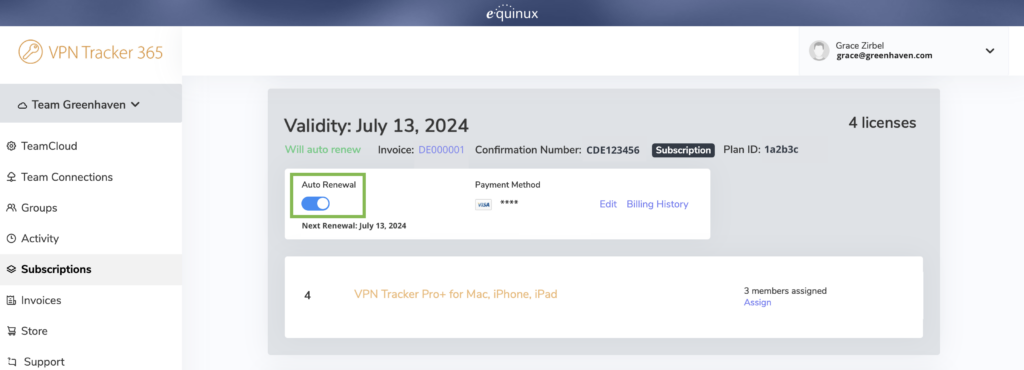
Manage automatic renewal in VPN Tracker Team Setup
Here you can always check the auto-renewal status of your subscriptions and see if and when a plan will renew.
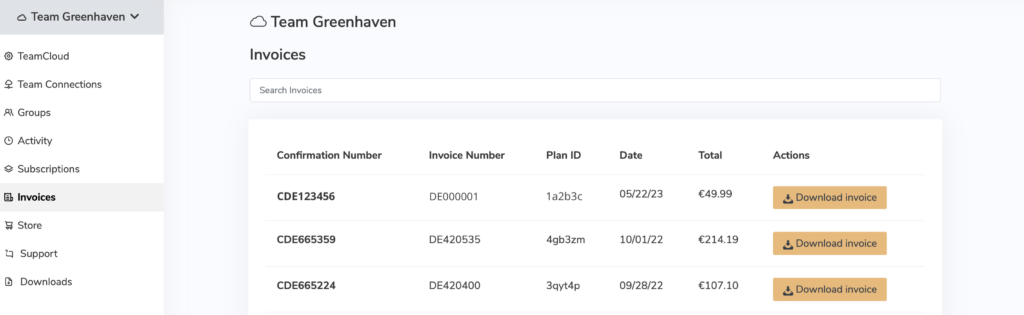
Accessing invoices in VPN team management
Go to the Invoices tab to view and download past invoices for your VPN team management records:
Access invoices for your VPN Tracker Team Setup
New to VPN Tracker?
Start your free, 7 day VPN Tracker trial today to test all the latest features.