Find out how to use the Network Scanner in VPN Tracker for Mac to work more productively with VPN.
Menu:
Scanning networks
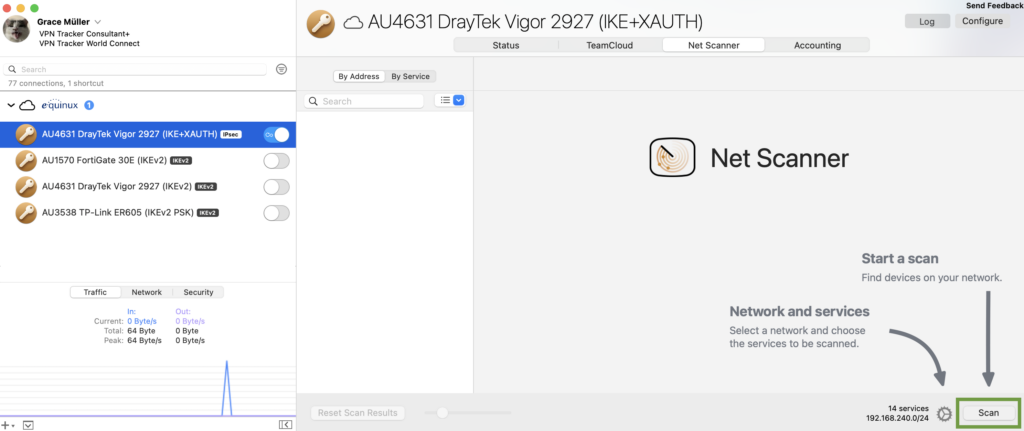
To scan a network, your Mac must be connected to the network via VPN.
- Select the VPN connection in the sidebar and start the connection
- Go to the “Net Scanner” tab
- Click the “Scan” button in the bottom right corner to scan the network using a selection of the most popular network services:
Host to Everywhere VPNs
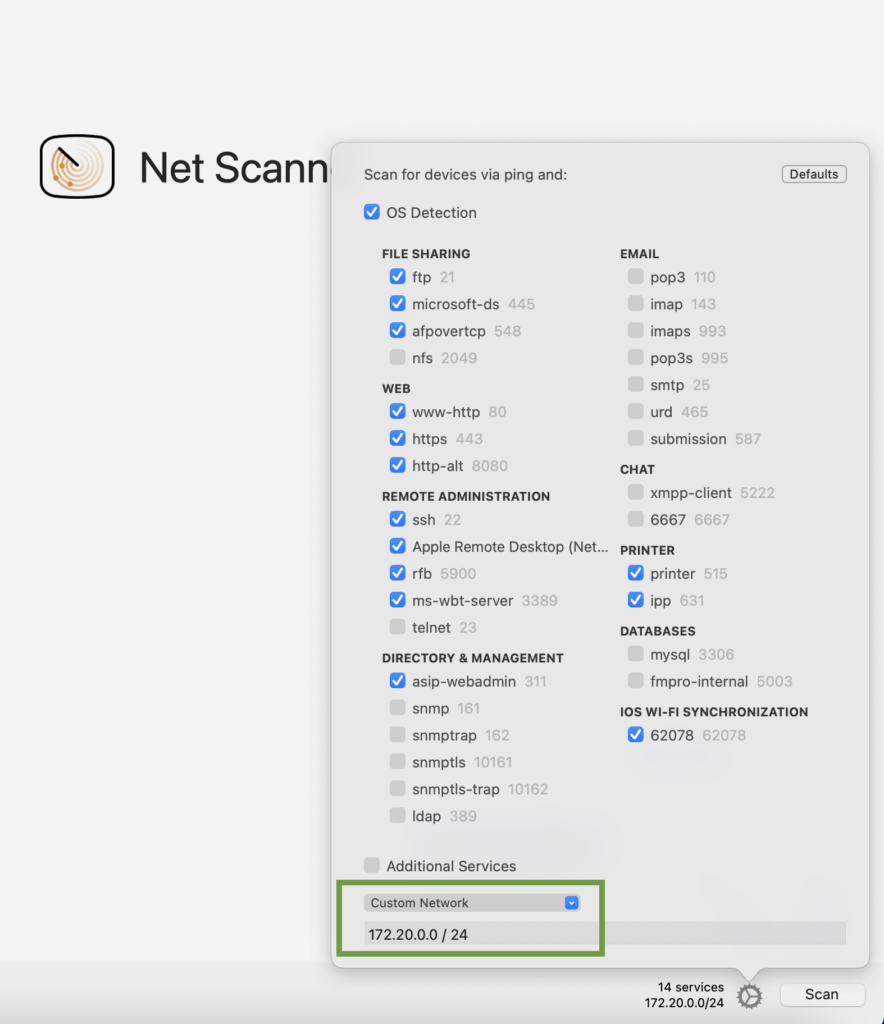
If you are connected to a VPN where all network traffic is sent through the VPN (Host to Everywhere), you will need to specify the network that you would like to scan. To do so, click the Settings icon and enter the network range:
Depending on the size of the network and your internet connection, the scan may take a while to complete. You can continue working with VPN Tracker while a scan is in progress. You’ll receive a notification when the scan is complete.
Customizing network services
By default, the Network Scanner scans for a selection of the most popular network services.
- To select different services, click the settings icon and check or uncheck the services that you would like VPN Tracker to scan for:
- To turn OS detection on or off, use the checkbox at the top of the settings.
- To check/uncheck all services, hold down the Option key while clicking a checkbox.
- To restore the default selection of services and networks, click the “Defaults” button at the top of the settings.
What is OS Detection?
The Network Scanner can detect the type of host (e.g. macOS, Windows, Linux, Network Equipment, Printers) from the services that are available on that host.
OS Detection requires certain services to be included in the scan. If you uncheck a service that is required for OS Detection, OS Detection will be unchecked as well.
Scan results
You can use your scan results in the following ways:
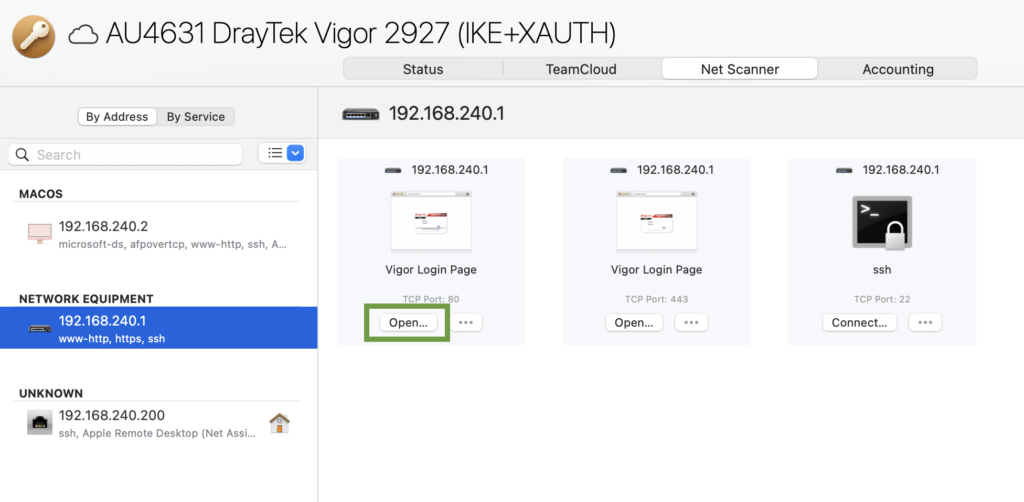
Connect to services
Connect to a service right from the Network Scanner, or open the app associated with this service on your Mac.
- Display the scan results ”By Address” or “By Service”.
- On the right side, click the “Connect” or “Open” for the service or host that you would like to connect to:
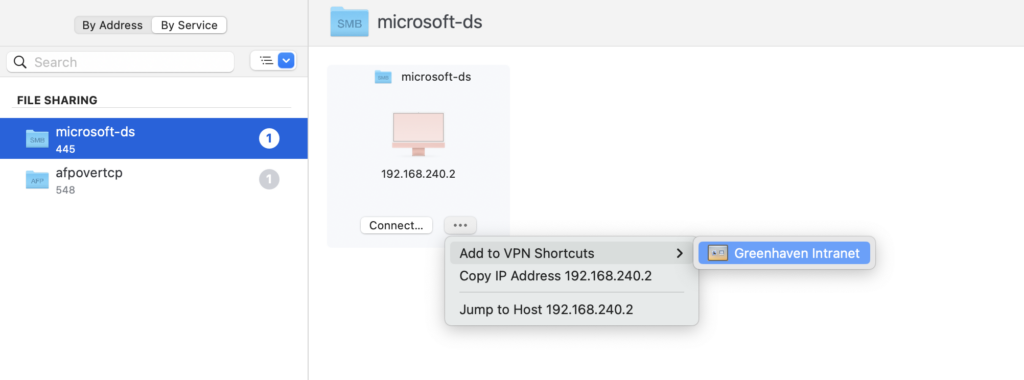
Add to VPN Shortcuts collection
- To add a service as VPN Shortcut, click the ‘...’ button for the service that you would like to add to a VPN Shortcuts Collection.
- Choose “Add to VPN Shortcuts” and select the VPN Shortcuts Collection that you want the service to be added to:
Other options
You can also use the Scanner to copy the IP address or to jump to host.
Customizing results
You have multiple customization options for your scan results which make working with the Scanner more productive.
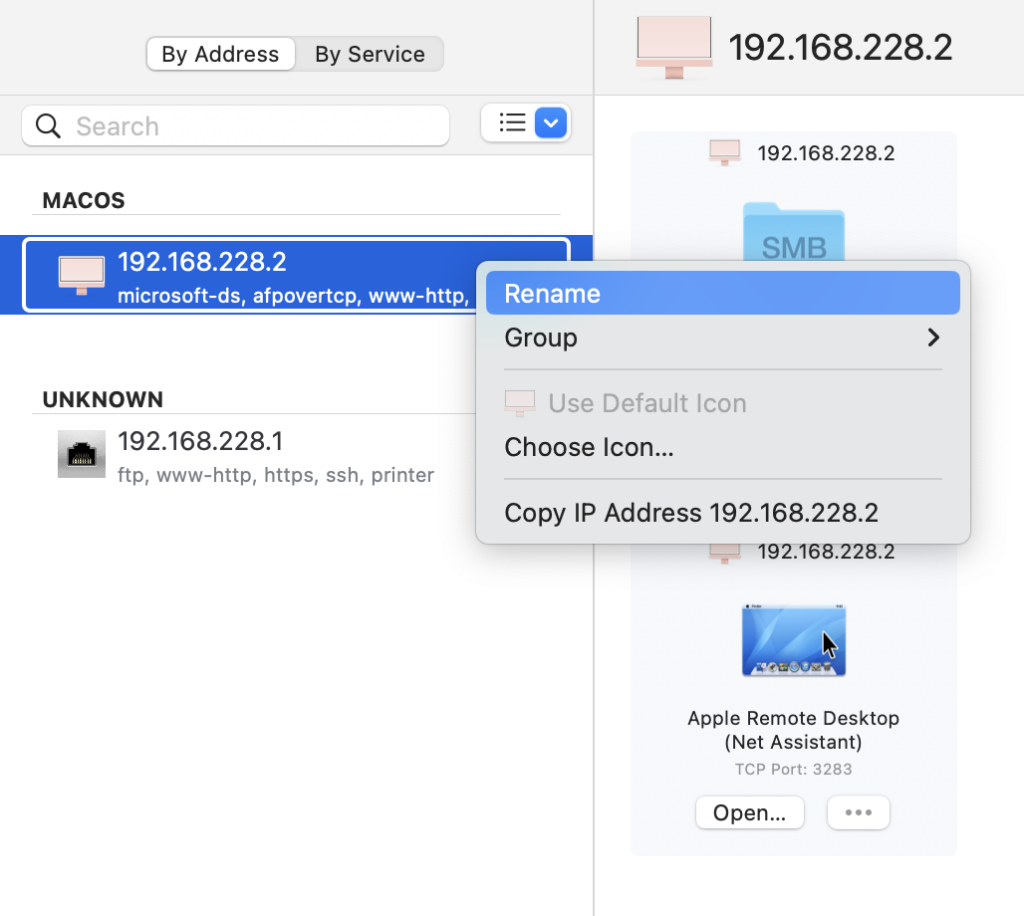
Renaming hosts
Renaming hosts in the Network Scanner list makes it easy to locate your most important computers and network devices:
- Display the scan results ”By Address”
- Right click the host you want to rename
- Choose ”Rename” and enter a more identifiable name:
Automatic Hostname Lookup
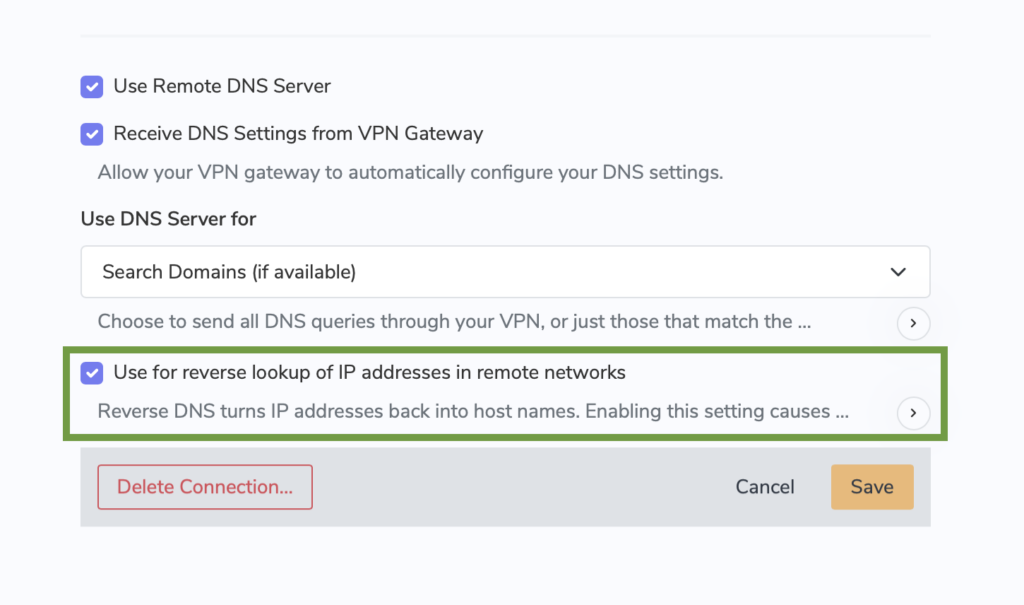
VPN Tracker can automatically look up the hostnames for IP addresses in the Network Scanner. All you need is a Remote DNS server for your VPN that can provide host names for the IP addresses that are being scanned (reverse DNS lookup).
Important: Make sure the checkbox “Use for reverse lookup of IP addresses in remote networks'' (Basic > DNS) is checked:
Custom icons for hosts
- Display the scan results ”By Address”
- Right click the host you want to change the icon for and click “Choose icon...” to set a custom icon for this host:
![]()
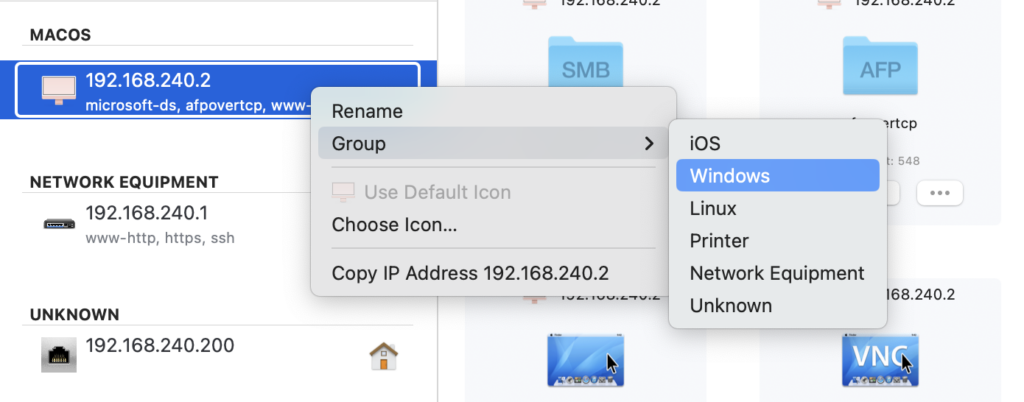
Change the OS Detection group
The Network Scanner automatically detects the kind of host – whether it’s macOS, Windows or Linux, or a printer or network equipment. OS detection uses the services on a host to determine the most likely type of host. OS detection might put a host into a different group than what it actually is.
You can change the group manually if a host is not detected correctly.
- Display the scan results ”By Address”
- Right click the host whose group you want to change.
- Select the new group from the “Group” menu:
Availability
The Network Scanner is exclusively available in selected VPN Tracker for Mac plan tiers. Visit our store for an overview.
New to VPN Tracker?
Start your free, 7 day VPN Tracker trial today to test all the latest features.