TP-Link Omada and SafeStream Multi-WAN VPN routers are powerful networking solutions for small-to-medium businesses. As part of TP-Link's evolution towards the Omada SDN platform, these professional gateways—formerly known strictly as SafeStream—now offer centralized cloud management alongside their robust VPN capabilities.
In this guide, we show you step-by-step how to set up an IKEv2 IPsec VPN connection to your Omada or SafeStream router to get secure remote access on your Mac, iPhone, or iPad.
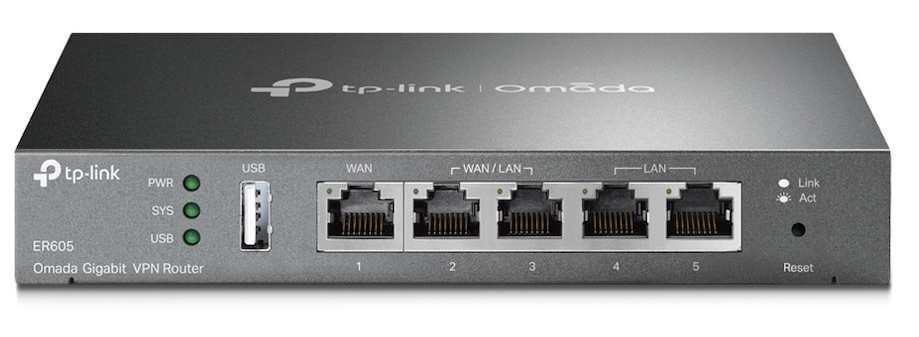
Tech specs: TP-Link Omada ER605
Series: TP-Link Omada / SafeStream Gigabit VPN router
Model: ER605 (formerly TL-R605)
Recommended for: Small businesses & Professional Home Offices
Supported VPN Protocols: IPsec (IKEv1 + IKEv2), WireGuard, PPTP, L2TP, OpenVPN
Max no. of VPN users: 20 (IPsec), 16 (OpenVPN)
WiFi: No
Device Status: Active
Set up IKEv2 IPsec VPN for TP-Link Omada / SafeStream
Note for Omada Controller Users: If your router is managed via an Omada SDN Controller, these settings should be configured within the Controller interface under Settings > VPN > VPN > IPsec rather than the router’s local web UI.
Create a new IPsec policy
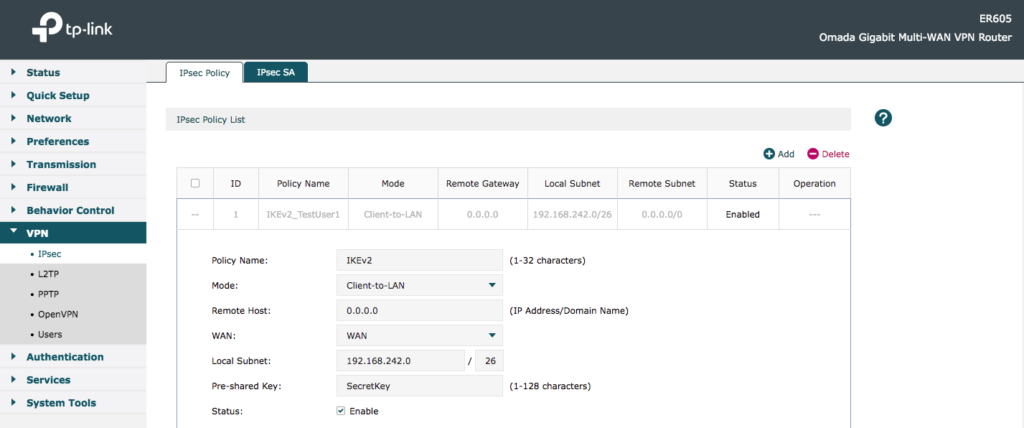
In the user interface, go to VPN > IPsec > IPsec Policy, where you can begin setting up IPsec VPN for your device.
Click Add to get started:

Add a new IPsec policy
Enter your VPN settings
You will now see a setup window for your new VPN policy. Fill out the initial fields with your connection settings:
- Policy Name: Choose an identifiable name for your VPN tunnel
- Mode: Select Client-to-LAN from the dropdown
- WAN: Select your active WAN port from the dropdown
- Local Subnet: Enter the LAN address range you will be using for the VPN
- Pre-shared Key: Enter a secure password. You will need this later in VPN Tracker to establish the connection.
Add your initial VPN settings
Add advanced VPN settings
Click Advanced Settings to expand the next section. Then, fill out the phase one settings as demonstrated:
- IKE Protocol Version: Select IKEv2
- Negotiation Mode: Change to Responder Mode, then enter your IP address pool for the VPN clients
- Local ID Type: Choose IP address
- Remote ID Type: Choose IP address
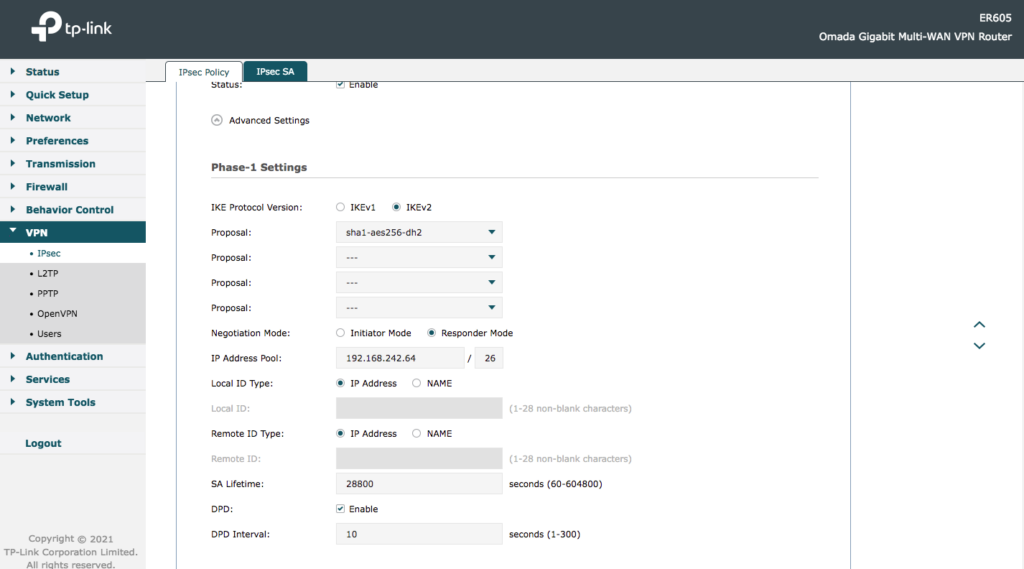
Add your phase 1 settings
Finally, under Phase 2, click OK to save your new IKEv2 IPSec VPN tunnel.
Connect to TP-Link Omada / SafeStream IKEv2 VPN on Mac, iPhone, iPad
In order to connect to your new VPN, you will need a VPN client. VPN Tracker is the best VPN client for Mac and iOS and is fully compatible with the TP-Link Omada and SafeStream series (IKEv1, IKEv2, & WireGuard) – providing you secure remote access to your office network on all Apple devices.
Get connected in 3 steps:
- Open the VPN Tracker connection creator for TP-Link and create a free account.
- Open the configuration and enter your device's public (WAN) IP address or hostname.
- Under Authentication, add the Pre-shared Key you configured on your router and save your connection.