About ASUS VPN Routers
ASUS routers are a popular and affordable choice for home office users looking for an all-in-one network and security solution.
As well as impressive WiFi capabilities, many ASUS routers also feature support for both IPsec (IKEv1 + IKEv2) and WireGuard® VPN - making it easy to gain secure remote access to your network when out and about.
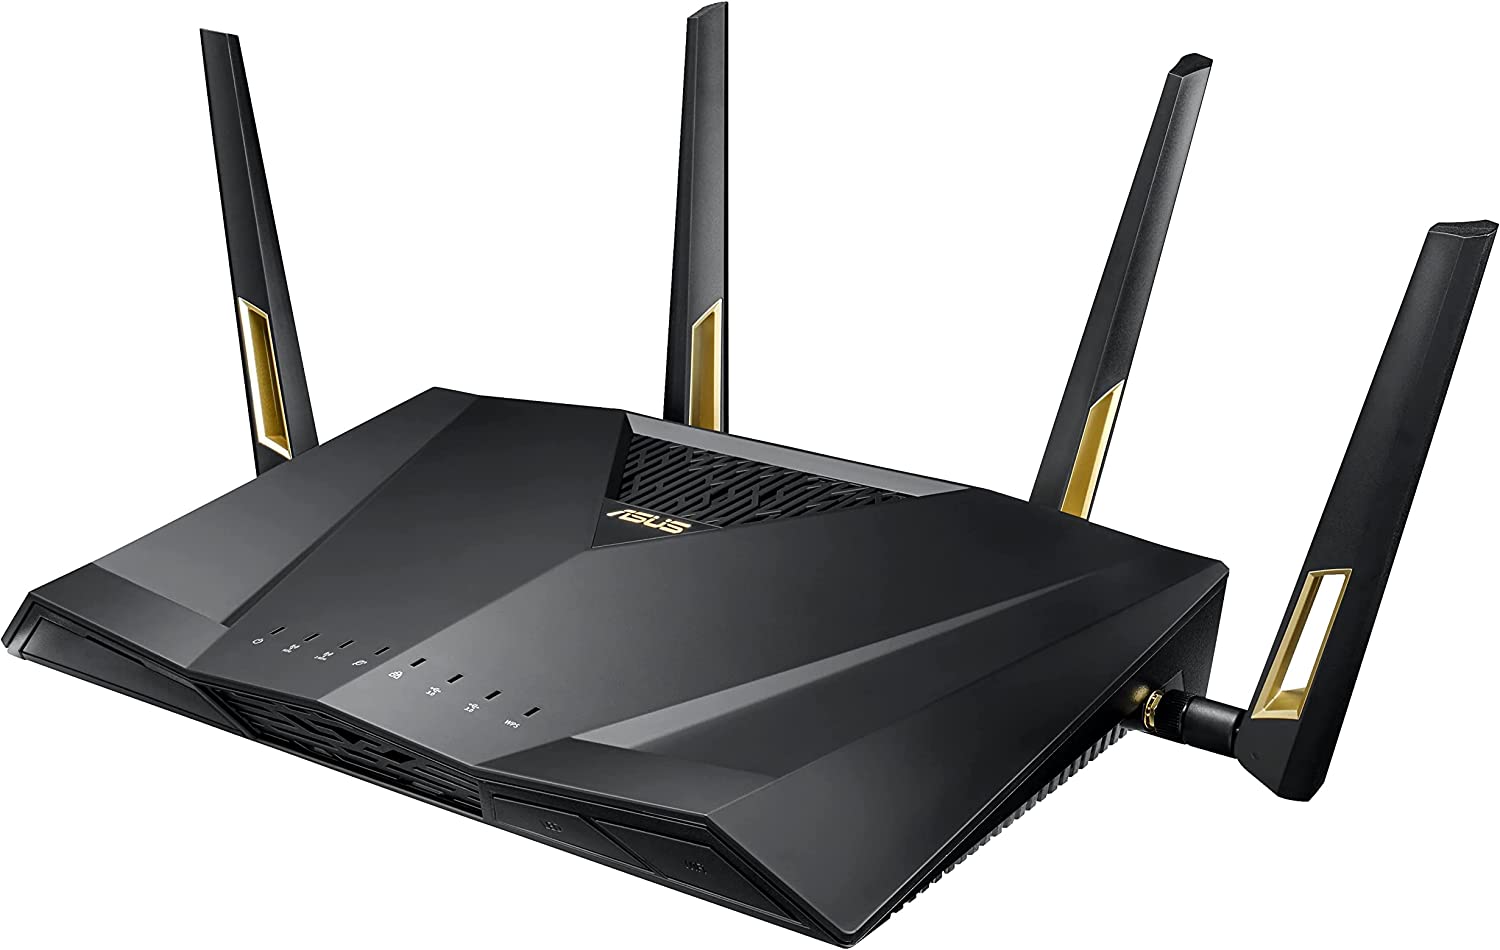
On this page, we take you through the key VPN specification for one of the most popular ASUS devices of the moment - the RT-AX88U - as well as all you need to know about setting up an IPsec or WireGuard® VPN server on your ASUS device to connect on Mac, iPhone or iPad.
Menu
Technical Specification
Model: RT-AX88U
Recommended for: Home Office / Personal Use
Supported VPN Protocols: IPsec (IKEv1 & IKEv2), WireGuard®
Max number of VPN users (IPsec): 8
Built in WiFi: Yes
Key Features: WiFi 6, up to 6000 Mbit/s WiFi speeds, 1.8 GHz quad-core processor, Amazon Alexa compatible, AiProtection Pro license from Trend Micro™ included
Device Status: Active
Which ASUS devices support WireGuard® VPN?
Looking to configure a WireGuard® VPN connection for your ASUS device? WireGuard® is available for devices running ASUSWRT 2022 and newer:
- ZenWiFi XT9
- ZenWiFi AX (XT8)
- GT-AXE11000
- RT-AX88U
- RT-AX86U
- RT-AX86S
- RT-AX86U Pro
- RT-AXE7800
- GT6
- ZenWiFi XD6
- XT12
Don't see your device in the list? No problem. You can still get remote access on Mac, iPhone & iPad using IPsec VPN.
Requirements
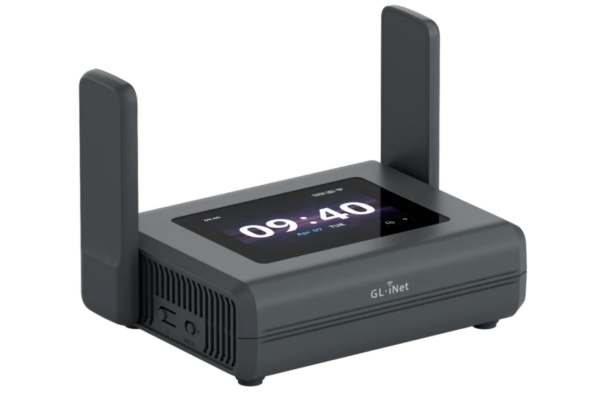
In order to reach your ASUS device remotely, you will need a fixed public IP address or alternatively a DynDNS host name (1). Find out more in this guide.
How to Configure IKEv2 IPsec VPN for an ASUS Router
Configuration information
Throughout this guide, certain information is referenced which you will need later to configure your new IPsec VPN connection in the VPN client. To help you identify this information, it is labelled as follows:
- Public WAN IP address
or DDNS Host name (see above) - Pre-shared Key
- Username
- Password
Step One: Activate IPsec VPN
- Open the web UI of your ASUS router and go to Advanced Settings > VPN > VPN Server
- Click the slider to activate IPsec VPN
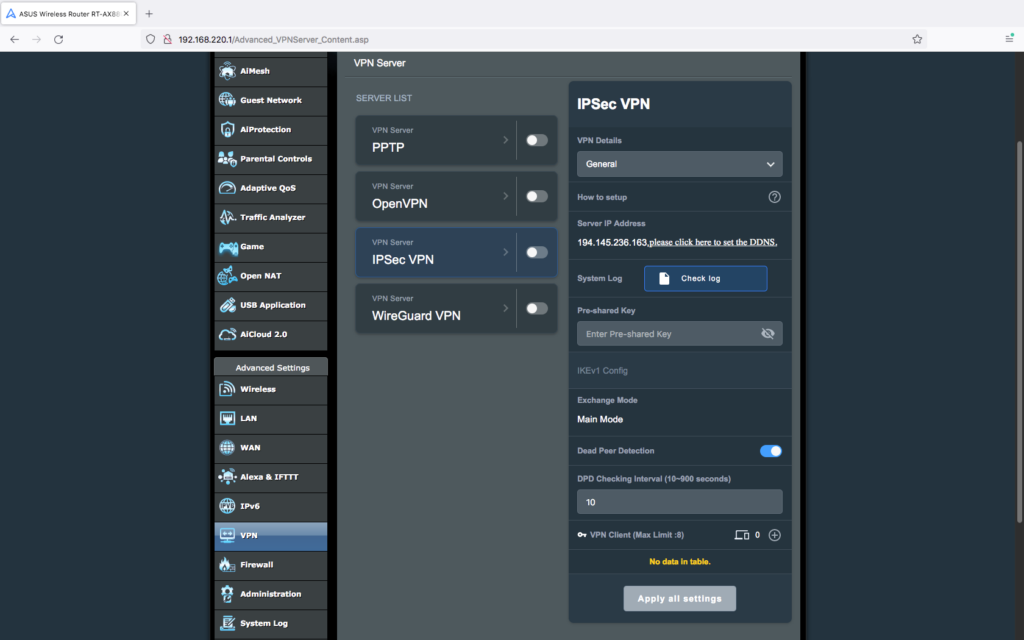
Activate IPsec VPN for your ASUS router
Step Two: Configure IPsec VPN
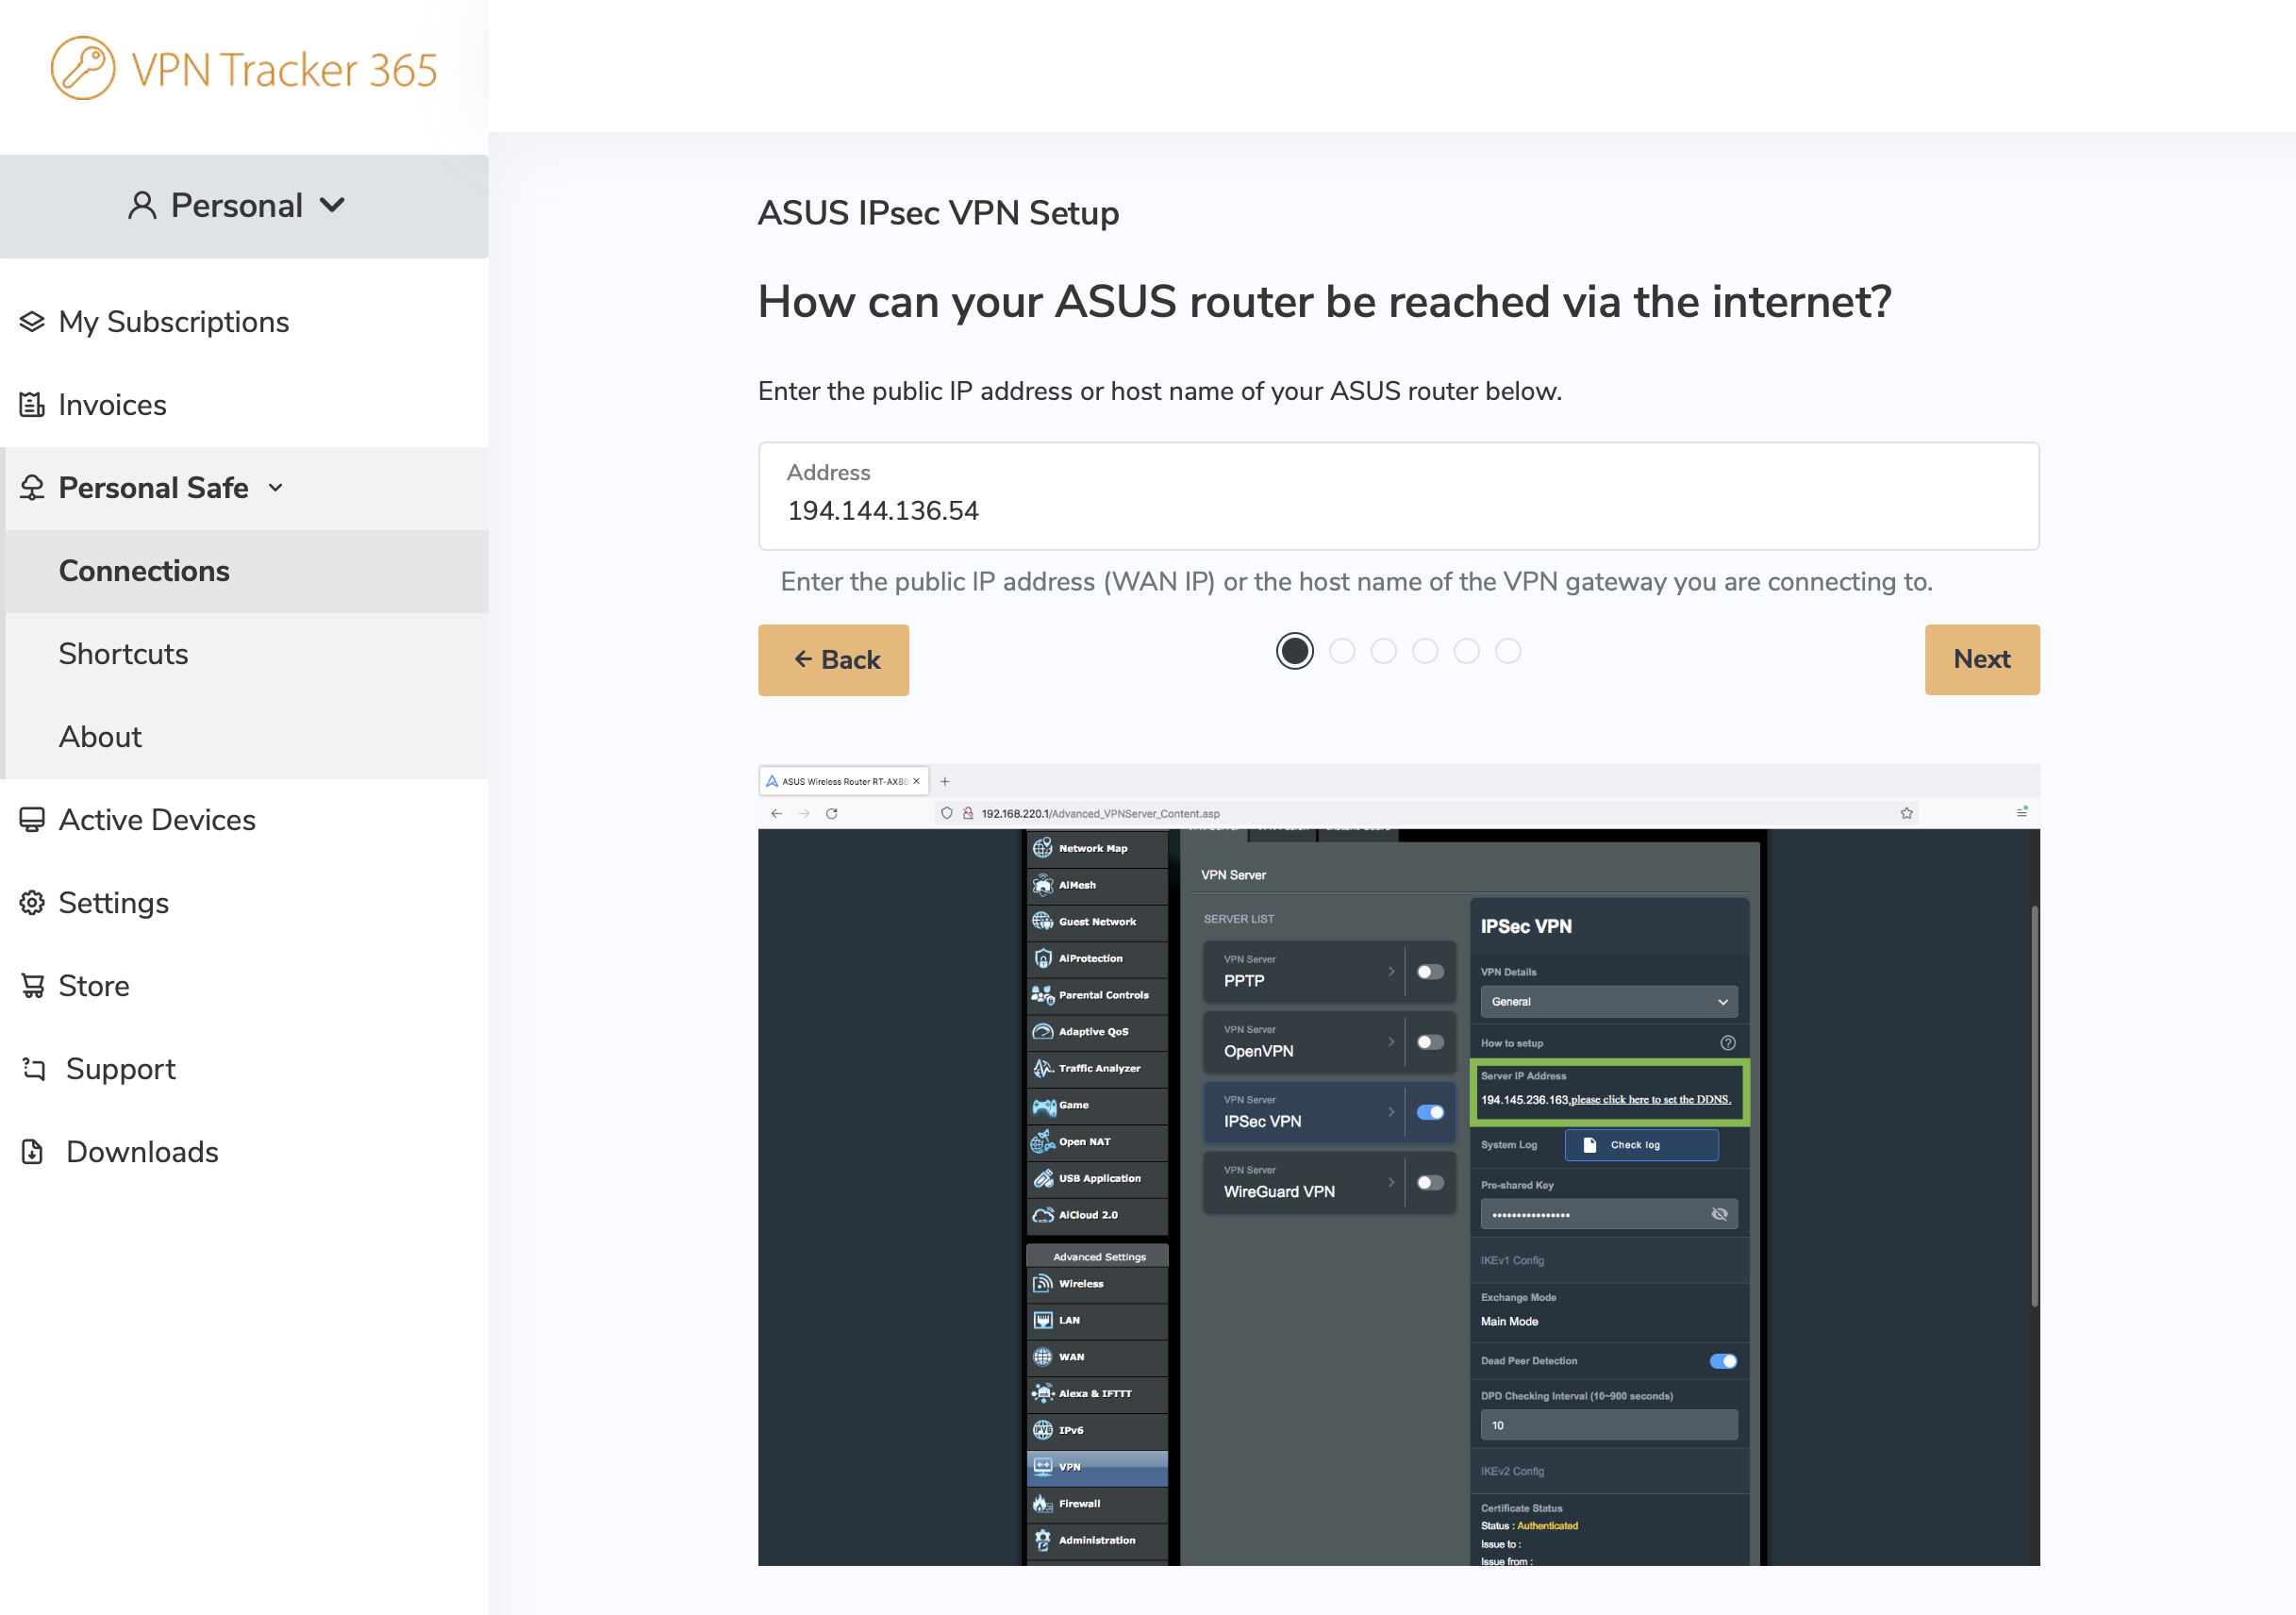
- Under General settings, go to Server IP Address and make a note of the IP address shown (1) - you will need this later to configure your VPN in the VPN client. If you don't have a public IP address assigned from your ISP, you'll need to set up DDNS instead.
- For Pre-shared key, enter a secure connection password (2). This will be used to access the connection in the VPN client
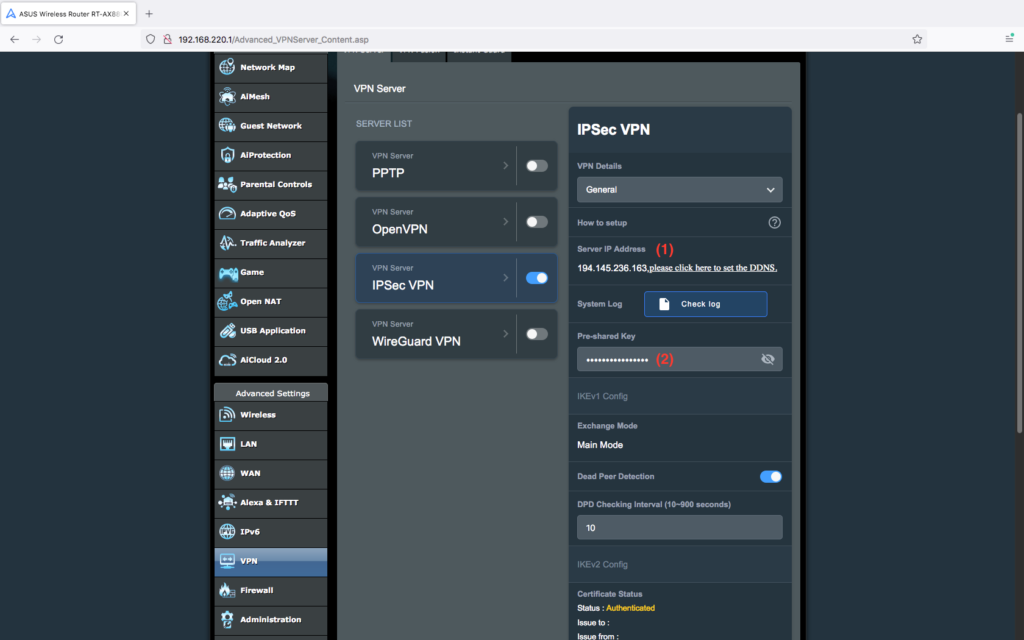
Configure a Pre-Shared Key for your VPN connection
Step Three: Set up a VPN User
- Scroll down to VPN Client and click the + to add a new VPN user
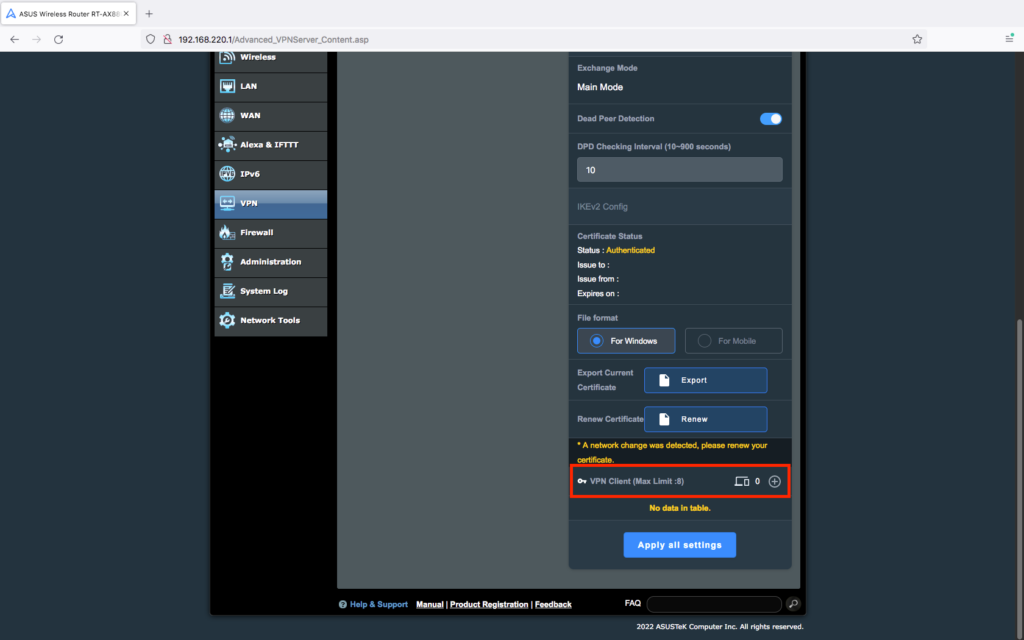
Add a new VPN user
- Enter a Username (3) and Password (4) and select V1 & V2 from the dropdown
- Click Apply all settings to save the new configuration
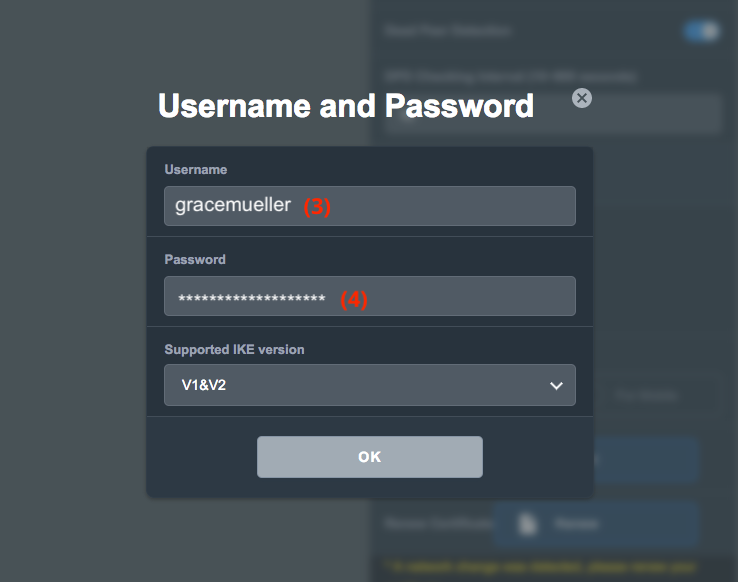
Set up your new user profile with a username and password
Connect to your new IPsec VPN Server
In order to connect to the new IPsec VPN and get secure remote access to your ASUS device, you will need a VPN client.
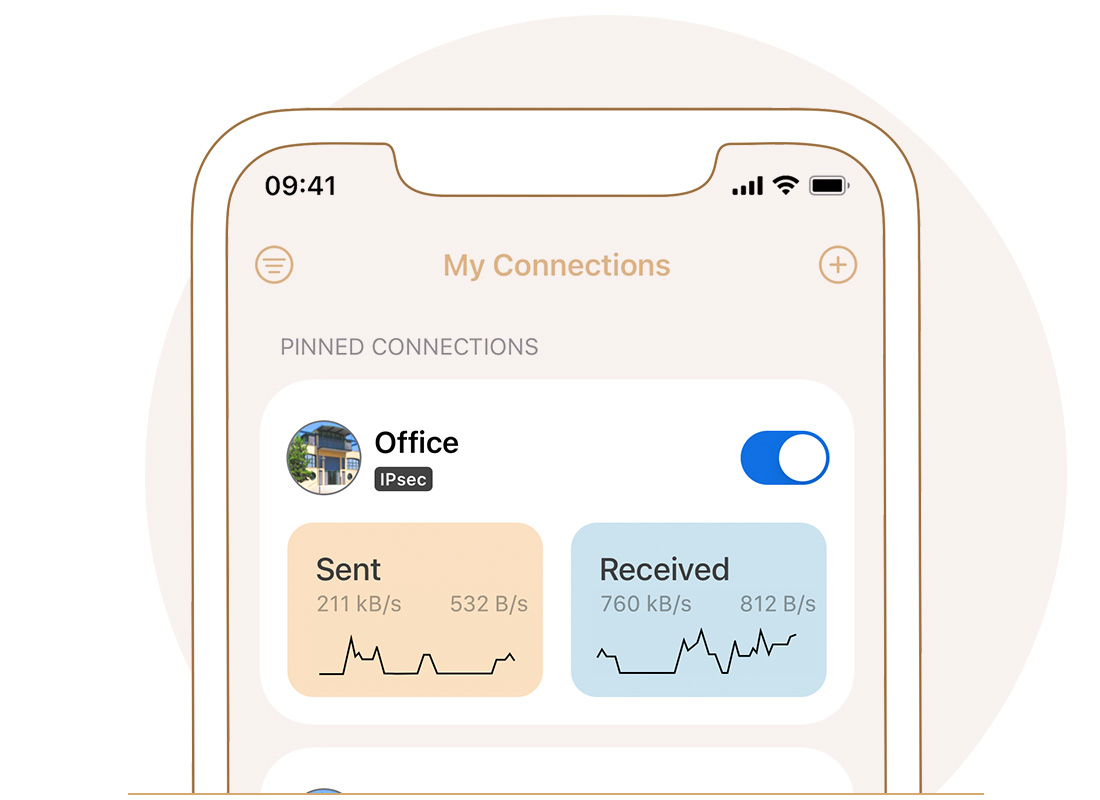
VPN Tracker supports IPsec VPN connections on Mac, iPhone and iPad!
Follow these steps to configure a connection:
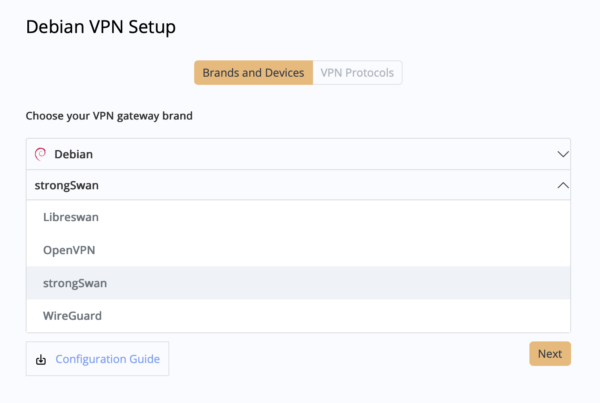
- Open the VPN Tracker Connection Creator for ASUS and create a free account
- Enter the IP address or host name of your ASUS router
- Fill out the remaining fields in the setup window, then save your connection in your account with end-to-end encryption
You can now connect to your ASUS router via IKEv2 IPsec VPN on Mac, iPhone or iPad!
How to Configure IPsec VPN (IKEv1) for an ASUS Router
Configuration information
Throughout this guide, certain information is referenced which you will need later to configure your new IPsec VPN connection in the VPN client. To help you identify this information, it is labelled as follows:
- Public WAN IP address
or DDNS Host name (see above) - Pre-shared Key
- Username
- Password
Step One: Activate IPsec VPN
- Open the web UI of your ASUS router and go to Advanced Settings > VPN > VPN Server
- Click the slider to activate IPsec VPN
Activate IPsec VPN for your ASUS router
Step Two: Configure IPsec VPN
- Under General settings, go to Server IP Address and make a note of the IP address shown (1) - you will need this later to configure your VPN in the VPN client. If you don't have a public IP address assigned from your ISP, you'll need to set up DDNS instead.
- For Pre-shared key, enter a secure connection password (2). This will be used to access the connection in the VPN client
Configure a Pre-Shared Key for your VPN connection
Step Three: Set up a VPN User
- Scroll down to VPN Client and click the + to add a new VPN user
Add a new VPN user
- Enter a Username (3) and Password (4) and select V1 & V2 from the dropdown
- Click Apply all settings to save the new configuration
Set up your new user profile with a username and password
Connect to your new IPsec VPN Server
In order to connect to the new IPsec VPN and get secure remote access to your ASUS device, you will need a VPN client.
VPN Tracker supports IPsec VPN connections on Mac, iPhone and iPad!
Follow these steps to configure a connection:
- Open the VPN Tracker Connection Creator for ASUS and create a free account
- Enter the IP address or host name of your ASUS router
- Follow the remaining steps in the configuration wizard, then save your connection in your account with end-to-end encryption
You can now connect to your ASUS router via IPsec VPN on Mac, iPhone or iPad!
How to Configure WireGuard® VPN for an ASUS Router
Step One: Activate WireGuard® VPN
- Open the web UI of your ASUS router and go to Advanced Settings > VPN > VPN Server
- Click the slider to activate WireGuard VPN

Activate WireGuard VPN on your ASUS device
Step Two: Enable DNS (optional)
You can also choose to allow DNS for the connection. When enabled, your router's DNS settings will be exported with your WireGuard® configuration file for the VPN client. This step is optional and not required to gain remote access to your device.
Please refer to ASUS support for more information on configuring DNS for your router.
- Under VPN Details, click the dropdown to switch to Advanced Settings
- Click the slider to Allow DNS
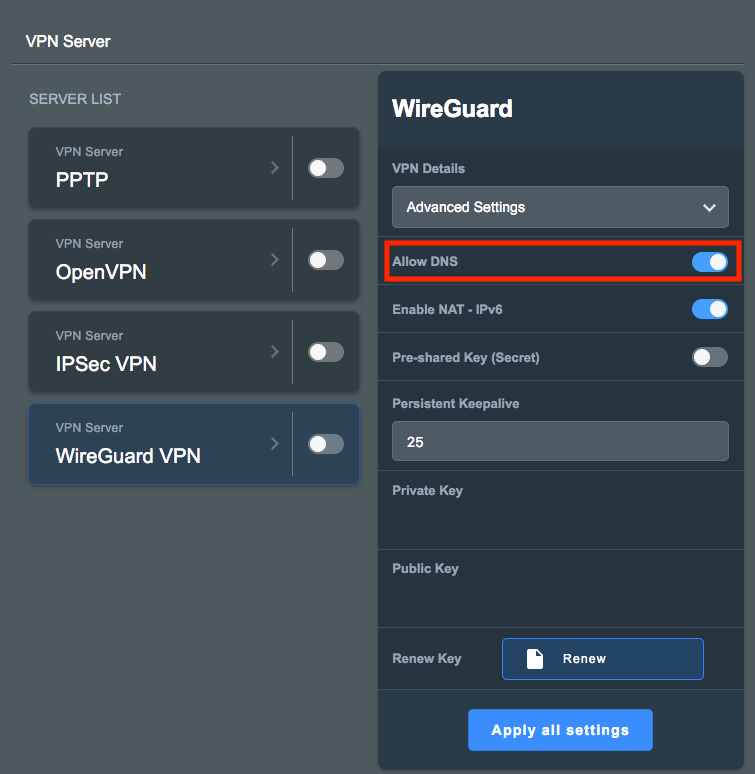
Optional: Enable DNS for the connection
Step Three: Set up a VPN User
- Switch back to the General settings
- Go to VPN Client and click the + to add a new VPN user
- Enter a Username in the popup window (e.g. testuser1)
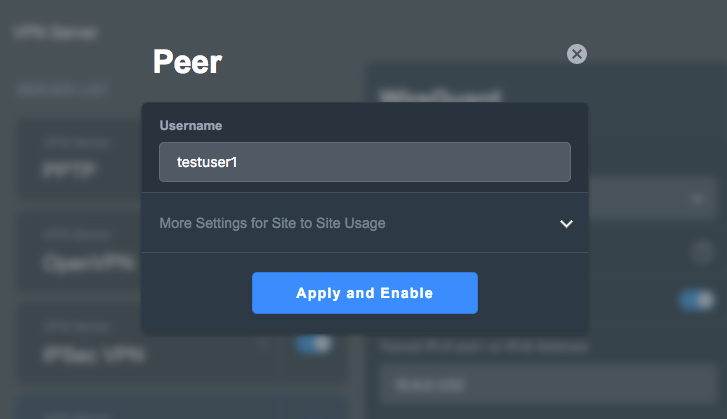
Enter a Username for the new VPN user
Optional: Configure split tunneling
Within the user configuration window, you can also choose to set up split tunneling for your connection. This gives you the option to specify a remote network range (e.g. the LAN network) to be used with the new VPN tunnel.
- Click to expand the dropdown More Settings for Site to Site Usage
- In the field Allowed IPs (Client), enter the remote network range to be used with the VPN, e.g. 192.168.10.0/24
- Click Apply and Enable to save your changes
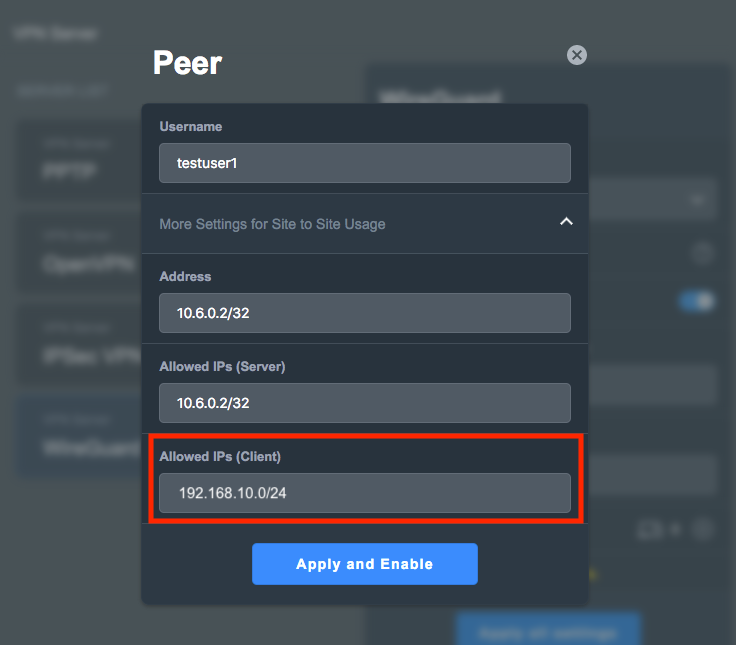
Optional: Enter a remote network range to use for split tunneling
Note: If you don't configure this option, all traffic is tunneled via the VPN by default which could result in slower VPN connection speeds, depending on your internet performance.
Step Four: Generate your configuration file
- Once you've saved your new user profile, it will appear in the list under VPN Client
- Click the (...) icon to access your new WireGuard® VPN configuration
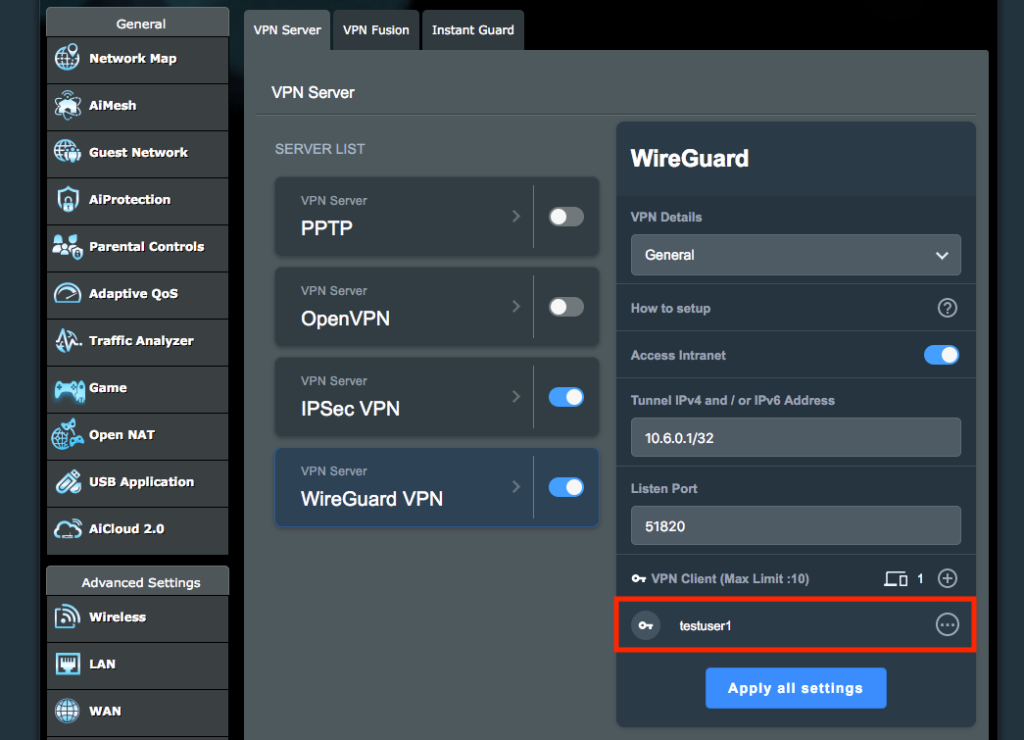
- Choose between:
- A QR code: Scan this with your iPhone or iPad in the next step)
- A configuration file: Switch to the Export tab and click Export to download
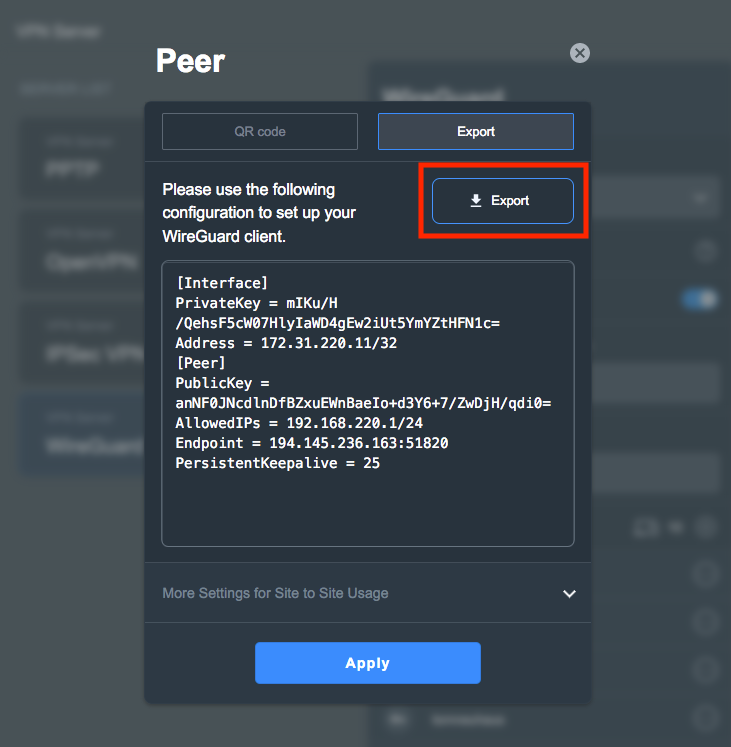
Export a WireGuard® configuration file to use in the VPN client
Connect to your new WireGuard® VPN Server
In order to connect to the new WireGuard® VPN server and get secure remote access to your ASUS device, you will need a VPN client.
VPN Tracker supports WireGuard® VPN connections on Mac, iPhone and iPad!
Follow these steps to configure a connection:
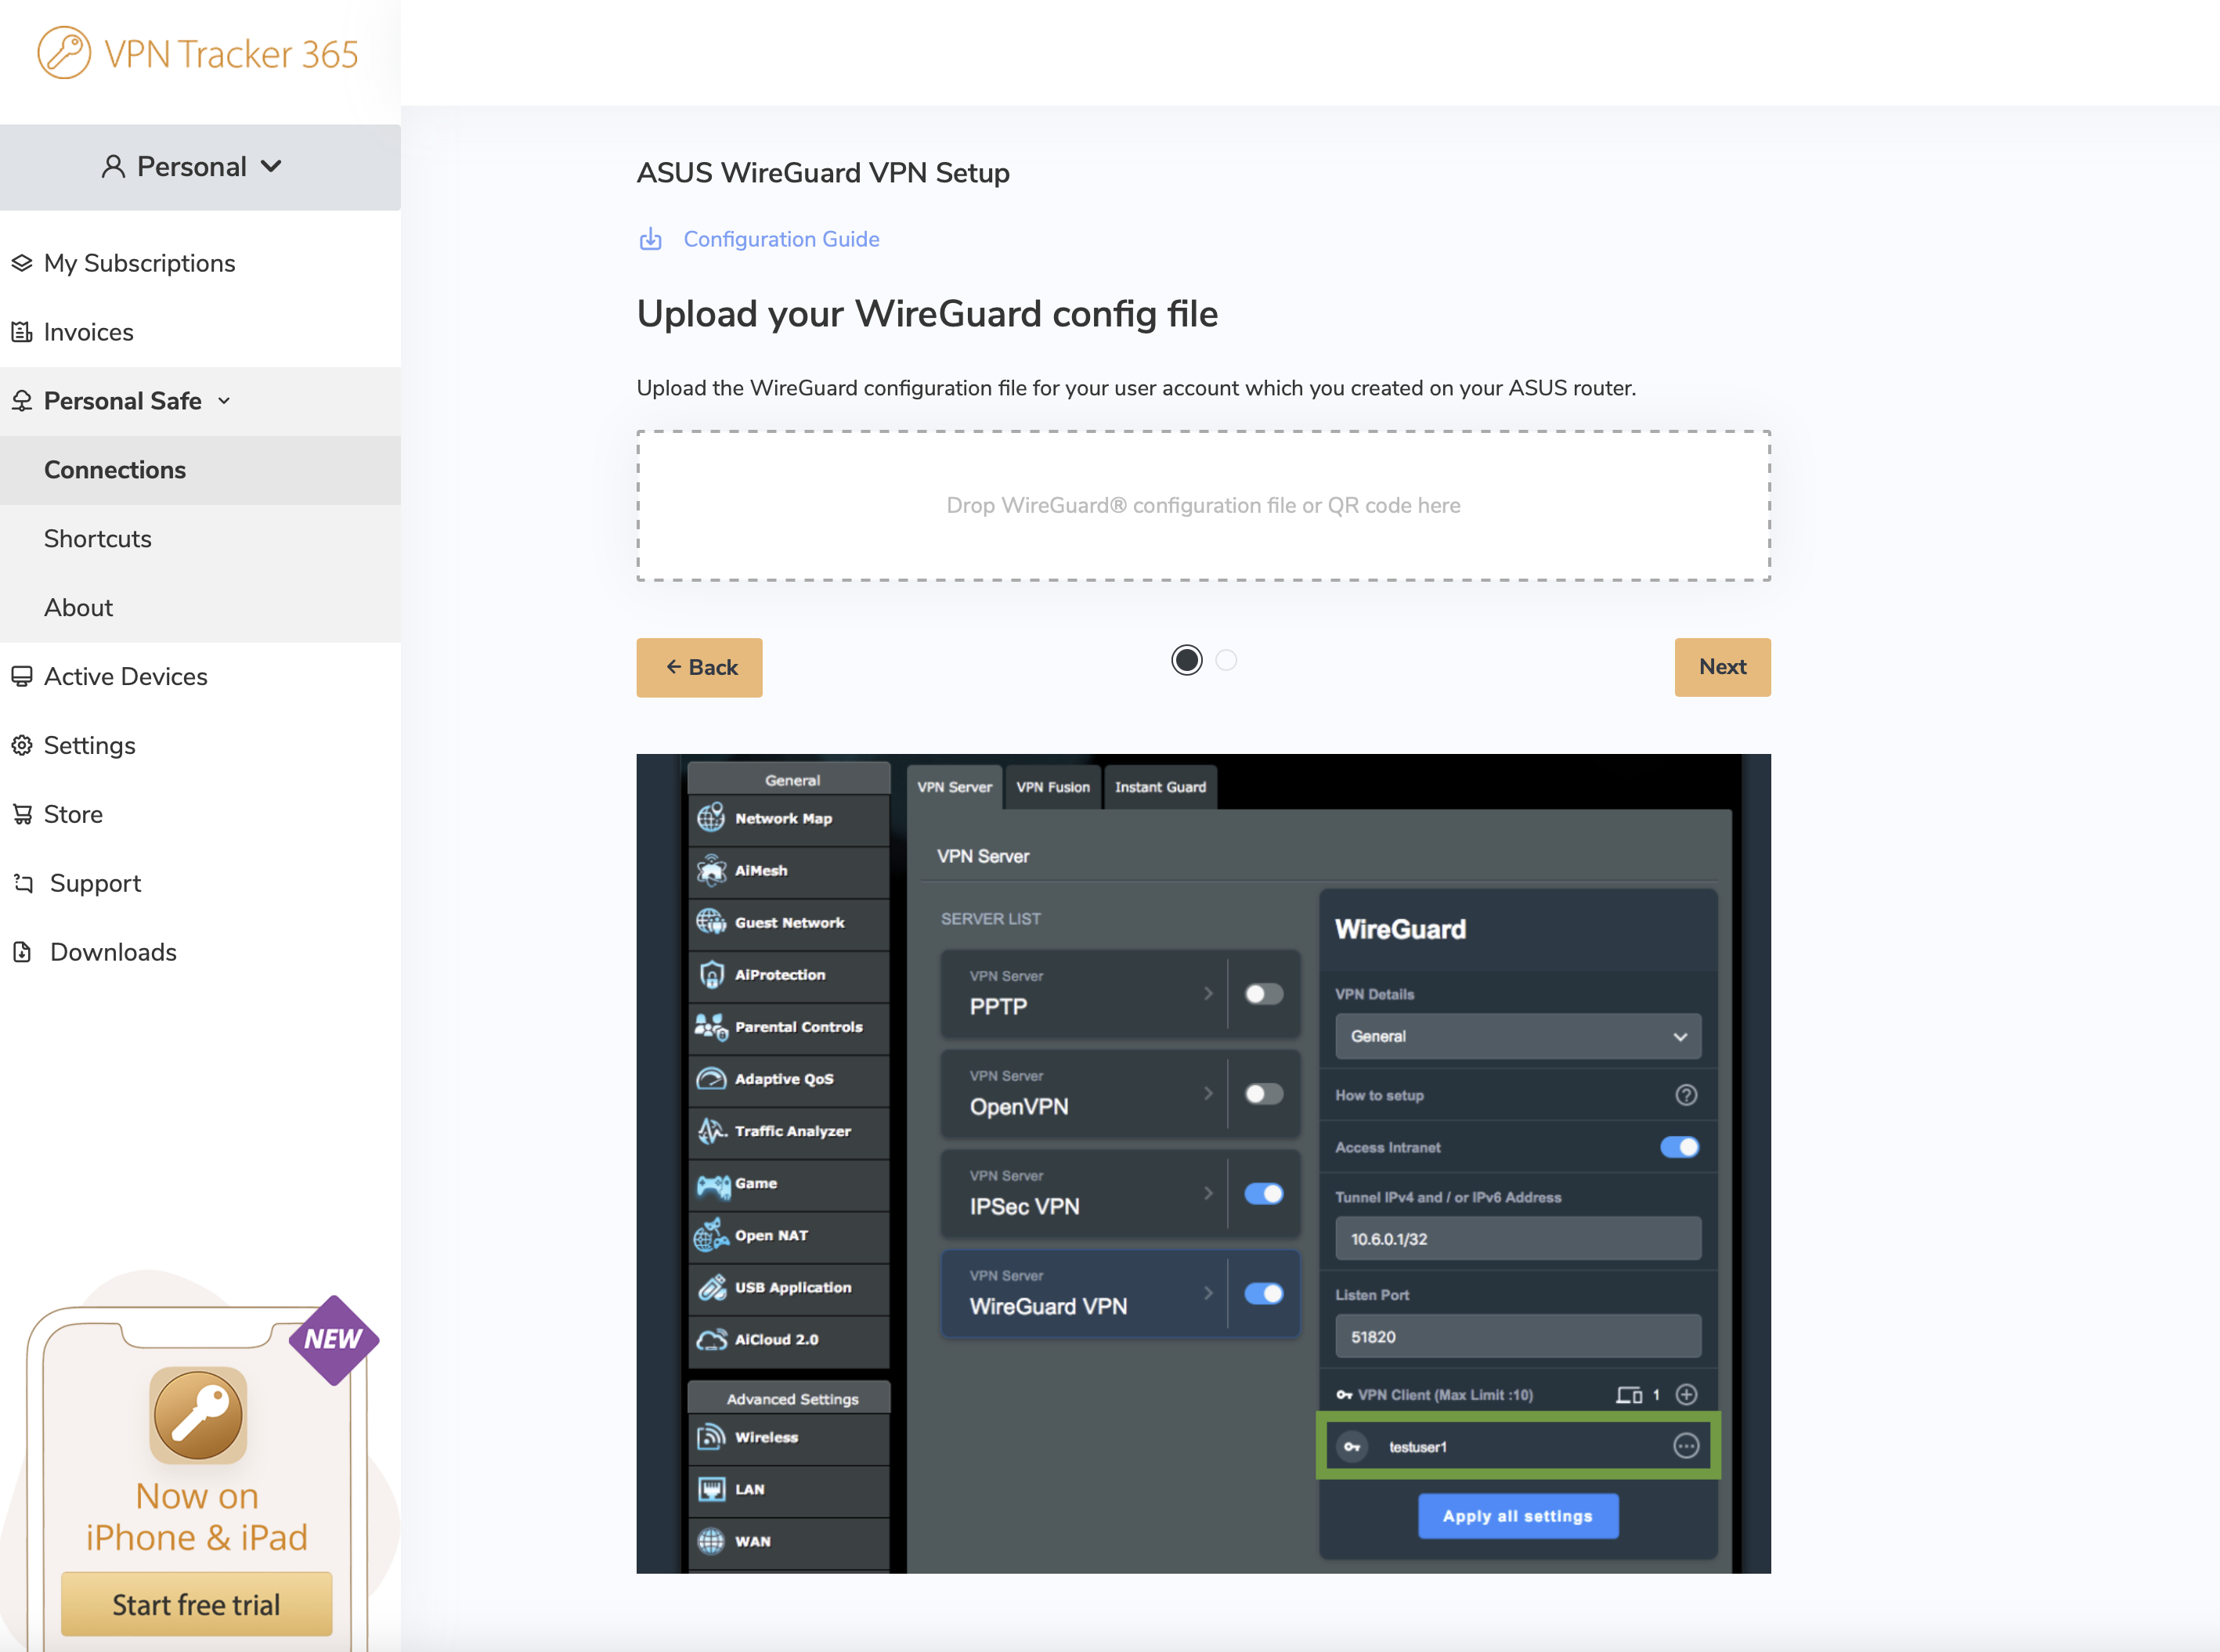
- Open the VPN Tracker Connection Creator for ASUS
- Scan your QR code with your iPhone or iPad or upload your WireGuard® configuration file to import your connection settings
- Save your connection in your account using end-to-end encryption for secure access on all your devices
Your VPN Tracker benefits
- Secure remote access to your company network, home office, and Smart Home - all in one app
- Use your own VPN gateway
-
Ready-made profiles for 300+ VPN devices
- Configuration wizard for a smooth and fast setup
- For Mac, iPhone, iPad
- Discover all features