Setting up VPN on your Windows Server 2019 is a practical way to get secure remote access to your files and data from another location - i.e. a home office, or on the go on your MacBook, iPhone or iPad.
In this guide, we take you through the basic steps of setting up SSTP VPN on a Windows Server 2019, including how to configure the connection in your VPN client for secure access on all your devices.
Configure SSTP VPN on Windows Server 2019
Step One: Install the Remote Access Server role
Before you get started, the Remote Access Server role is required to set up VPN on your Windows Server:
- Open the Server Manager Dashboard, go to Manage and select Add Roles and Features
- Choose Remote Access, check the box next to DirectAccess and VPN and click Next to finish installing
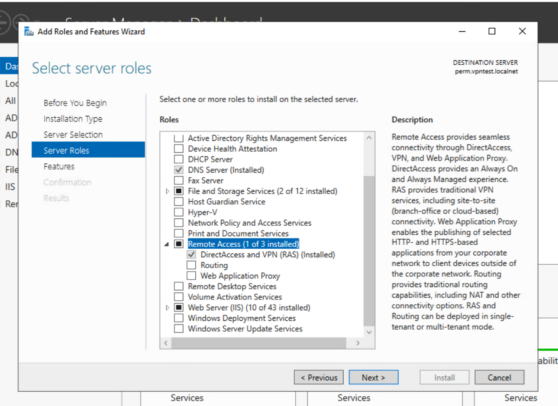
Install the Remote Access Server role to set up VPN on your Windows Server 2019
Step Two: Configure Remote Access
- In the Tools menu, click Remote Access Management to start the VPN configuration process
- If this is the first time you are configuring VPN on your Windows Server, you will see the Getting Started Wizard. Choose Deploy VPN only to open the RRAS Management Console and start configuring your VPN:
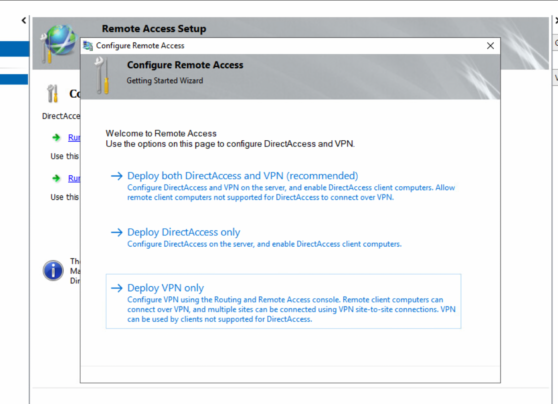
First timer? Use the Getting Started Wizard to begin the Remote Access configuration process
- Otherwise, you will directly open the RRAS Management Console (Routing and Remote Access.) Click Action > Add Server:
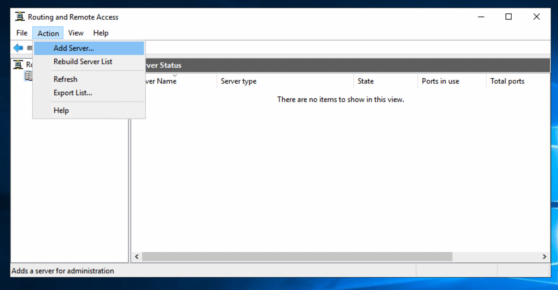
Add a new VPN server in the RRAS Management Console
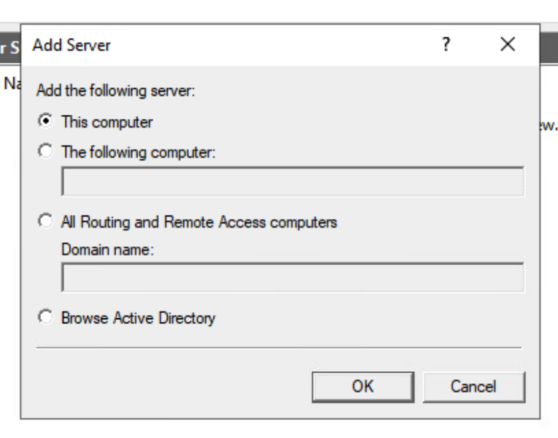
- In the next popup window, select This computer
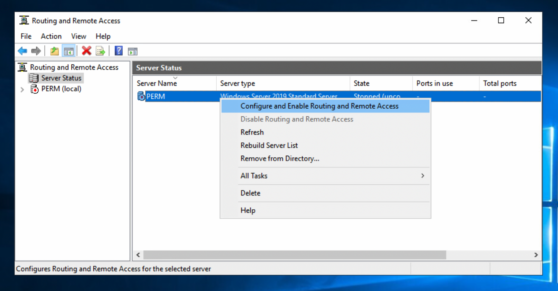
- Your server will now appear in the list. Right click the entry and select Configure and Enable Routing and Remote Access:
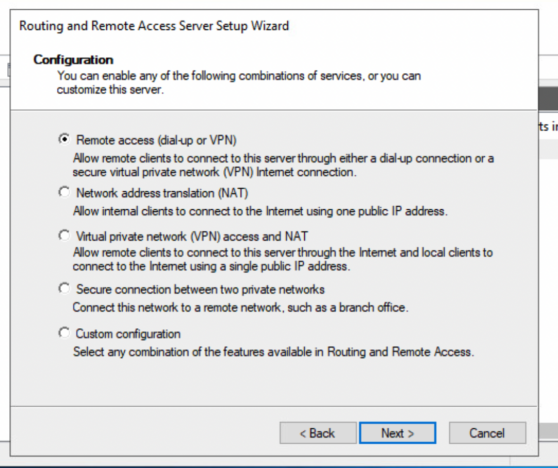
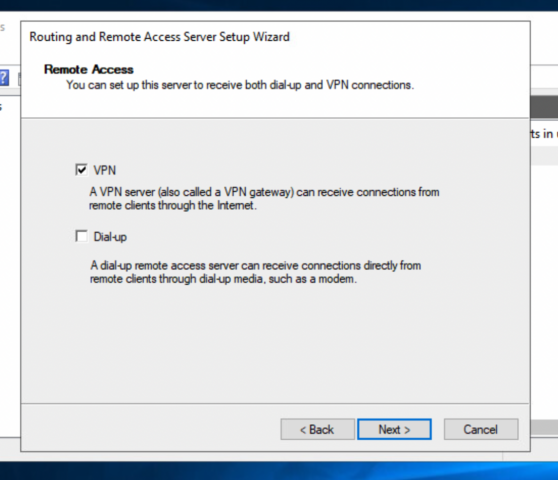
- The RRAS Server Setup Wizard will now appear. Click to enable Remote access (dial-up or VPN), then select VPN:
- In the next step, select the LAN IP Address. Your server will now appear in the list. Right click the entry and select Configure and Enable Routing and Remote Access:
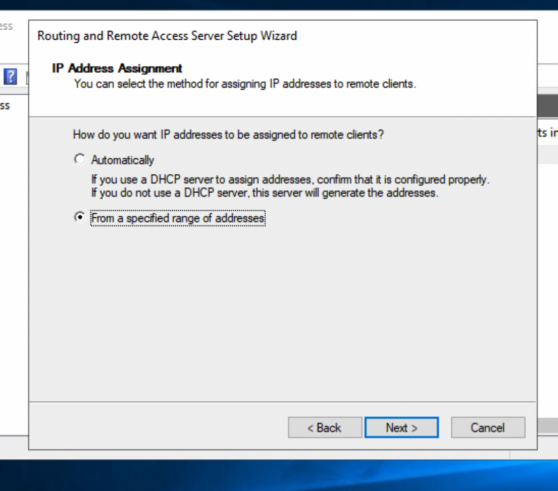
- IP Address Assignment: Here you should assign IP addresses From a specified range of addresses. Then, click New… and enter the desired IPv4 address range in the next step:
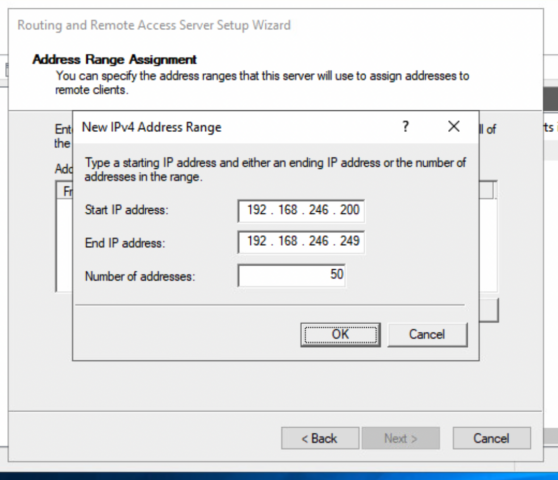
Enter the desired IPv4 address range here.
- Select No when asked whether or not to set up your VPN server to work with RADIUS
- The configuration is now complete. Click Finish to end the set up your new server:
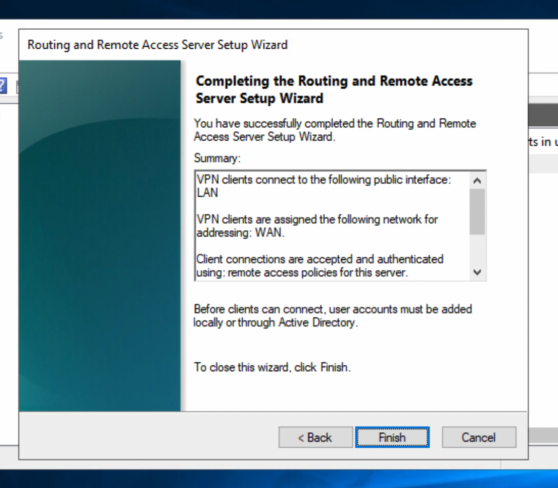
Click Finish to complete the configuration
Step Three: Configure your Windows Server 2019 VPN connection in the VPN client
To enable remote access to your Windows Server 2019 VPN on your other devices, you will need a VPN client. If you're a Mac or iOS user, VPN Tracker is a great choice that enables you to securely connect to your Windows VPN on your Mac, iPhone or iPad.
The next steps explain how to configure your new Windows Server 2019 VPN connection in VPN Tracker and get remote access on your other devices.
Setting up your Windows Server 2019 VPN in VPN Tracker
- Open the VPN Tracker Connection Creator for Windows Server 2019
- Under VPN Gateway, enter your Public IP Address or Host Name
- Under Authentication, you will need to enter your user credentials
- Depending on your setup, this will either be your regular login details for your Windows PC or your Active Directory login details. Not sure? Please contact your network administrator
Once you've filled in all the required fields, you can securely save and sync your connection in your VPN Tracker account for convenient access on Mac, iPhone and iPad.