In this guide, we’ll walk you through how to set up VPN for Sophos XGS Firewall using both IPsec and SSL protocols. Whether you’re a small‑business admin or IT pro at an enterprise, you’ll get step‑by‑step instructions for user setup, tunnel configuration, firewall rules, and seamless connectivity with VPN Tracker on Mac and iOS.
About the Sophos XGS Firewalls
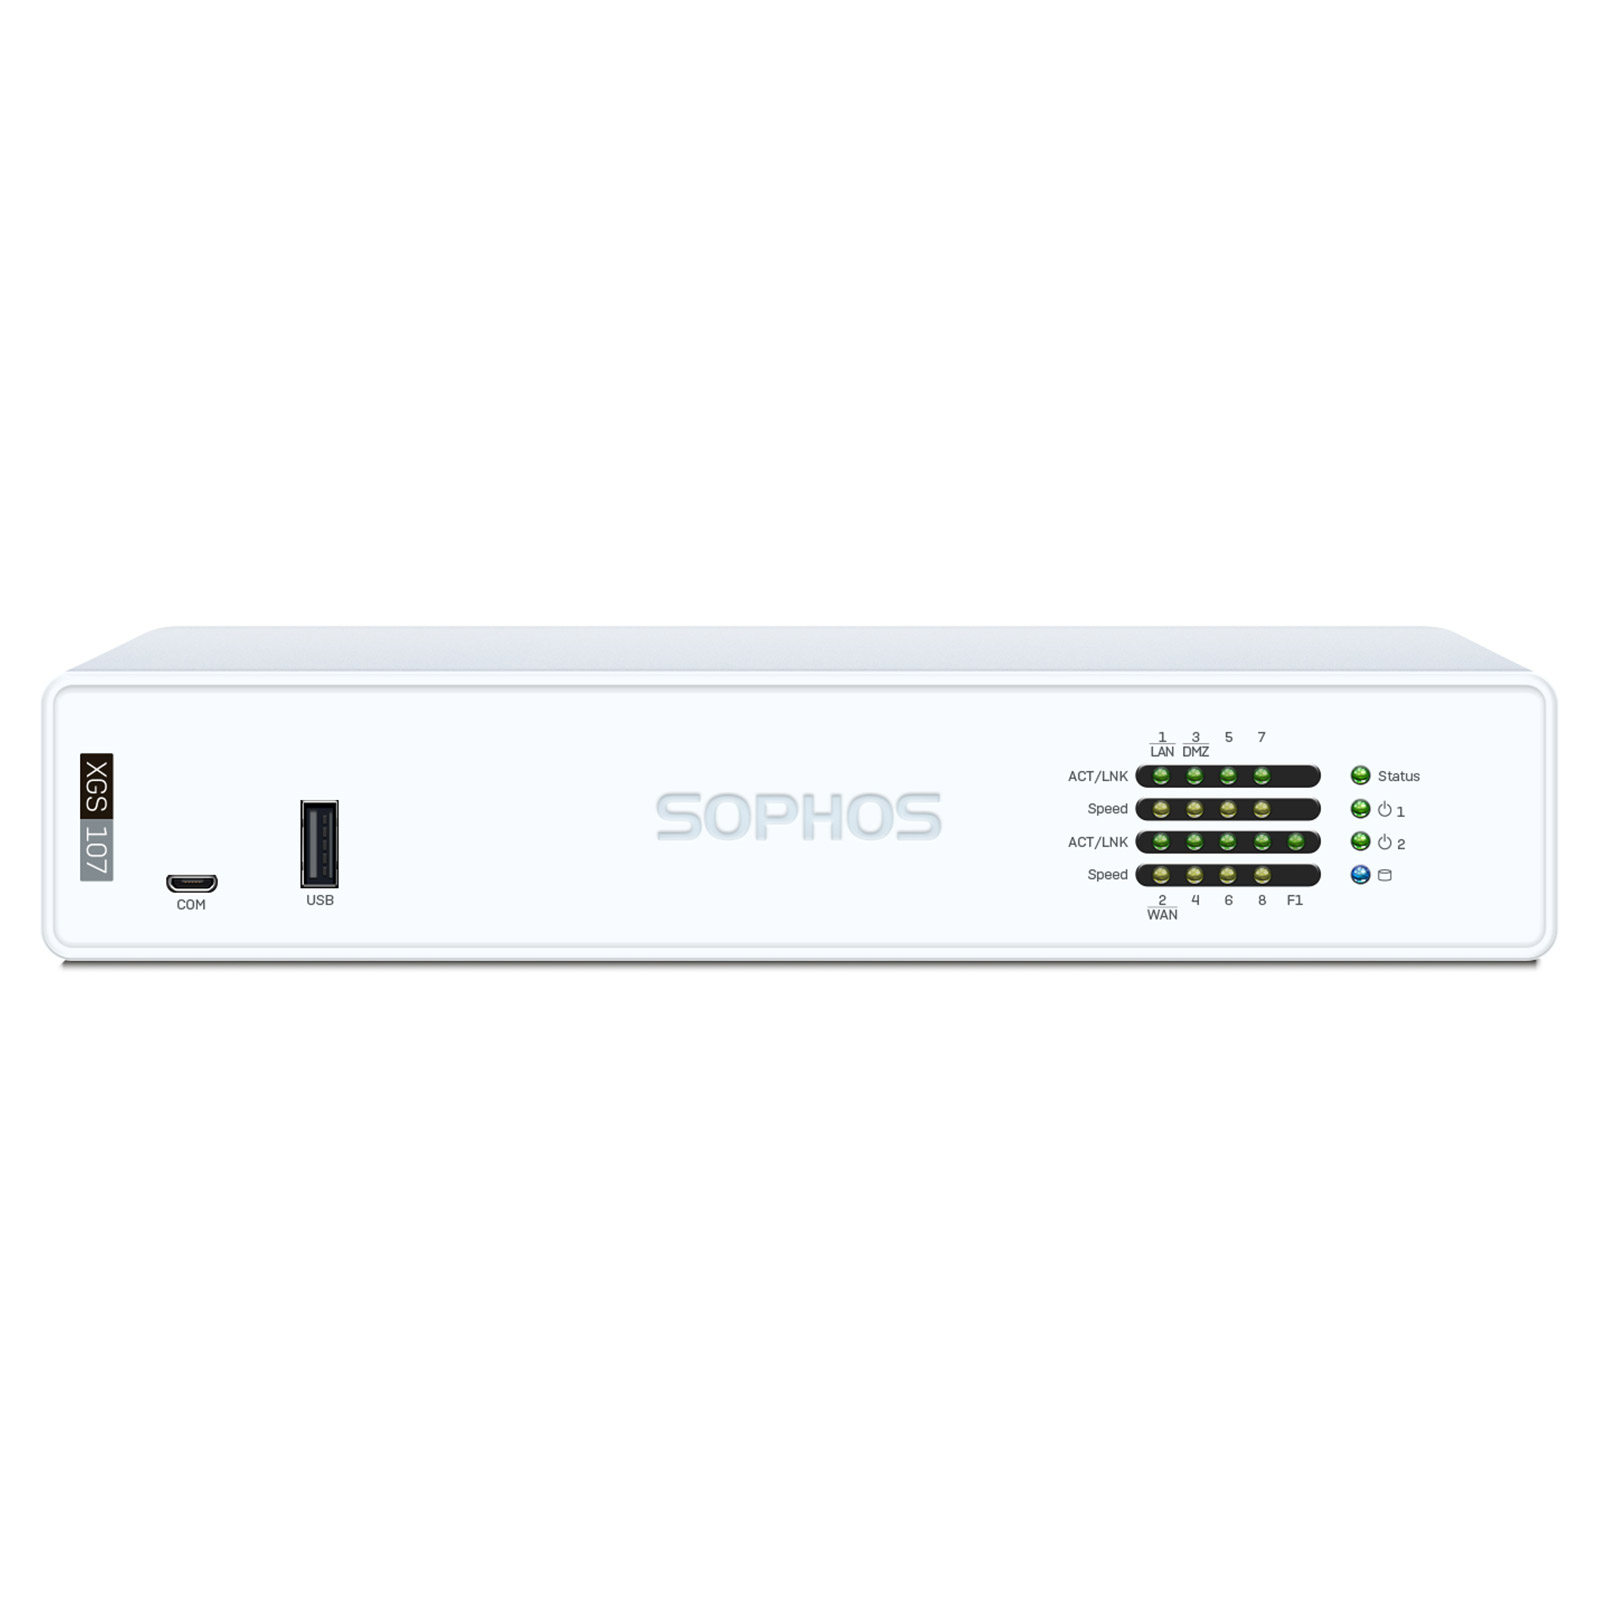
Sophos XG and XGS Next Generation Firewalls offer security-conscious business users high performance protection for their network.
These powerful VPN firewalls come with a diverse spec designed to suit a range of use cases, from private home office and small business users to branch offices, all the way up to enterprise and data center level. A sleek white design combined with essential security features, including a practical, cloud-based central management system for easier day-to-day management makes the series an attractive choice.
Jump to:
IPSec vs SSL VPN
When it comes to VPN, Sophos XGS firewall users have the choice between IPsec and SSL, both of which are fully supported in VPN Tracker for Mac and iOS.
Generally, we would recommend using IPsec VPN wherever possible, as it provides faster connection speeds and is more stable. However, SSL VPN is compatible in more network locations - making it a good fallback choice when IPsec is not available (i.e. due to network restrictions.) Overall, both standards are considered equally secure for your business.
This guide explains step-by-step how to configure both IPsec and SSL VPN on your Sophos firewall, as well as how to set up your VPN in VPN Tracker and get connected on Mac, iPhone and iPad.
Important note: This guide applies to Sophos XG/XGS firewall models using firmware version SFOS 18.5.2 and newer. If you are using an older XG model, please check out our Sophos XG Legacy IPsec guide.
First step: Add VPN users to your Sophos firewall
Before you get start setting up your VPN tunnel, you’ll need to add VPN users to the firewall. These are the users who will have access to the VPN once it has been configured (i.e. members of staff.)
The easiest way to do this is by creating a new User Group. This allows you to configure VPN access for an entire group instead of for individual users and, if you need to add more users later on, you can simply add them to the group instead of updating the entire VPN configuration.
Please note, each user you add here will have their own unique username and password which will be required later to access the VPN.
- Log into the web interface of your Sophos firewall and go to Authentication > Groups
- Click Add to set up a new User Group(e.g. VPN Users) and add your team members
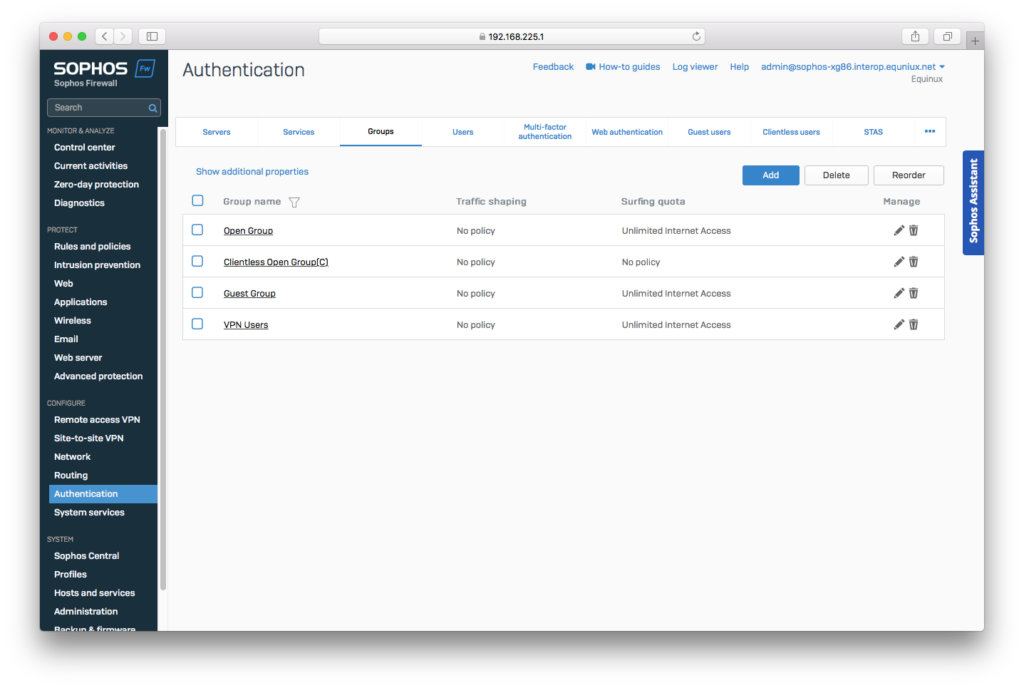
Add User Groups for team members who need VPN access
- You can now configure your VPN tunnel:
Configure IPsec VPN on your Sophos XG / XGS firewall
Configuration checklist
Throughout this guide there will be certain pieces of information which are needed later on for configuring IPsec VPN in the VPN client. This information is marked within the guide so it is easier for you to reference:
- Device Host Name or Public (WAN) IP Address - if in doubt, you will find this in the network overview of your firewall’s web interface
- Pre-shared Key
- Local Identifier
- Remote Identifier
- Sophos User Login
- Sophos User Password
Step One: Add a new IPsec VPN profile
- Go to Configure > Remote Access VPN > IPsec
- Select Enable next to IPsec remote access
- For Interface, choose Port 2
- For IPsec profile, choose DefaultRemoteAccess
- For Authentication type, choose Preshared key, then enter a secure password (2) in the field below (make a record of this, as you will need it to access your connection later)
- Local ID: Select DNS and enter a name of your choice. In this case, the Local ID is the ID of the firewall, e.g. “sophos” (3)
- Remote ID: Select DNS and enter a name of your choice. In this case, the Remote ID is the ID of the VPN client, e.g. “vpntracker” (4) - please note the roles will be reversed in the VPN client and the Local ID will become the Remote ID!
- Allowed users and groups: Select the User Group you configured in the first step. You can add multiple groups and single users if you wish
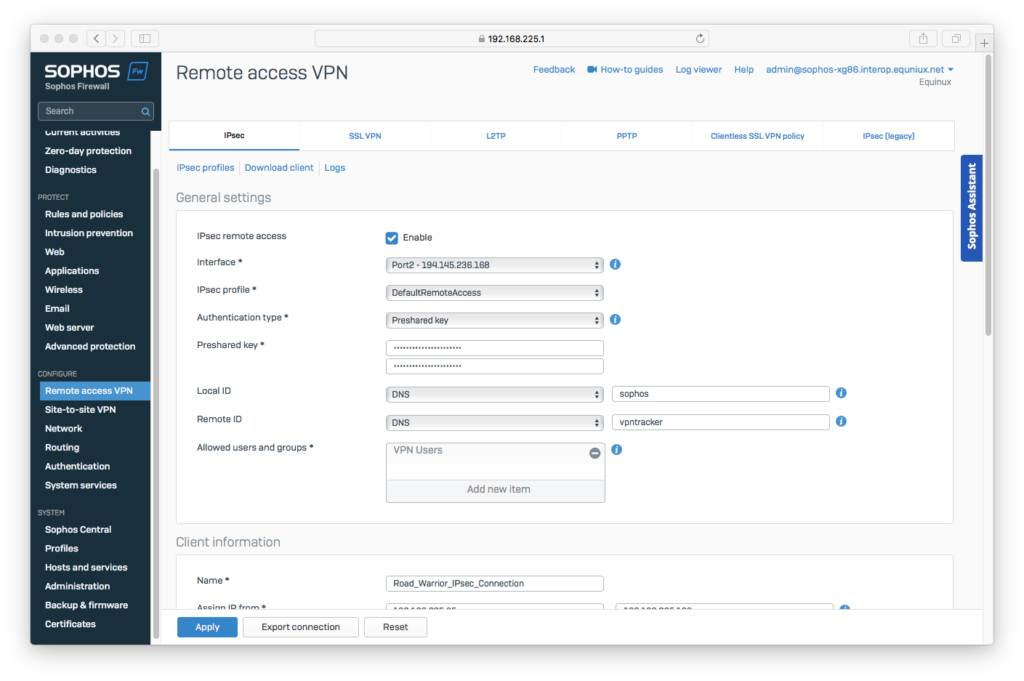
Set up your new Sophos IPsec profile
- Client information > Name: Can be chosen freely
- Assign IP from: Enter the IP address range for your new network in full (e.g. 192.168.255.65 - 192.168.255.126.) - ensure this address range does not collide with an existing network (i.e. is not part of the LAN or any other existing remote network).
Important: If the Sophos firewall is not the primary gateway of the remote network, a static route to the Sophos must be set on the primary gateway for the address range above, otherwise no reply traffic will come back over the VPN. - DNS server 1 + 2: These are optional and can be left blank if you don’t want to configure DNS.
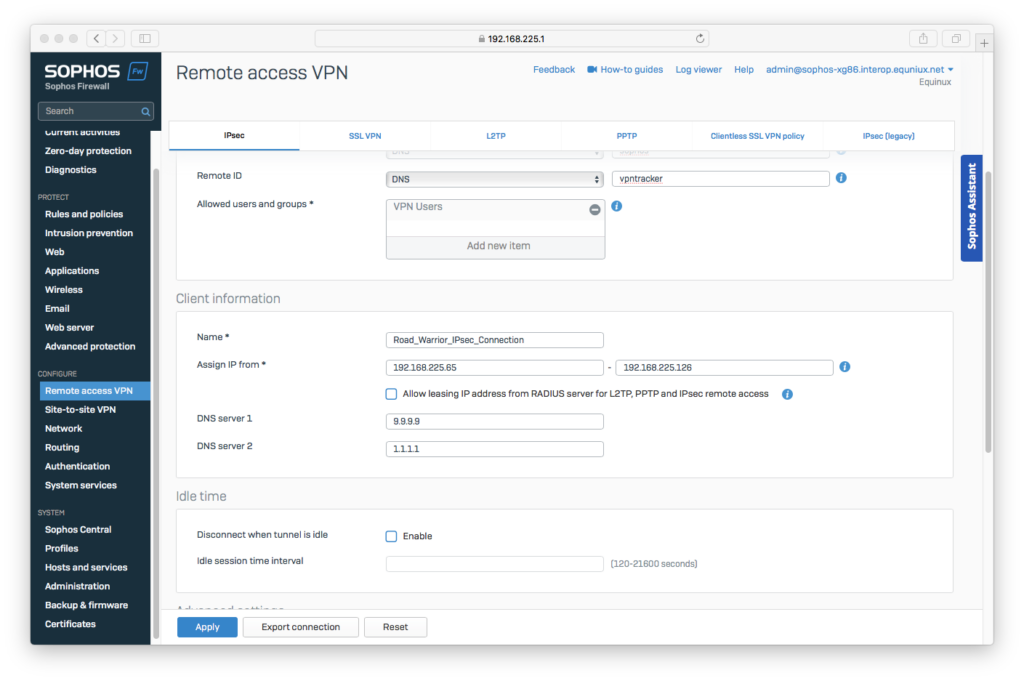
Enter the IP address range for the VPN
Advanced settings > Use as default gateway: Here you can determine which remote network addresses should be accessible via the VPN:
- If you want to tunnel all traffic through the VPN click the slider to Use as default gateway
- If you want to set up split tunneling and only allow access to specific remote network addresses through the VPN, you will need to specify the LAN addresses in the box Permitted network resources
- If you need to configure a new network object to use here, select Add new item > Network and enter your details in the pop up window
- Click Apply to save your configuration
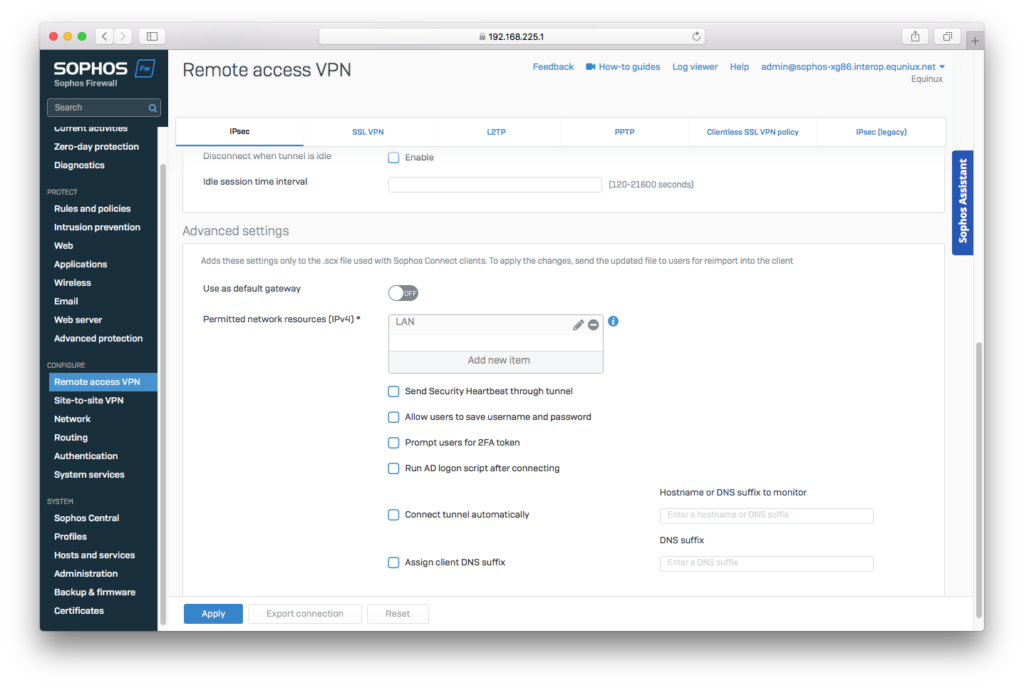
Determine which remote network addresses should be accessible through the VPN
Step Two: Configure the firewall access rules
Once you have configured your IPsec VPN tunnel, you can set up access rules on your firewall. This determines which services will be made available over the VPN.
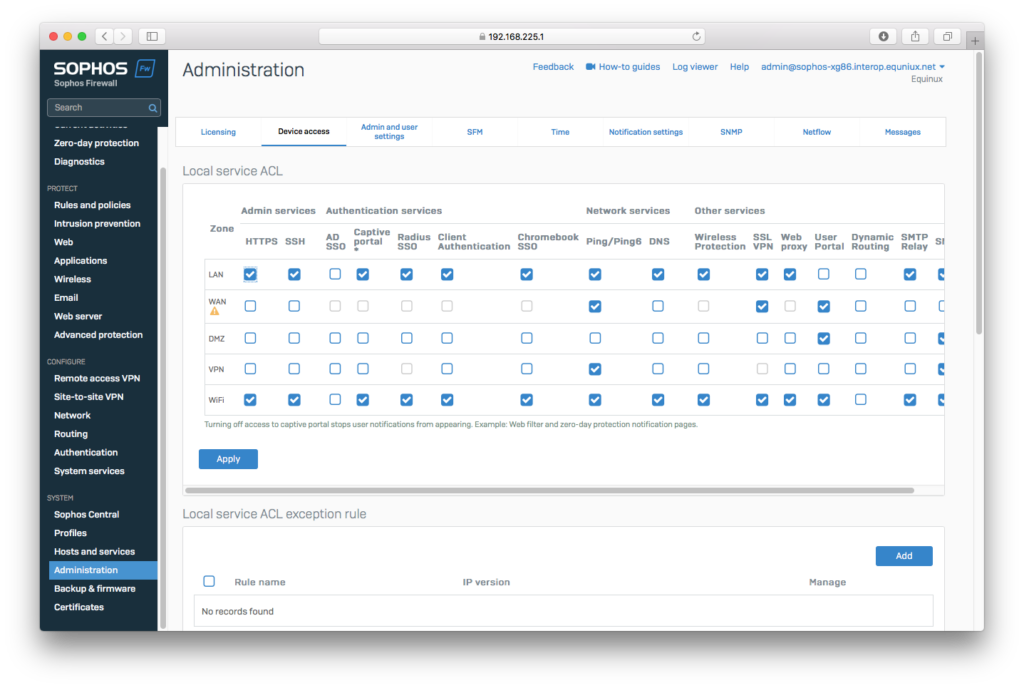
- Go to System > Administration > Device access
- Go to the table Local service ACL. In the row VPN, check the box to enable the respective service over VPN. You are free to choose which services you wish to make available, however, enabling Ping/Ping6 for debugging purposes is strongly recommended
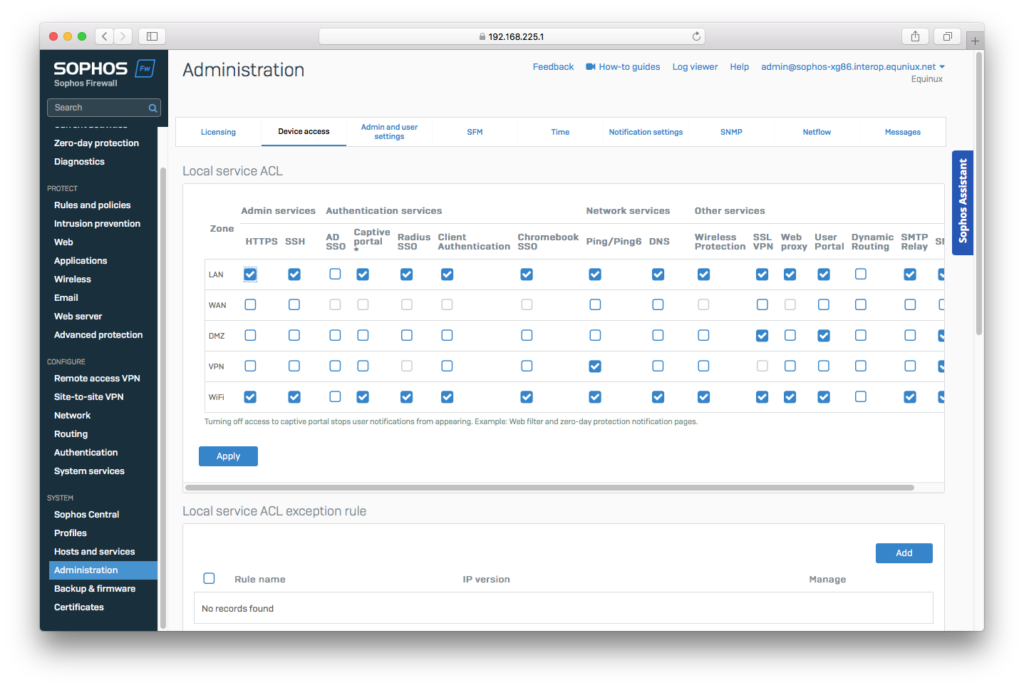
Choose which firewall services should be accessible via the VPN
Step Three: Add a new firewall rule
- Go to Protect > Rules and policies > Firewall rules
- Click Add firewall rule > New firewall rule to create a new rule, then choose a Rule name (e.g. VPN Access)
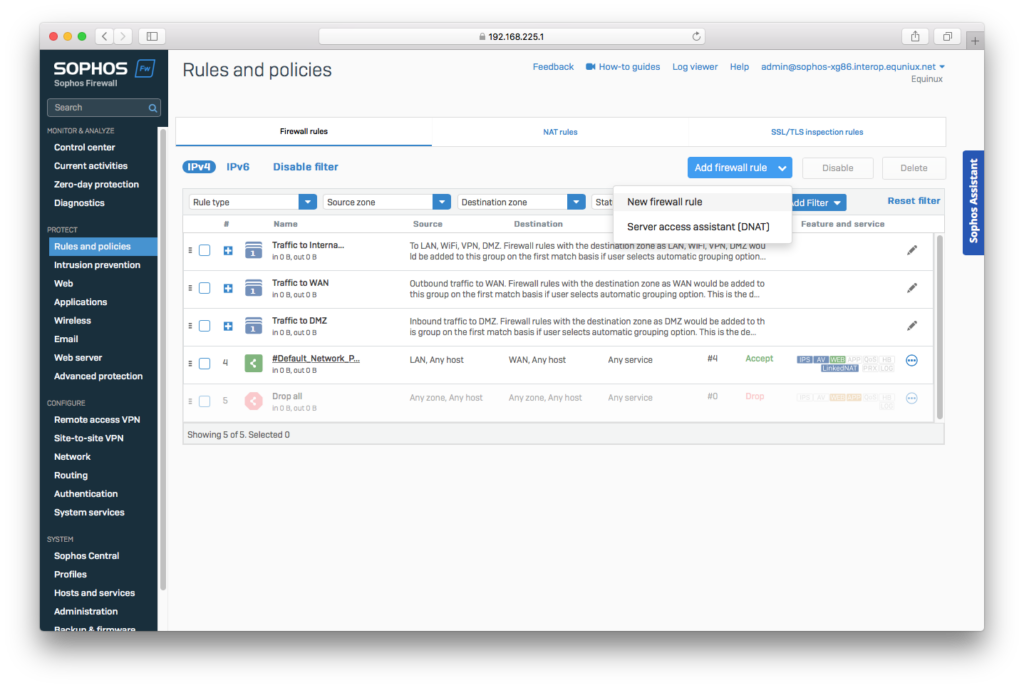
Add a new firewall rule for your new IPsec VPN connection
- Go to Source > Source zones. Here you can choose the zone to apply the new rule. In this case, you should choose VPN
- Go to Destination and services > Destination zones. Here you can choose the zones your VPN users will have access to. Most likely you will add LAN to enable remote access, but you can also choose other zones such as VPN, WiFi, and DMZ if desired
- Click Save to finish configuring the new firewall rule
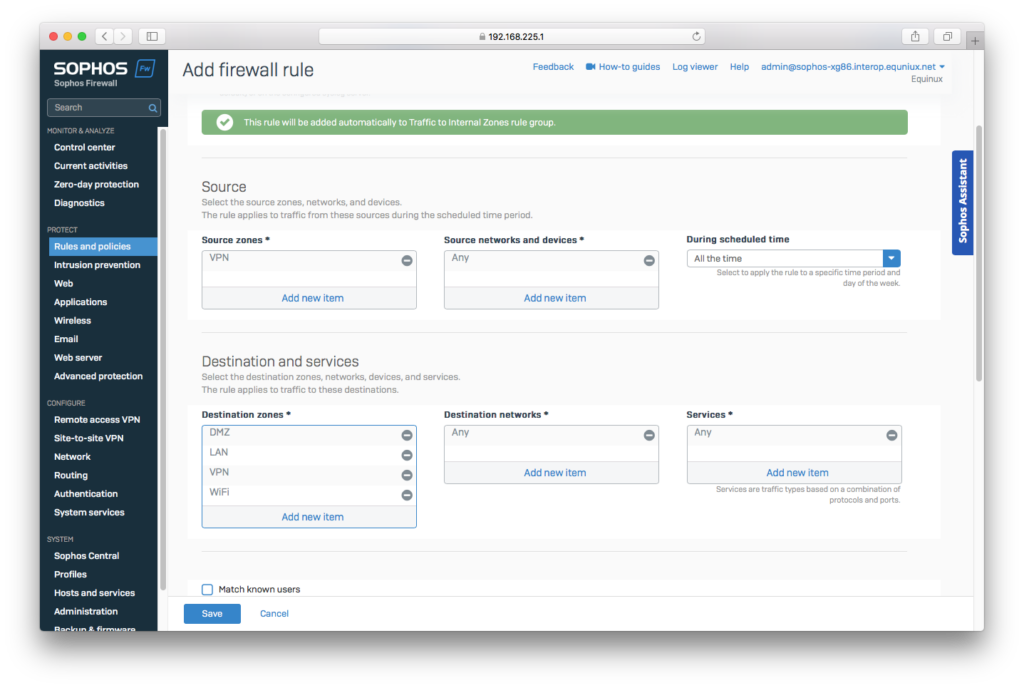
Select the source zone where the rule should apply and select which destination zones should be available
Connect to your new Sophos IPsec VPN tunnel in VPN Tracker
In order to connect to the new IPsec VPN tunnel and get secure remote access to your Sophos XGS firewall, you will need a VPN client.
VPN Tracker supports IPsec VPN connections on Mac, iPhone and iPad!
Follow these steps to connect to Sophos VPN:
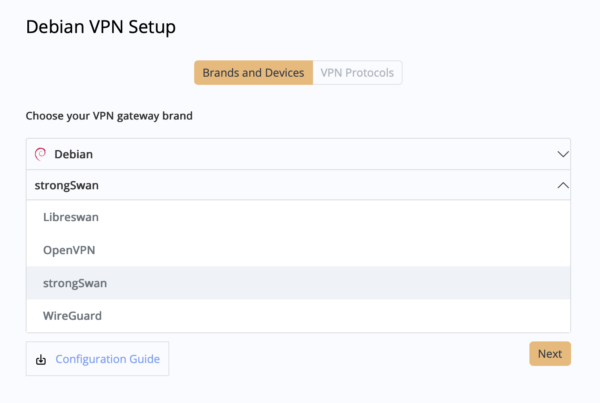
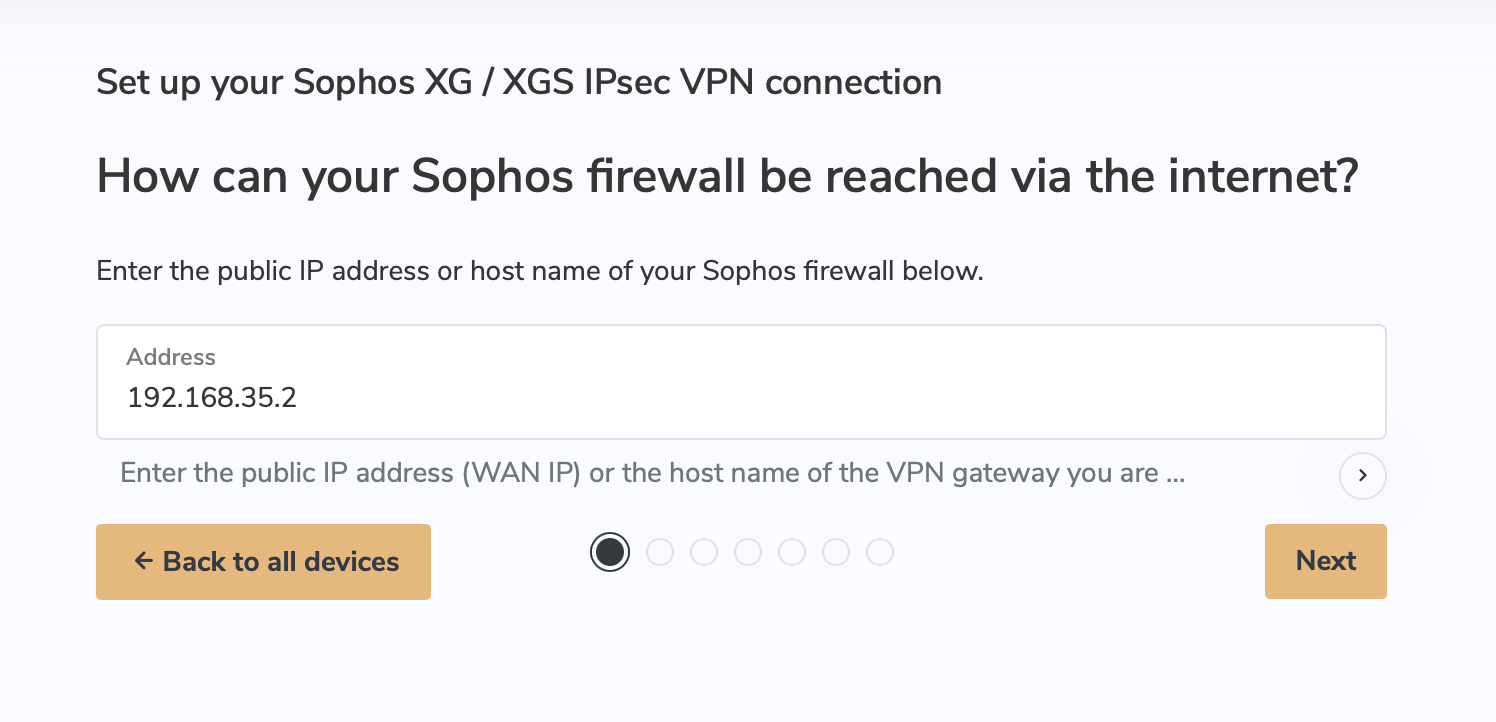
- Open the VPN Tracker Configuration Wizard for Sophos
- Enter the Host Name or IP Address (1) of your Sophos firewall. If in doubt, you will find this on the network overview in the web interface of your device
- Now follow the remaining steps in the wizard, referring to the information your configuration checklist
- Save your connection to your VPN Tracker account for secure remote access on Mac and iOS
You can now connect to your Sophos XGS firewall via IPsec VPN on Mac, iPhone or iPad.
Configure Sophos SSL VPN on your Sophos XG / XGS firewall
Step One: Add a new SSL VPN Tunnel
- Go to Configure > Remote access VPN > SSL VPN
- Click Add to configure a new tunnel:
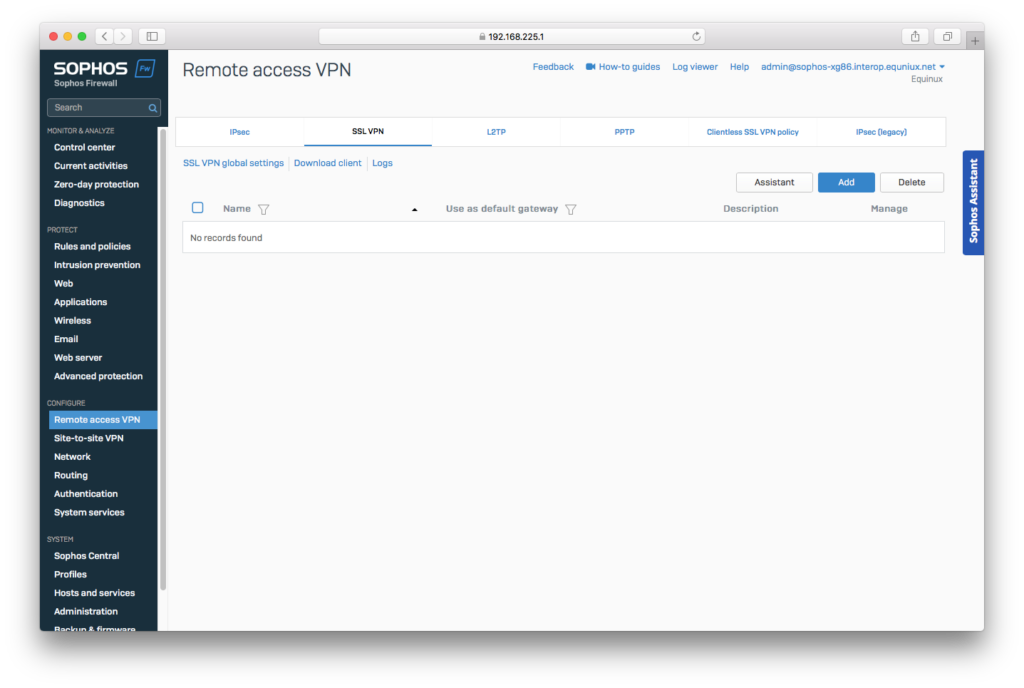
Add a new SSL tunnel
Step Two: Configure the SSL tunnel
- Choose a name for your new SSL tunnel (e.g. SSL Remote Access)
- By Policy members, select Users or a User Group that should have VPN access
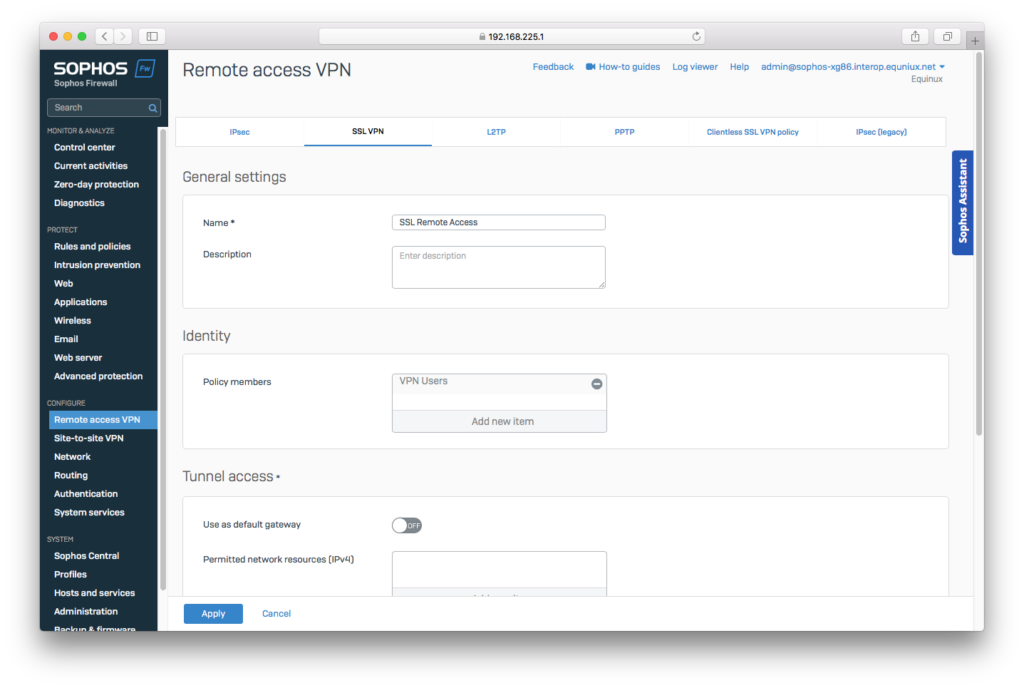
Select the user group(s) who require access
Tunnel access: Here you can determine which remote network addresses should be accessible via the VPN tunnel.
- If you want to tunnel all traffic through the VPN click the slider to Use as default gateway
- If you want to set up split tunnelling and only allow access to specific remote network addresses through the VPN, you will need to specify the LAN addresses in the box Permitted network resources
- Click Apply to save the new tunnel
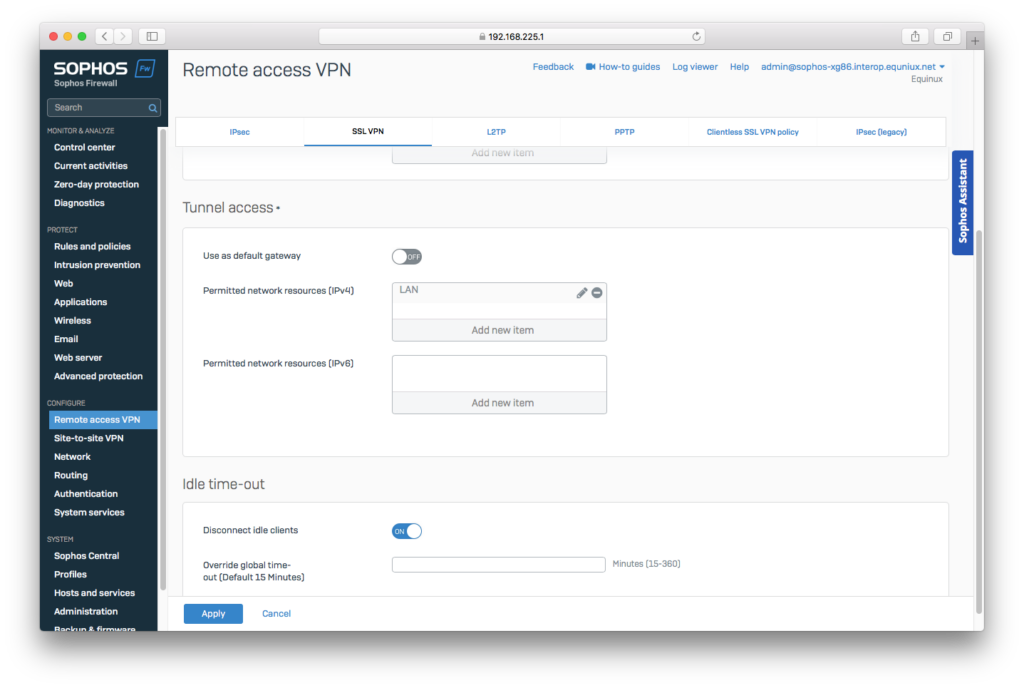
Should all traffic go through the VPN or will you only permit access to specific addresses?
Step Three: Configure SSL Global Settings
In this step, you can configure global settings for your new SSL tunnel, as well as any additional tunnels you add in the future.
- Under the SSL VPN menu, click SSL VPN global settings
- Select and apply the following settings:
- Protocol: Choose between TCP and UDP. UDP offers a much faster performance - great if you’re only using SSL VPN, however, if you have both SSL and IPSec VPN, TCP is generally more compatible and will work in more locations
- IPv4 addresses: Enter your desired network range, making sure these addresses don’t overlap with any existing networks
- IPv4 DNS: Optional - leave blank if you do not wish to set this up
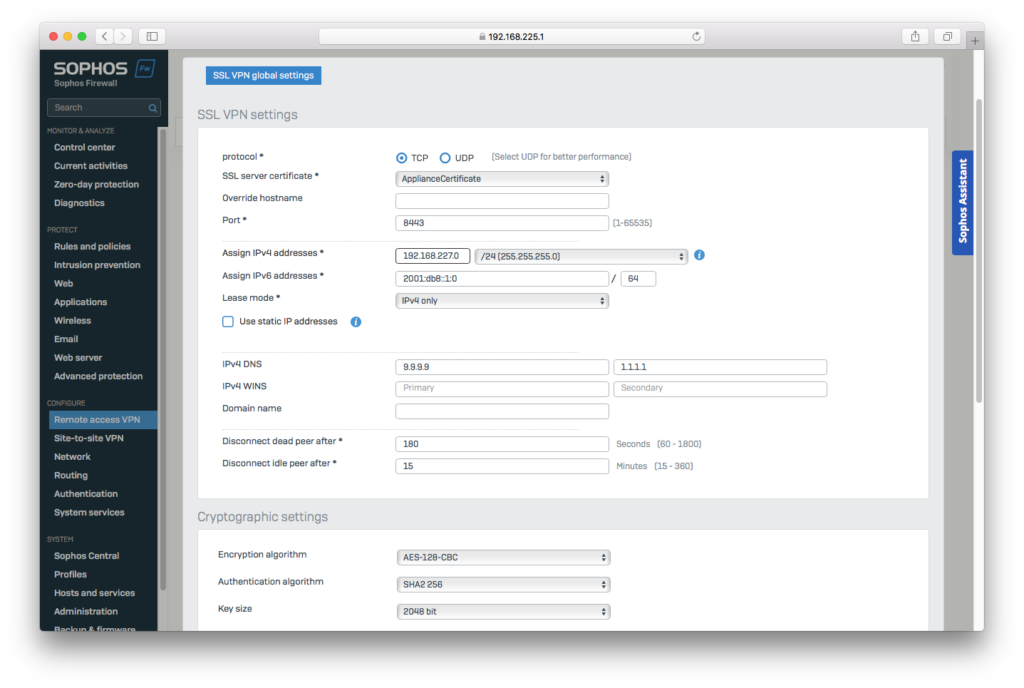
- Encryption algorithm: We recommend AES-128-GCM for the best performance
- Click Apply to save your new settings
- Protocol: Choose between TCP and UDP. UDP offers a much faster performance - great if you’re only using SSL VPN, however, if you have both SSL and IPSec VPN, TCP is generally more compatible and will work in more locations
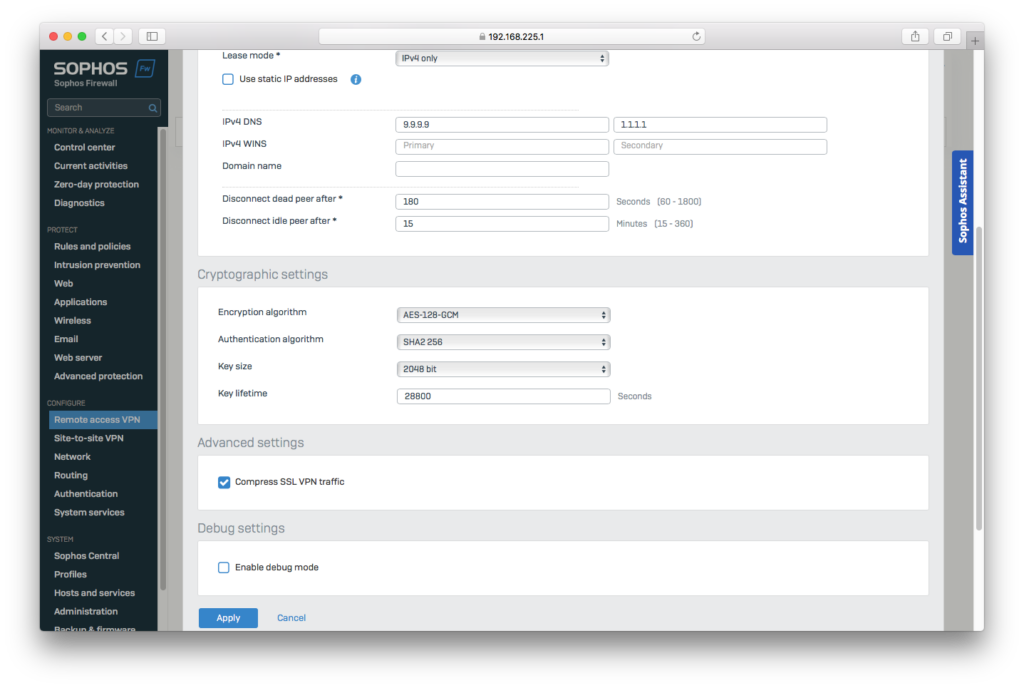
Apply your SSL global settings
Step Four: Configure SSL VPN WAN Access
In order to reach your network remotely, you need to configure SSL VPN to be available for the WAN zone.
- Go to System > Administration > Device access
- Under the column SSL VPN, check the box to enable the WAN zone
Important: In order to log into the firewall’s User Portal (needed to download the configuration file in the next step), you should also check User Portal on LAN and/or WAN zones. When you are done, click Apply.
Configure WAN access for your SSL tunnel
Step Five: Download your configuration file
The last step requires the user to download the .ovpn configuration file from the firewall’s User Portal.
Note: If you are still logged in as the admin, you should log out of the admin UI and log back into the regular User Portal with your username and password to download your connection.
- Log in to the User Portal and go to VPN in the sidebar menu
- Go to VPN configuration > SSL VPN configuration and choose Download for Android and iOS
- You can now download your .ovpn configuration file to use to set up VPN on your device
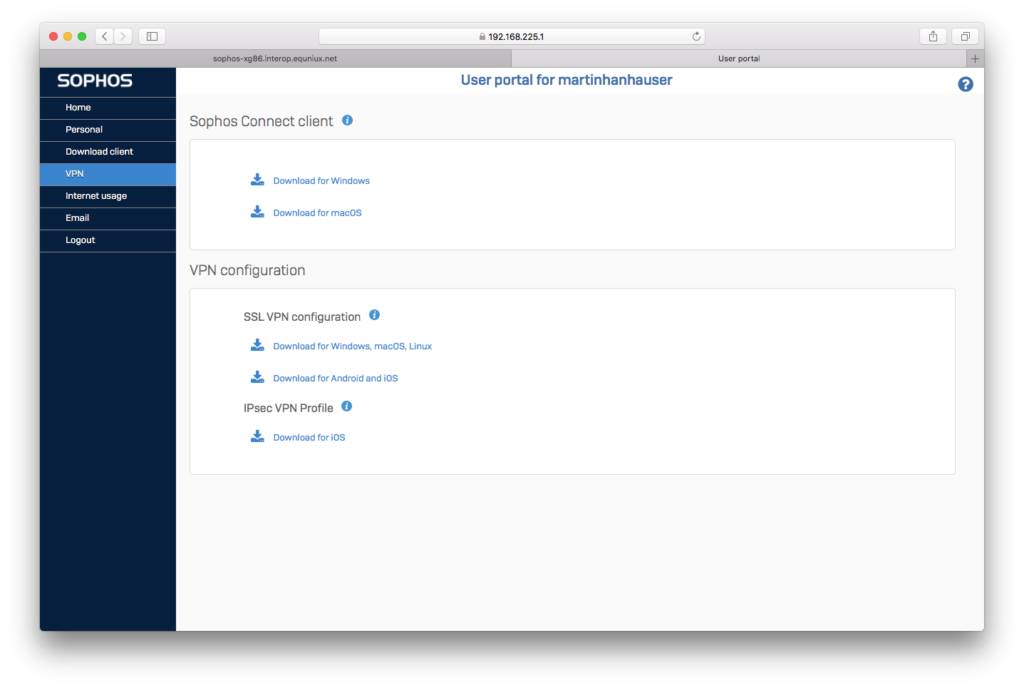
Download your .ovpn configuration file from the User Portal
Connect to your new Sophos SSL VPN tunnel
In order to connect to the new SSL VPN tunnel and get secure remote access to your Sophos XGS firewall, you will need a VPN client.
VPN Tracker supports SSL VPN connections on Mac, iPhone and iPad!
Follow these steps to configure a connection:
- Open the VPN Tracker Connection Creator for Sophos XG/XGS
- Upload your .ovpn configuration file
- Give the connection a name and save your connection in your account using secure end-to-end encryption
You can now connect to your Sophos XGS firewall via SSL VPN on Mac, iPhone or iPad.
Share a Sophos VPN connection with your team
Configuring VPN for multiple users? VPN Tracker makes it easier than ever to roll out pre-configured VPN connections to team members using secure, end-to-end encrypted, cloud-based technology.
Select Share with Team to instantly share the new connection with team members using TeamCloud and grant them secure VPN access on Mac, iPhone and iPad. For example, for SSL VPN connections, end users won't need to log in to the User Portal and download the configuration for themselves, as it will be ready and waiting for them in their VPN Tracker account. Learn more.
Tip: You can even choose to hide the connection settings for complete zero-trust privacy.
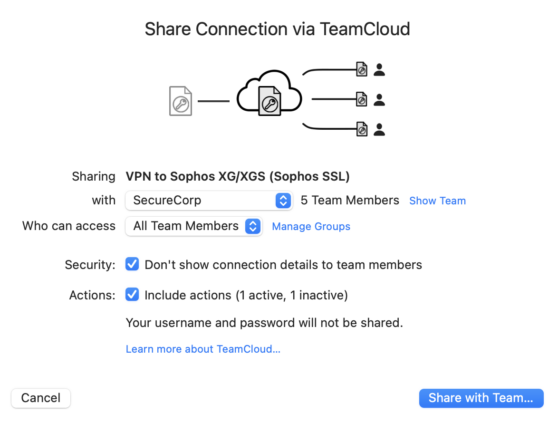
Use TeamCloud technology to securely share VPN connections with team members
Once a team member has received their connection, all they need to do is use their unique Username and Password from the Sophos gateway to access the VPN in VPN Tracker.