A practical, Mac-focused guide for IT admins and decision-makers who need to migrate to WireGuard® VPN from legacy VPN protocols (IKEv1, L2TP/IPsec, OpenVPN) — with zero downtime.
Quick Links
- Why Should My Business Migrate to WireGuard VPN?
- Legacy VPN Setups – Risks and Problems
- Benefits of WireGuard VPN
- Why Use VPN Tracker Instead of the WireGuard App
- Step-by-Step: Setting Up WireGuard in VPN Tracker
- Common Pitfalls and How to Avoid Them
- Wrap-Up: Upgrade to WireGuard the Smart Way
Why Should My Business Migrate to WireGuard VPN?
Legacy VPN protocols—like IKEv1, old L2TP/IPsec implementations, and some older OpenVPN setups—are increasingly problematic for modern Mac environments. They often require complex configuration, break on macOS updates, and take more time to maintain. For many users, WireGuard offers a modern alternative: smaller codebase, faster connection times, and easier configuration—features that particularly benefit Mac-first teams and distributed workforces.
Legacy VPN Setups – Risks and Problems
If you’re still running older VPN setups, you’ll likely recognise some of these recurring problems:
- macOS compatibility issues: System updates can change networking behavior and break legacy VPNs.
- High support overhead: Each user or device may need manual configuration or troubleshooting.
- Performance limitations: Slow handshakes and higher latency impact remote workflows (large file transfers, video calls).
- Security and maintenance burden: Older protocols often require more certificates/keys and more frequent renewals.
- Scaling friction: Adding/removing users or rolling out changes takes significantly more time.
These risks translate into real costs: lost productivity, repeated help-desk tickets, and the exposure that comes with unpatched or deprecated configurations.
Benefits of WireGuard VPN
WireGuard is a modern VPN protocol designed to be lightweight and secure, using contemporary encryption primitives such as ChaCha20 and the Noise framework. Its configuration is simpler than many legacy VPN protocols, with single text-based files that can be easily distributed or automated. WireGuard also offers improved performance, including faster handshakes and lower overhead, which can reduce latency and speed up reconnections. Finally, it is supported across major platforms, including macOS and iOS, making it easier to maintain a consistent setup for Mac-based teams.
Why Choose VPN Tracker for WireGuard?
For individual users, the WireGuard app may work fine. But for Mac-based teams, it quickly becomes unmanageable. VPN Tracker for Mac solves the challenges that the WireGuard app alone cannot:
- Centralized team management: No insecure emailing of .conf files or manually configuring each Mac. Admins can assign, update, and revoke connections for all users from one dashboard
- Access control & security: Rotate or revoke keys remotely without touching devices — something the standard WireGuard app does not provide
- Staged rollouts: Use publishing to roll out connections gradually to different users or departments, avoiding mass cutovers and potential downtime
- Monitoring & troubleshooting: Track who is connected, verify tunnel health, and access logs in real time — a capability missing from the WireGuard client
- Mac-first experience: Fully integrated with macOS and iOS, providing native notifications, smoother setup, and better UX than the standalone app
- Hybrid VPN support: Manage WireGuard alongside IKEv2 or other legacy protocols from one interface — essential for teams migrating gradually
Bottom line: For Mac teams who need scale, reliability, and control, VPN Tracker is the only viable solution.
In the following section, we’ll show exactly how to import WireGuard connections into VPN Tracker and roll them out to your team.
Step-by-Step: Migrate Your Team to WireGuard in VPN Tracker
This guide assumes you already have a VPN Tracker team set up. If not, download VPN Tracker on your Mac and go to File > New > Team in the app toolbar. Once you've created a Team, you can add staff under Members > Invite Members.
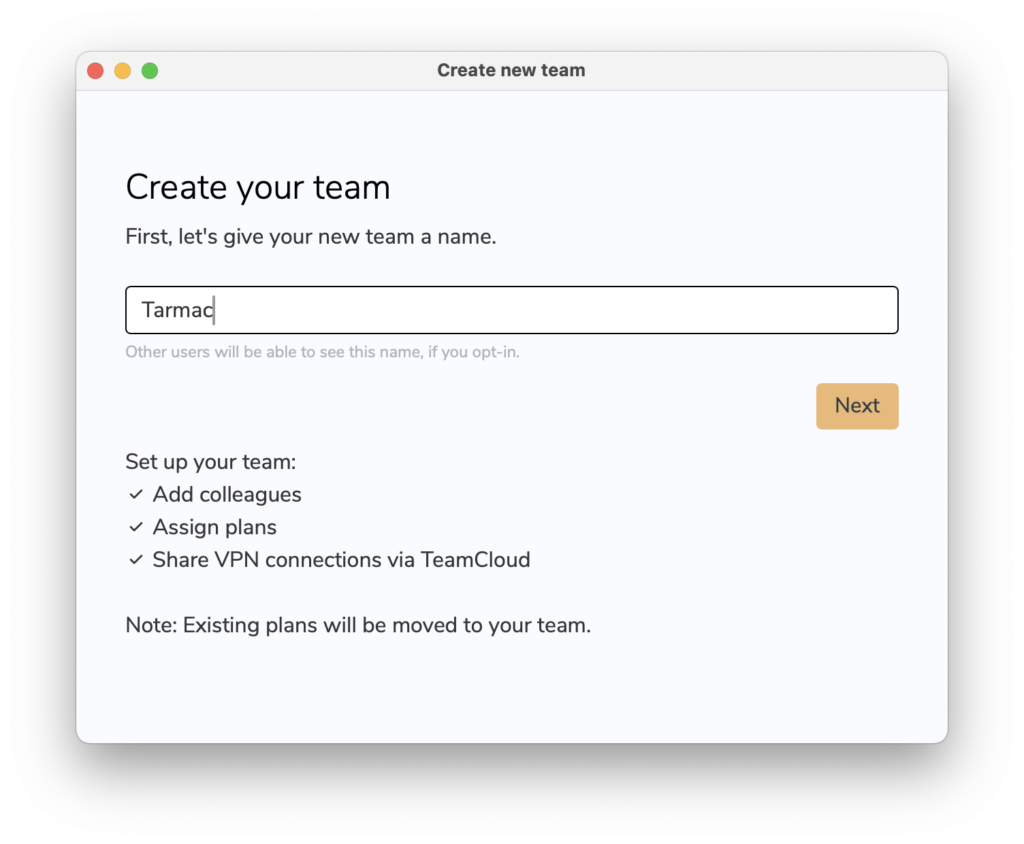
Not got a VPN Tracker team yet? Set one up in just a few minutes for easier VPN rollout
Please refer to our team setup guide or get in touch for more detailed instructions on managing users and licenses.
Overview
This workflow shows how to import WireGuard connections, assign them to users, stage activation, and verify connections — all from VPN Tracker for Mac.
Step 1 — Prepare WireGuard configuration files
On your VPN gateway, export or generate the standard WireGuard .conf files for each peer.
Tip: Make sure each file has a clear name that maps to the intended user or role (e.g. sales-jane.doe.conf).
If you’re unsure about this step, please refer to your gateway manufacturer’s documentation.
Step 2 — Bulk import WireGuard configs
- Open VPN Tracker for Mac and locate your team in the sidebar
- Go to Connections > New > Import Connection
- Multi-select your WireGuard .conf files and drop them into the app
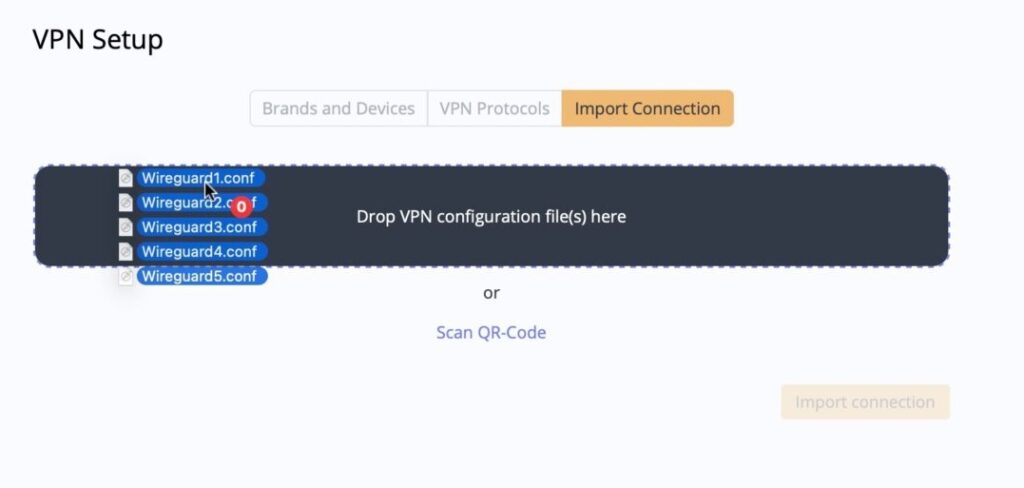
Import multiple WireGuard VPN connections into VPN Tracker at once.
Step 3 — Organize and rename connections
After import, tidy up connection names and group them in a folder for the new WireGuard setup. Consistent naming helps keep track of your rollout and simplifies team management.
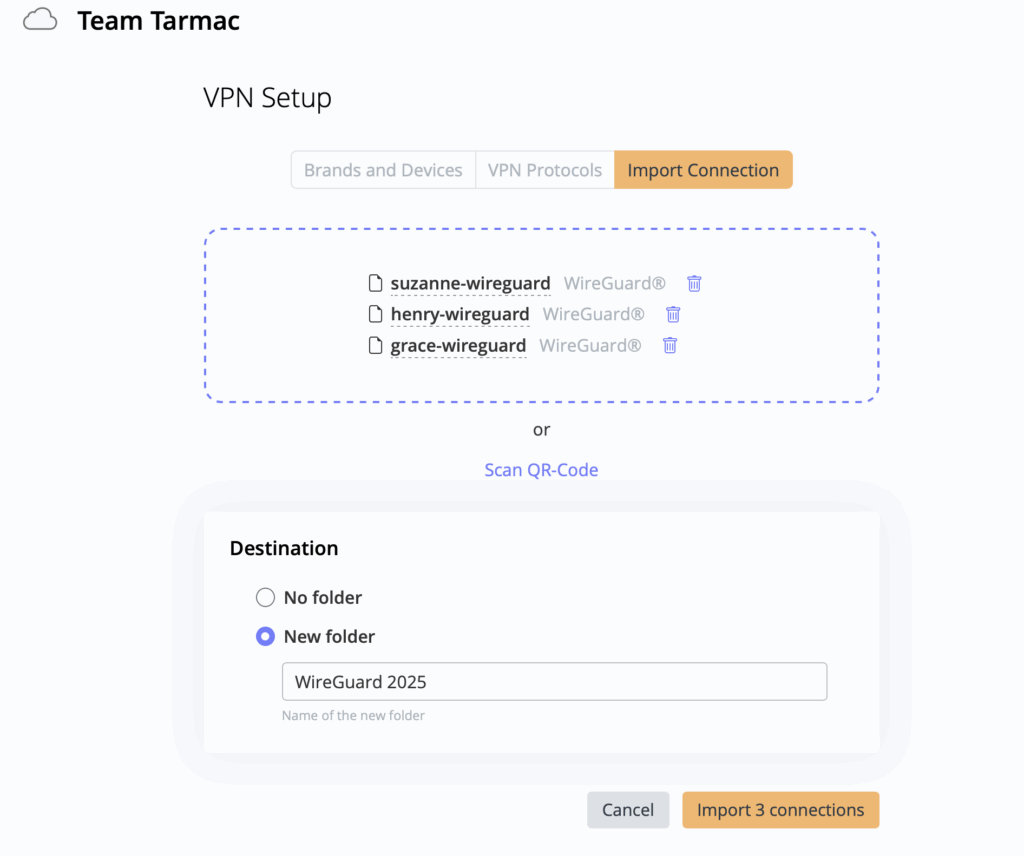
Organize your WireGuard connections with folders and a consistent naming scheme.
Step 4 — Verify and monitor
Newly imported team connections are unpublished by default, meaning they are only visible to team admins. This gives you the opportunity to test each connection before users access it — avoiding issues where users connect too early.
Click the connection slider to start the VPN, then monitor the VPN Tracker dashboard for connection status, logs, and metrics. Confirm that DNS resolution and internal routing work correctly from multiple client networks. If you run into any issues, our team is happy to help!
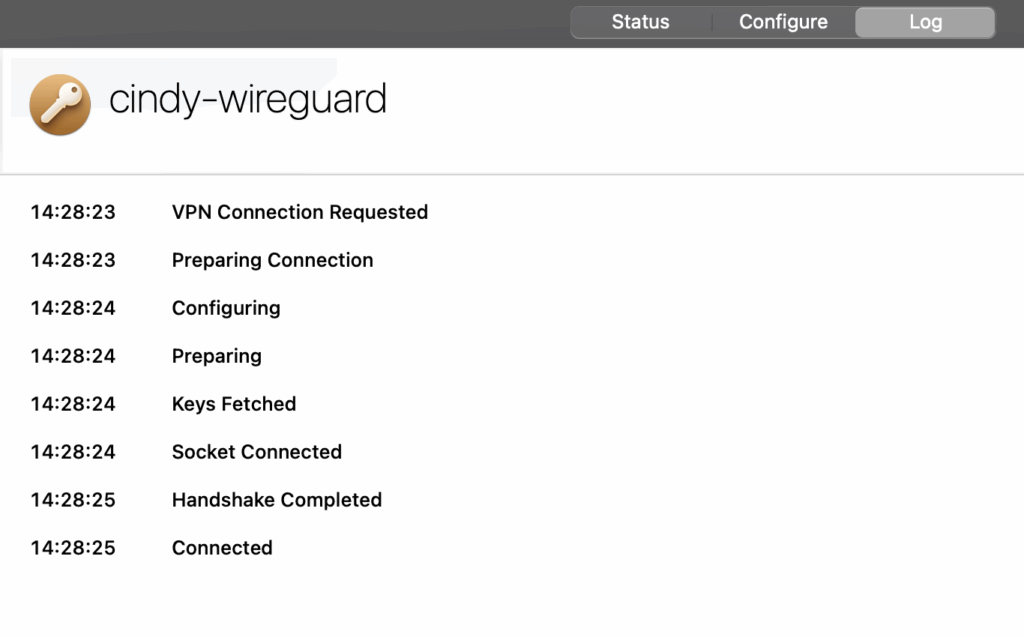
Check connection logs for any abnormalities during testing.
Step 5 — Assign connections to users
Once your test results look good, assign each connection to its intended user. This allows you to control who receives access — and when.
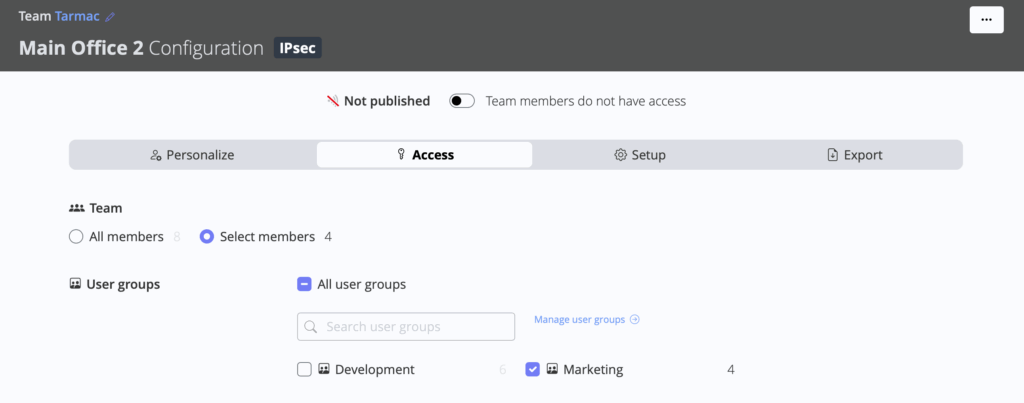
Click on a connection, then go to Configure > Access > Select members and choose the corresponding user from the list. (As an admin, you’ll always have access to all connections.)
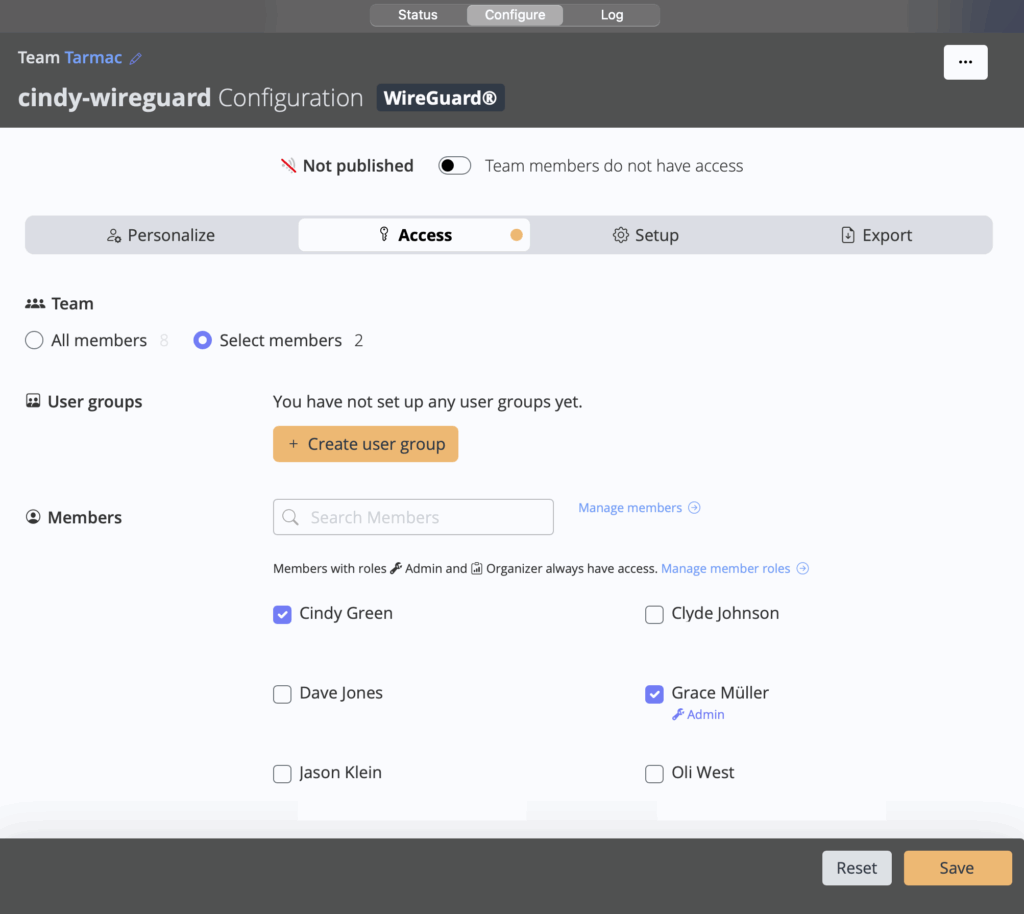
Select which user should have access to the WireGuard VPN connection.
Step 6 — Publish connections
Finally, use the Publish slider at the top of the configuration window to choose exactly when a connection becomes active for a user. Then click Save to go live.
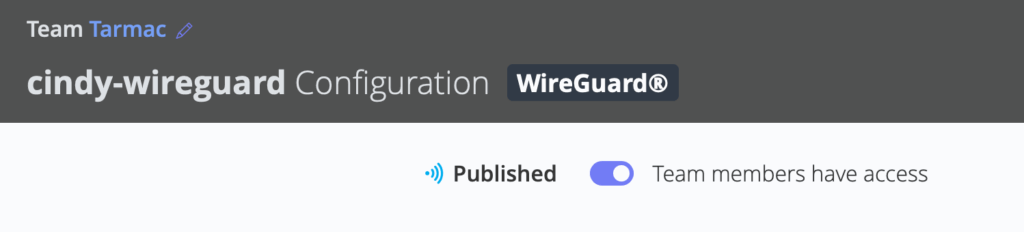
Publish a VPN connection to give users access. Unpublished connections remain invisible to the team.
Step 7 — Monitor errors
If your users experience connection errors with their new WireGuard VPN, you’ll be notified via the Team Activity view:
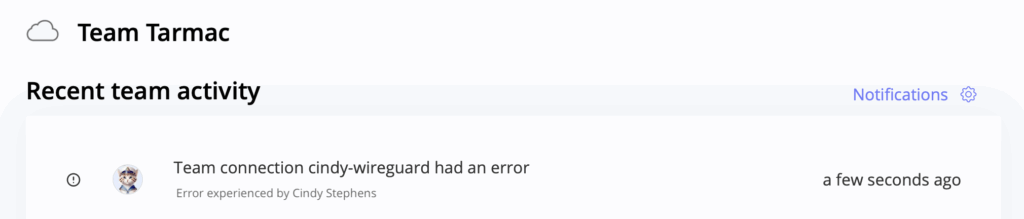
Keep an eye out for error messages in the Activity view.
Tip: Enable activity notifications by going to Activity > Notifications and selecting your preferences. You’ll then receive email alerts if users encounter connection issues.
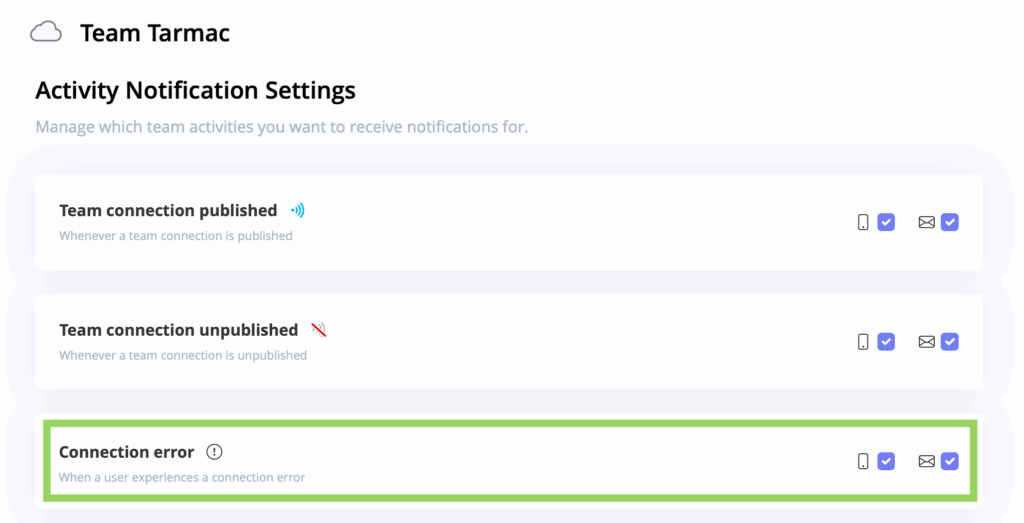
Tip: Enable activity notifications during your VPN migration.
Bonus Strategy: Run Legacy VPN and WireGuard Side-by-Side
For teams already using VPN Tracker, you can run your legacy VPN and new WireGuard connections side by side during the migration phase. Once you’ve published and tested the new WireGuard connections, you can gradually unpublish the older VPNs for the same users — reducing downtime and maintaining reliability throughout the transition.
Unpublish legacy VPN connections to gradually decommission them for users
This phased rollout approach minimizes risk and helps ensure a controlled, disruption-free migration to your new WireGuard setup.
Common Pitfalls and Why Expert Guidance Matters
Even with careful planning, taking the step to migrate to WireGuard VPN can introduce challenges that are easy to overlook. Common pitfalls include:
- DNS or routing issues: Missing internal DNS entries or misconfigured routes can prevent users from accessing key resources
- Complex peer definitions: Overcomplicating allowed IPs or mixing peer settings can create conflicts and traffic issues
- Key management errors: Reusing keys across multiple users or peers can compromise security and cause unexpected disconnections
- Incomplete testing: Failing to validate connectivity across different networks (home, office, mobile) can lead to downtime post-rollout
These issues may not be immediately obvious, but they can significantly disrupt productivity for your team. That’s why working with a VPN Tracker consultant is invaluable: our experts help audit your setup, identify risks before rollout, and ensure a smooth, error-free migration from legacy VPN protocols to WireGuard.
Migrate to WireGuard VPN the Smart Way
When you migrate to WireGuard VPN from legacy VPN protocols, your business gains tangible benefits in speed, reliability and manageability. With planning, pilot testing and a staged rollout strategy you can avoid downtime and reduce support overhead.

VPN Tracker's Consulting Service helps ensure your team's migration to WireGuard VPN runs as smoothly as possible.
WireGuard® is a registered trademark of Jason A. Donenfeld.